Top Tips for Capturing Fabulous Forest Scenes
Forests are one of the most challenging, and rewarding, landscapes to photograph. They’re busy, contrasty, and full of competing elements: trees, rocks, water, foliage, light shafts, and deep shadow. But with the right light, smart composition, and a few key techniques, you can turn what might seem to be chaos into captivating images.

Where & When
1. Not all Forests Are Created Equal
Some forests are naturally cleaner and easier to compose than others. I often see images from European photographers shooting woodland scenes with open canopies, low grasses and flowers and I am somewhat envious! We do have some open beech forests (mostly in the lower South Island) and planted forests (like Rotorua’s Redwoods) which have repeating patterns and simpler lower layers which are great for composition. By contrast, the dense native bush in NZ’s North Island can be visually chaotic, so it becomes more important to look for pockets of order: ferns, mossy logs, clear trunks, or flowing water to anchor the frame.

Classic North Island bush - it’s about finding order in the chaos
I love visiting the Redwood Forest in Rotorua, as the punga ferns create a lovely, simple lower canopy 2-3 metres high with the giant redwoods towering above in a much higher layer, it makes for a much more pleasing scene.
South Island forests are different again - in the far south around Queenstown and Fiordland the beech forest is more consistent in textures, more open and often has lovely ferns at ground level or mossy, soft ground and fallen logs. I generally find this type of forest easier to shoot than the typical North Island forest.

2. Time of day matters
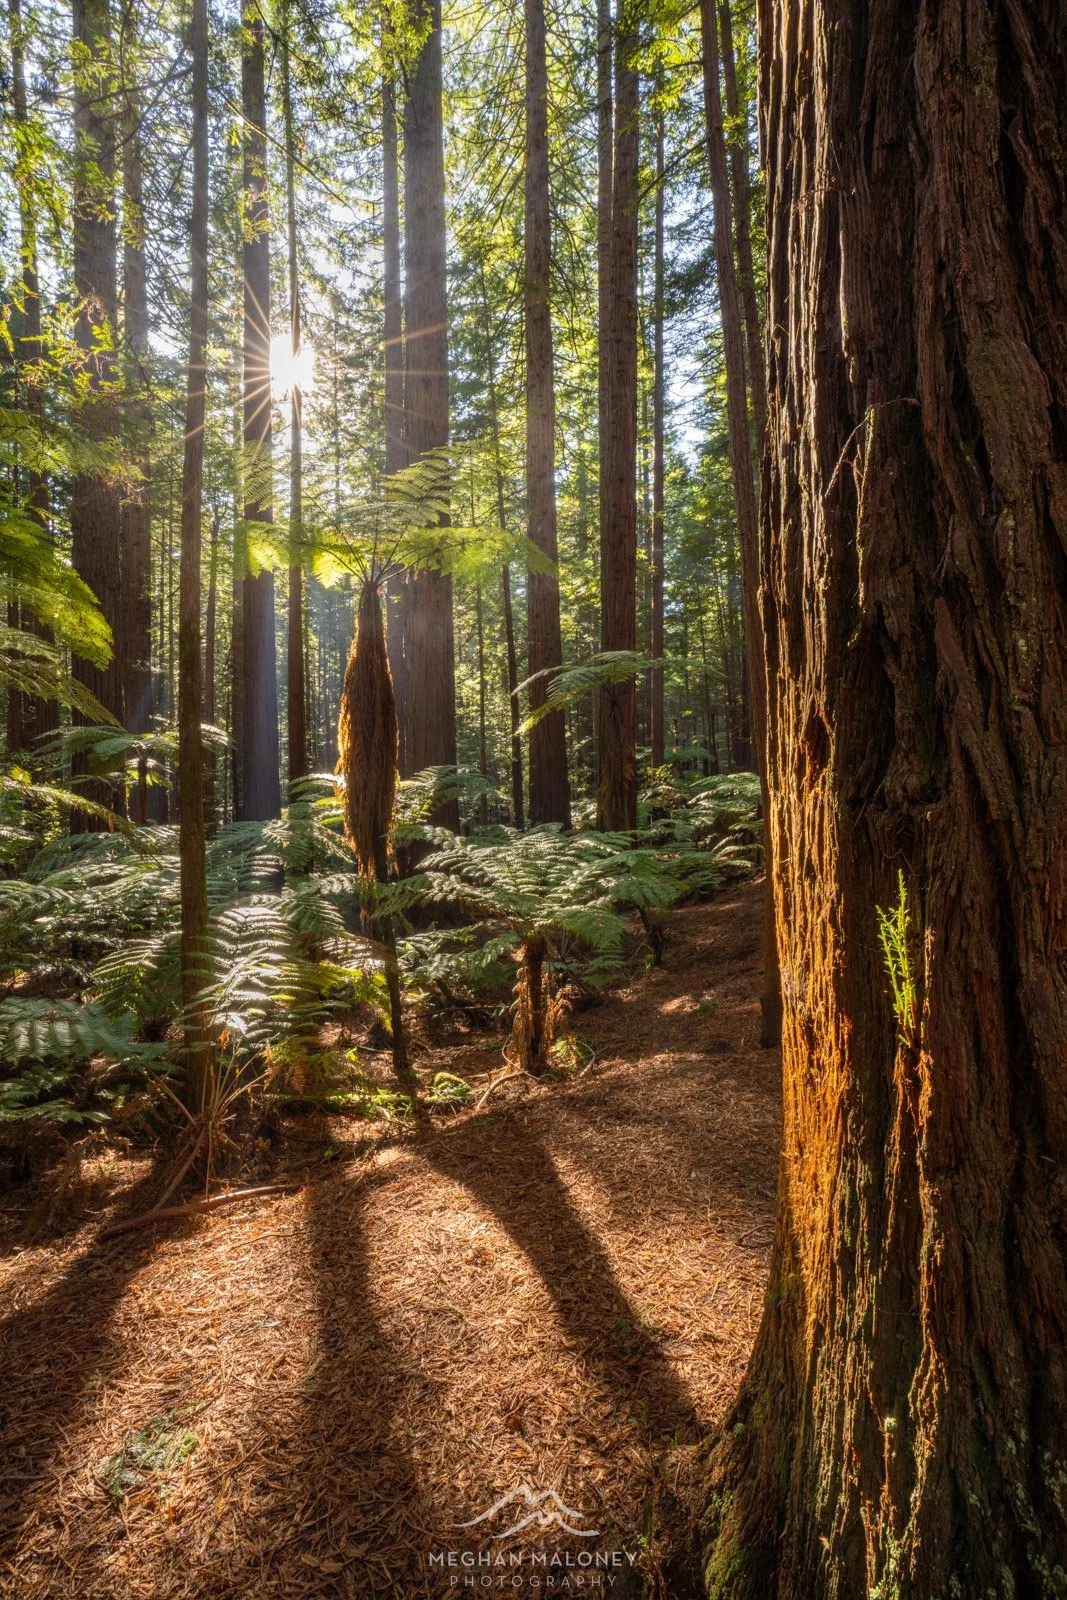
It's best to shoot when the light is low, as the shadows will be longer and it will be easier to capture a sunstar than when the sun is directly overhead. Therefore in summer go just after sunrise or just before sunset. In winter you can almost shoot all day as the sun stays so much lower in the sky and the contrasts between light and shadow are nowhere near as harsh. The image below was shot at midday, but as it's in midwinter the sun is low enough and gentle enough to incorporate in the scene.

You can position the sun to create a sunstar as well as interesting shadows on the ground from the tree trunks and to light up certain aspects of your scene like the fern in this shot above. It's not hard to angle yourself into a position where you can catch a sunstar, but bear in mind that the sun is on the move constantly so if you are trying to capture a sunstar you will need to keep moving every few seconds - this adds challenge to the scene!
3. It's all about the LIGHT!
Light will make or break your forest scene. Light in the wrong place or too much or not enough can make the scene look less than ideal. Soft side light or back light is the best lighting to aim for. The scene below incorporates a small amount of sidelighting to light up just a few areas in the scene - the spray above the waterfall, a few leaves in the trees and on the rocks below the waterfall.

Sometimes a moody day is what's needed to give a nice even light to the scene, too much light can create harsh contrasts. In the scene below, there was just enough light filtering down from above to cast a nice glow on the ferns surrounding the waterfall but no direct sunlight.

4. Mist adds atmosphere
Most other landscape scenes are a washout in thick fog but not a foggy forest, this only adds atmosphere and intrigue, one of my favourite ever forest shots was taken when I started hiking the Routeburn Track not far from the Divide as we climbed up towards Key Summit. The mossy branches and lush green ferns contrasted with the rocky path through the scene for great effect.

The How - Gear, Settings, Focus
Gear list: Camera, wide angle 16-35mm or a mid range 24-70mm lens, tripod, filters
5. Getting the best focus
It can be hard to get the entire scene in focus with a very intimate foreground subject but with trees and forest in the distance that you also want to be relatively sharp. One way to get around this is by focus stacking, a technique that involves taking multiple shots focusing on the different focal points in your scene (a minimum of two - one for foreground and one for background). The number you need to take will depend on how many strong subjects are at different focal depths into your shot.
If you want to get the best focus in a single shot, aim about ½ to ⅔ into the depth of the scene for the most optimal sharpness.
6. What settings should I use for the best exposure?
The available light in your scene will entirely dictate your settings, but in general if you want to get a good sharp shot you should be shooting at f/8-f/11 which is the sweet spot for landscapes. Keeping your ISO low between 100-400 will keep the noise at a minimum BUT bear in mind that forests are very busy scenes and therefore a lot more forgiving noise wise because they have a lot of texture than a scene with mountains and sky would be. So if you do have to put your ISO up higher it isn’t the end of the world.
On a calm day, you can therefore operate at f/11, ISO 100 and then adjust your shutter speed to suit the light, regardless of how slow this might be (so long as you are shooting on a tripod once you get into slow exposure territory). If there is a breeze in the forest, you will be forced to shoot much faster to prevent the foliage from blurring in your scene. If you find yourself in this position, you are going to need to increase your ISO and potentially widen your aperture to compensate.
7. Use a Polariser
People often don’t realise that using a polariser in the forest is essential to creating richer tones which make it much easier to edit green tones in particular. Light reflects off leaves far more than our natural eye appreciates, but it is obvious the minute you add your polariser and rotate to remove this light reflection.
If you are incorporating water and rocks in your images, then the difference between an unpolarised and polarised image is even more apparent.
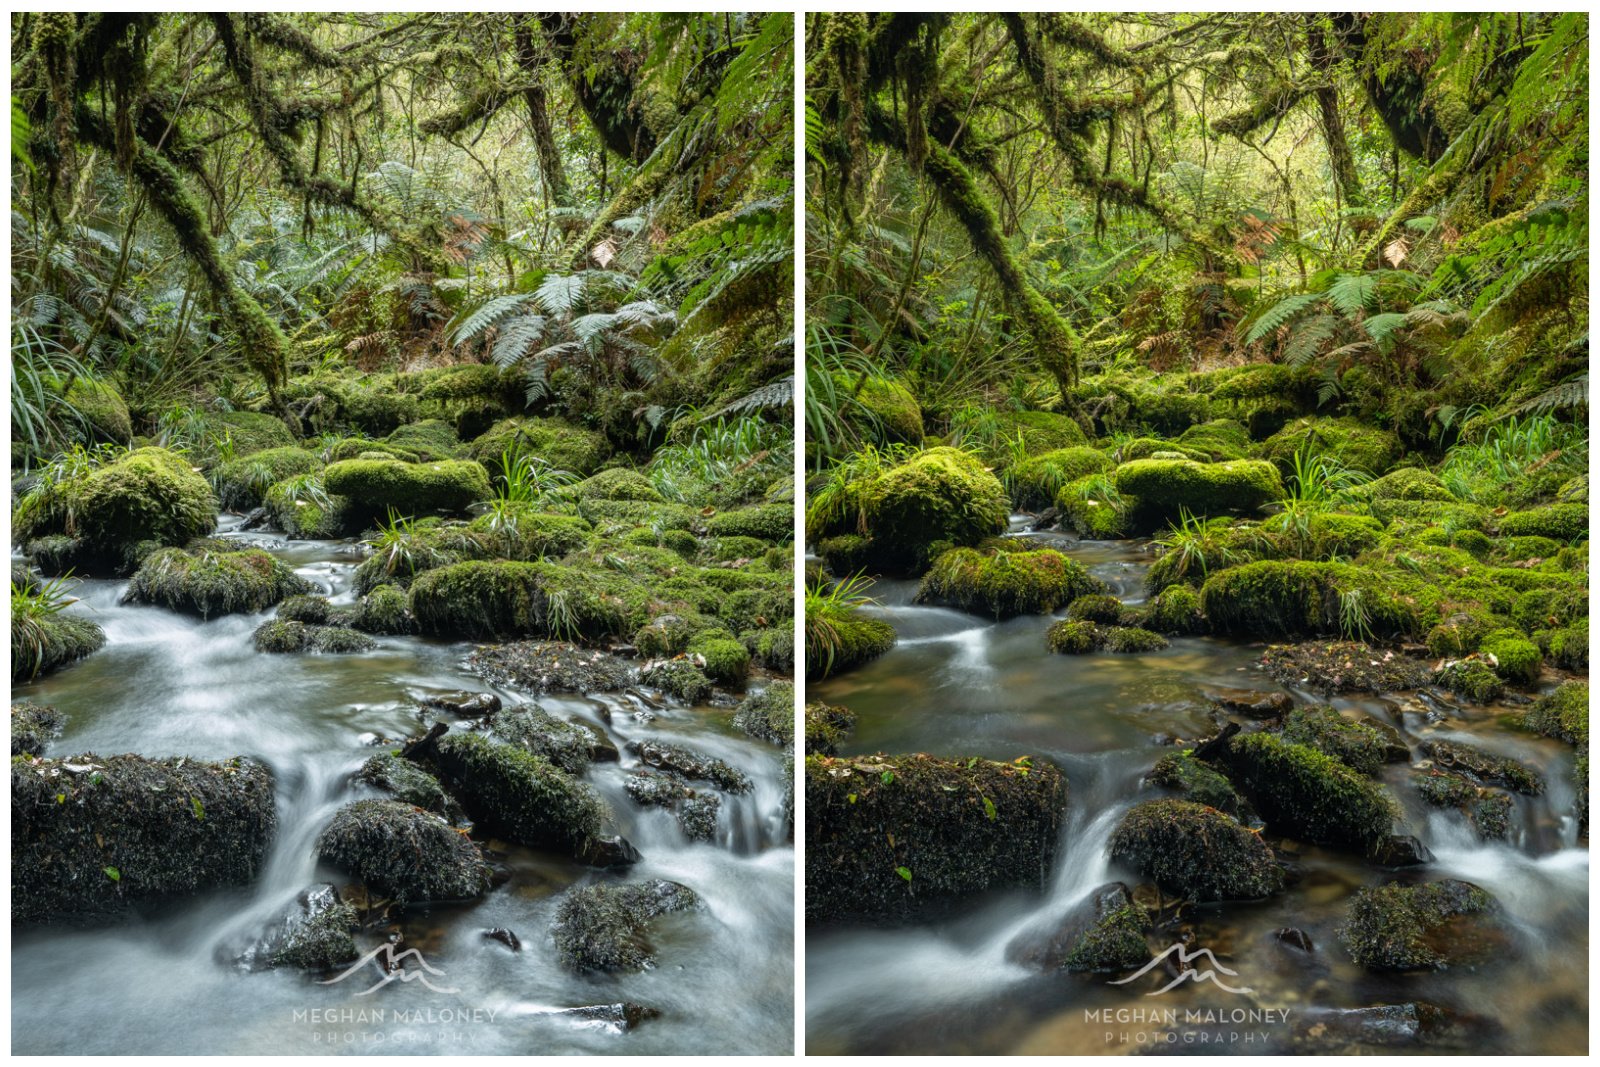
The difference between a polarised and non-polarised shot in the forest - the light is removed from the foliage to enable lusher green tones
8. Use an ND Filter with Water Scenes
If you are shooting a scene with a river or waterfall, an ND filter is a no brainer to slow the water down enough to create a silky flow. Experiment with different shutter speeds, often forest shots that incorporate rivers look better at ¼ - 1 second than they do at 10 or more seconds as you allow the natural path of the river to still be visible in the scene.

0.4 seconds, f/8, ISO100
I choose to shoot my forest, waterfall and river scenes with the Kase Filters Armour Kit and Kase Wolverine Circular Magnetic Professional ND Kit to get the best results.
Then find a Killer Composition
9. Take a Walk Around
Forests are very busy places, how do you even find a good subject to focus on? Rather than just plonking yourself in the first spot you come across, walk around for a while assessing the scene. Sometimes just 2 steps to the left or right will improve your shot.
Also you can use your phone to frame the scene, it’s much easier to visualise how a composition will look when looking through the frame of the phone cutting out the peripheral distractions, and is a handy precursory look - especially if the composition is down low and you'll need to put your tripod down near the ground to get the shot it can give you valuable feedback without wasting precious time setting it up and finding the composition isn't what you thought it would be.
10. Look through your viewfinder
Don’t rely on what your screen is telling you, you’ll be surprised just how much better you can analyse and assess your scene when you use your camera's viewfinder.
The viewfinder will help you see distractions: bright sticks, messy edges, stray highlights. Fix them in the field if you can with a little ‘forest gardening’, it beats having to remove it in Lightroom or Photoshop later when you don’t have to!
11. What's your Subject?
Even in a busy forest scene, your image needs a hero subject, this could be:
A river
A path
A log
A fern cluster
A waterfall
A leading tree trunk
If you have water in your scene, shoot upstream where possible, since flow toward camera = stronger visual pull.
Avoid large bright sky gaps if you can, they can blow out easily and steal attention.


12. Beware of chromatic aberration
Shooting with a strong light source from behind trees can also create chromatic aberration. Chromatic aberration is an effect that occurs when a lens is not able to properly refract all the wavelengths of colour in the same point. It's quite a common problem in photography that affects almost all lenses, though high-quality lenses will generally produce less chromatic aberration. The key is to tick the 'remove chromatic aberration' button in the Lens Distortion Panel in Lightroom to help reduce this issue.

13. Use Tried and Tested Composition Techniques
There are a number of composition techniques you can use in the forest to enhance your composition.
Think about framing - you can use tree trunks or leaves and branches to frame the edges of your image.
Use Leading Lines - a path or river through a forest makes for an awesome leading line drawing you into the scene.
Shoot Vertical - forests and trees are tall! Think about changing your orientation to incorporate more height into your scene.

Shoot low - this will enable you to get a more interesting foreground incorporating fallen logs, leaves or ferns, and to get better height overall in your shot.

1 sec, f/20, ISO100 at 31mm
Think in layers - can you stagger trees within the scene for depth? A
Introduce Diagonal Flow - water flowing through diagonally from top left to bottom right enables the eye to be lead through the whole scene.

No matter what compositional tools you use, remember that depth beats width in forests.
14. Go artistic (ICM)
One technique that is fun to try in a forest is ICM - intentional camera movement. This is where you intentionally move your camera while the shutter is open taking the photo to create a blurred effect. In forests, moving the camera up vertically while taking the shot or zooming in or out with your lens while the camera is shooting (think Star Trek warp speed ahead!) can create interesting results.
I find that about ¼ of a second is a good shutter speed and then it’s just a matter of practicing your technique - it can take a while to get a good result, 1 in 50 shots isn’t a bad rule of thumb! When shooting ICM, it's often better to shoot with a slightly longer zoom to avoid the barrel distortion that can occur at the edges of the scene.
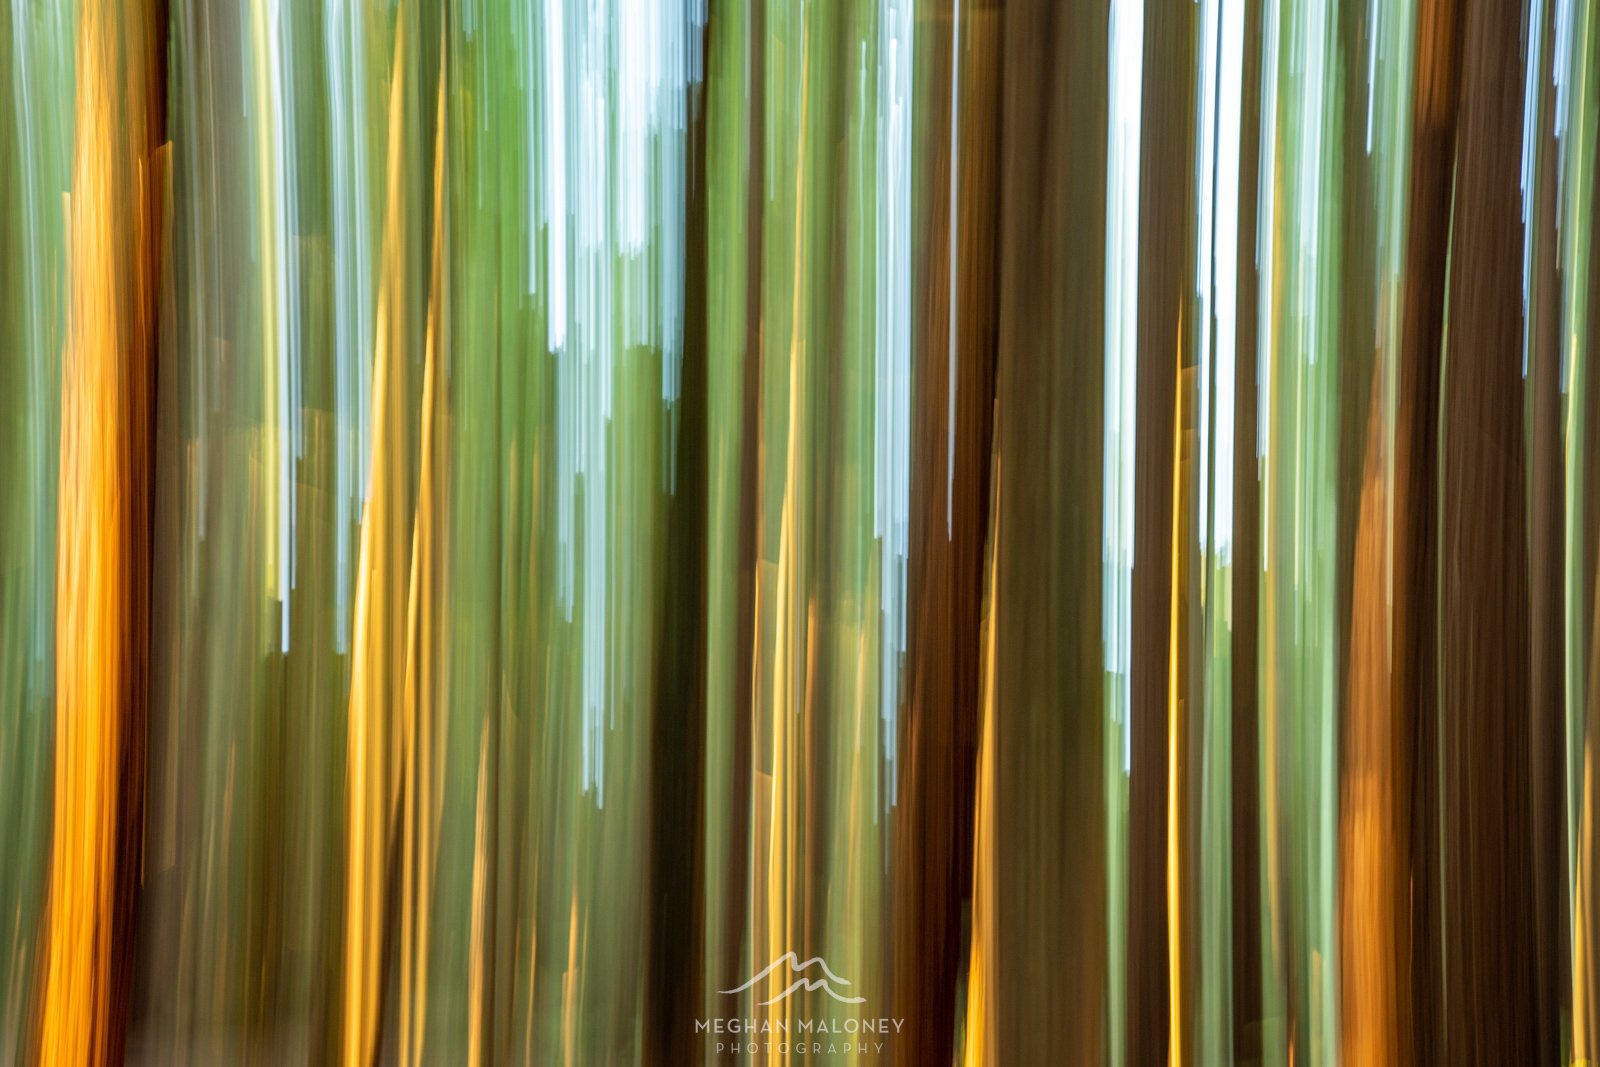
1/3 second, f2.8, ISO320 at 61mm (24-70 f2.8 GM lens)

1/3 second, f2.8, ISO 320 using 24-70 f2.8 GM zooming in while pressing the shutter
15. Lastly......enjoy the time in Nature!
There is something incredibly relaxing about spending time in the forest - it's quiet, the trees will often muffle the sounds of the outside world and there can be incredible native birdsong to enjoy depending on where you are. Take the time to stop and really let the forest envelop you and slow down to be in the moment. Regardless of whether you come away with exactly the images you had in mind, it will never be wasted time just being in nature.
I hope these tips give you more confidence to head out into the forest and shoot great content! There are so many amazing places in New Zealand where you can get into the forest and shoot interesting compositions while enjoying the solitude and peace of these places at the same time - something that is undoubtedly good for the soul.