
HDR (Exposure Bracketing) Showdown: Lightroom vs Luminar Neo
HDR Merge Tool: Lightroom vs Luminar Neo
Exposure bracketing (or HDR Merge) is one of those tools that landscape photographers tend to rely on quietly but regularly. It is especially useful when working with high dynamic range scenes like caves, forests, backlit mountains, or bright-sky/dark-foreground compositions. Getting a clean, natural-looking file with full tonal range can make your editing results so much better. I recently compared the HDR Merge Function in Luminar Neo and Lightroom using a range of real-world brackets, including some very challenging cave exposures, and there are some clear strengths and trade-offs worth knowing about.
One of the standout features of Luminar Neo’s HDR Merge tool is the Batch Merge capability.
This is where it really shines from a workflow perspective. If you load an entire folder of images into the program, you can send up to 100 photos at a time into the Batch Merge process. The software will automatically detect which images belong to which exposure bracket sets, group them accordingly, and present you with a preview before merging.
That preview step is particularly useful. You can quickly review detected brackets, remove duplicates, and move images between groups if something has been sorted incorrectly. When you’re shooting multiple brackets of the same composition, which many of us do for safety in tricky light, this makes it very easy to clean up and choose a favourite set of images before processing. Once you hit merge, Luminar Neo processes all brackets at once. It’s a huge time saver compared with doing these individually.
In my test, I selected and sent 98 files through the batch process in one go. Using the preview panel, I removed a few double-ups where I’d shot repeated brackets of the same scene. After the merge completed, I ended up with 18 HDR merged files. From there, it was quick to scan through and choose which merged images had the most potential to continue with the editing process. From a volume workflow perspective, especially after a big shoot, this is incredibly efficient.
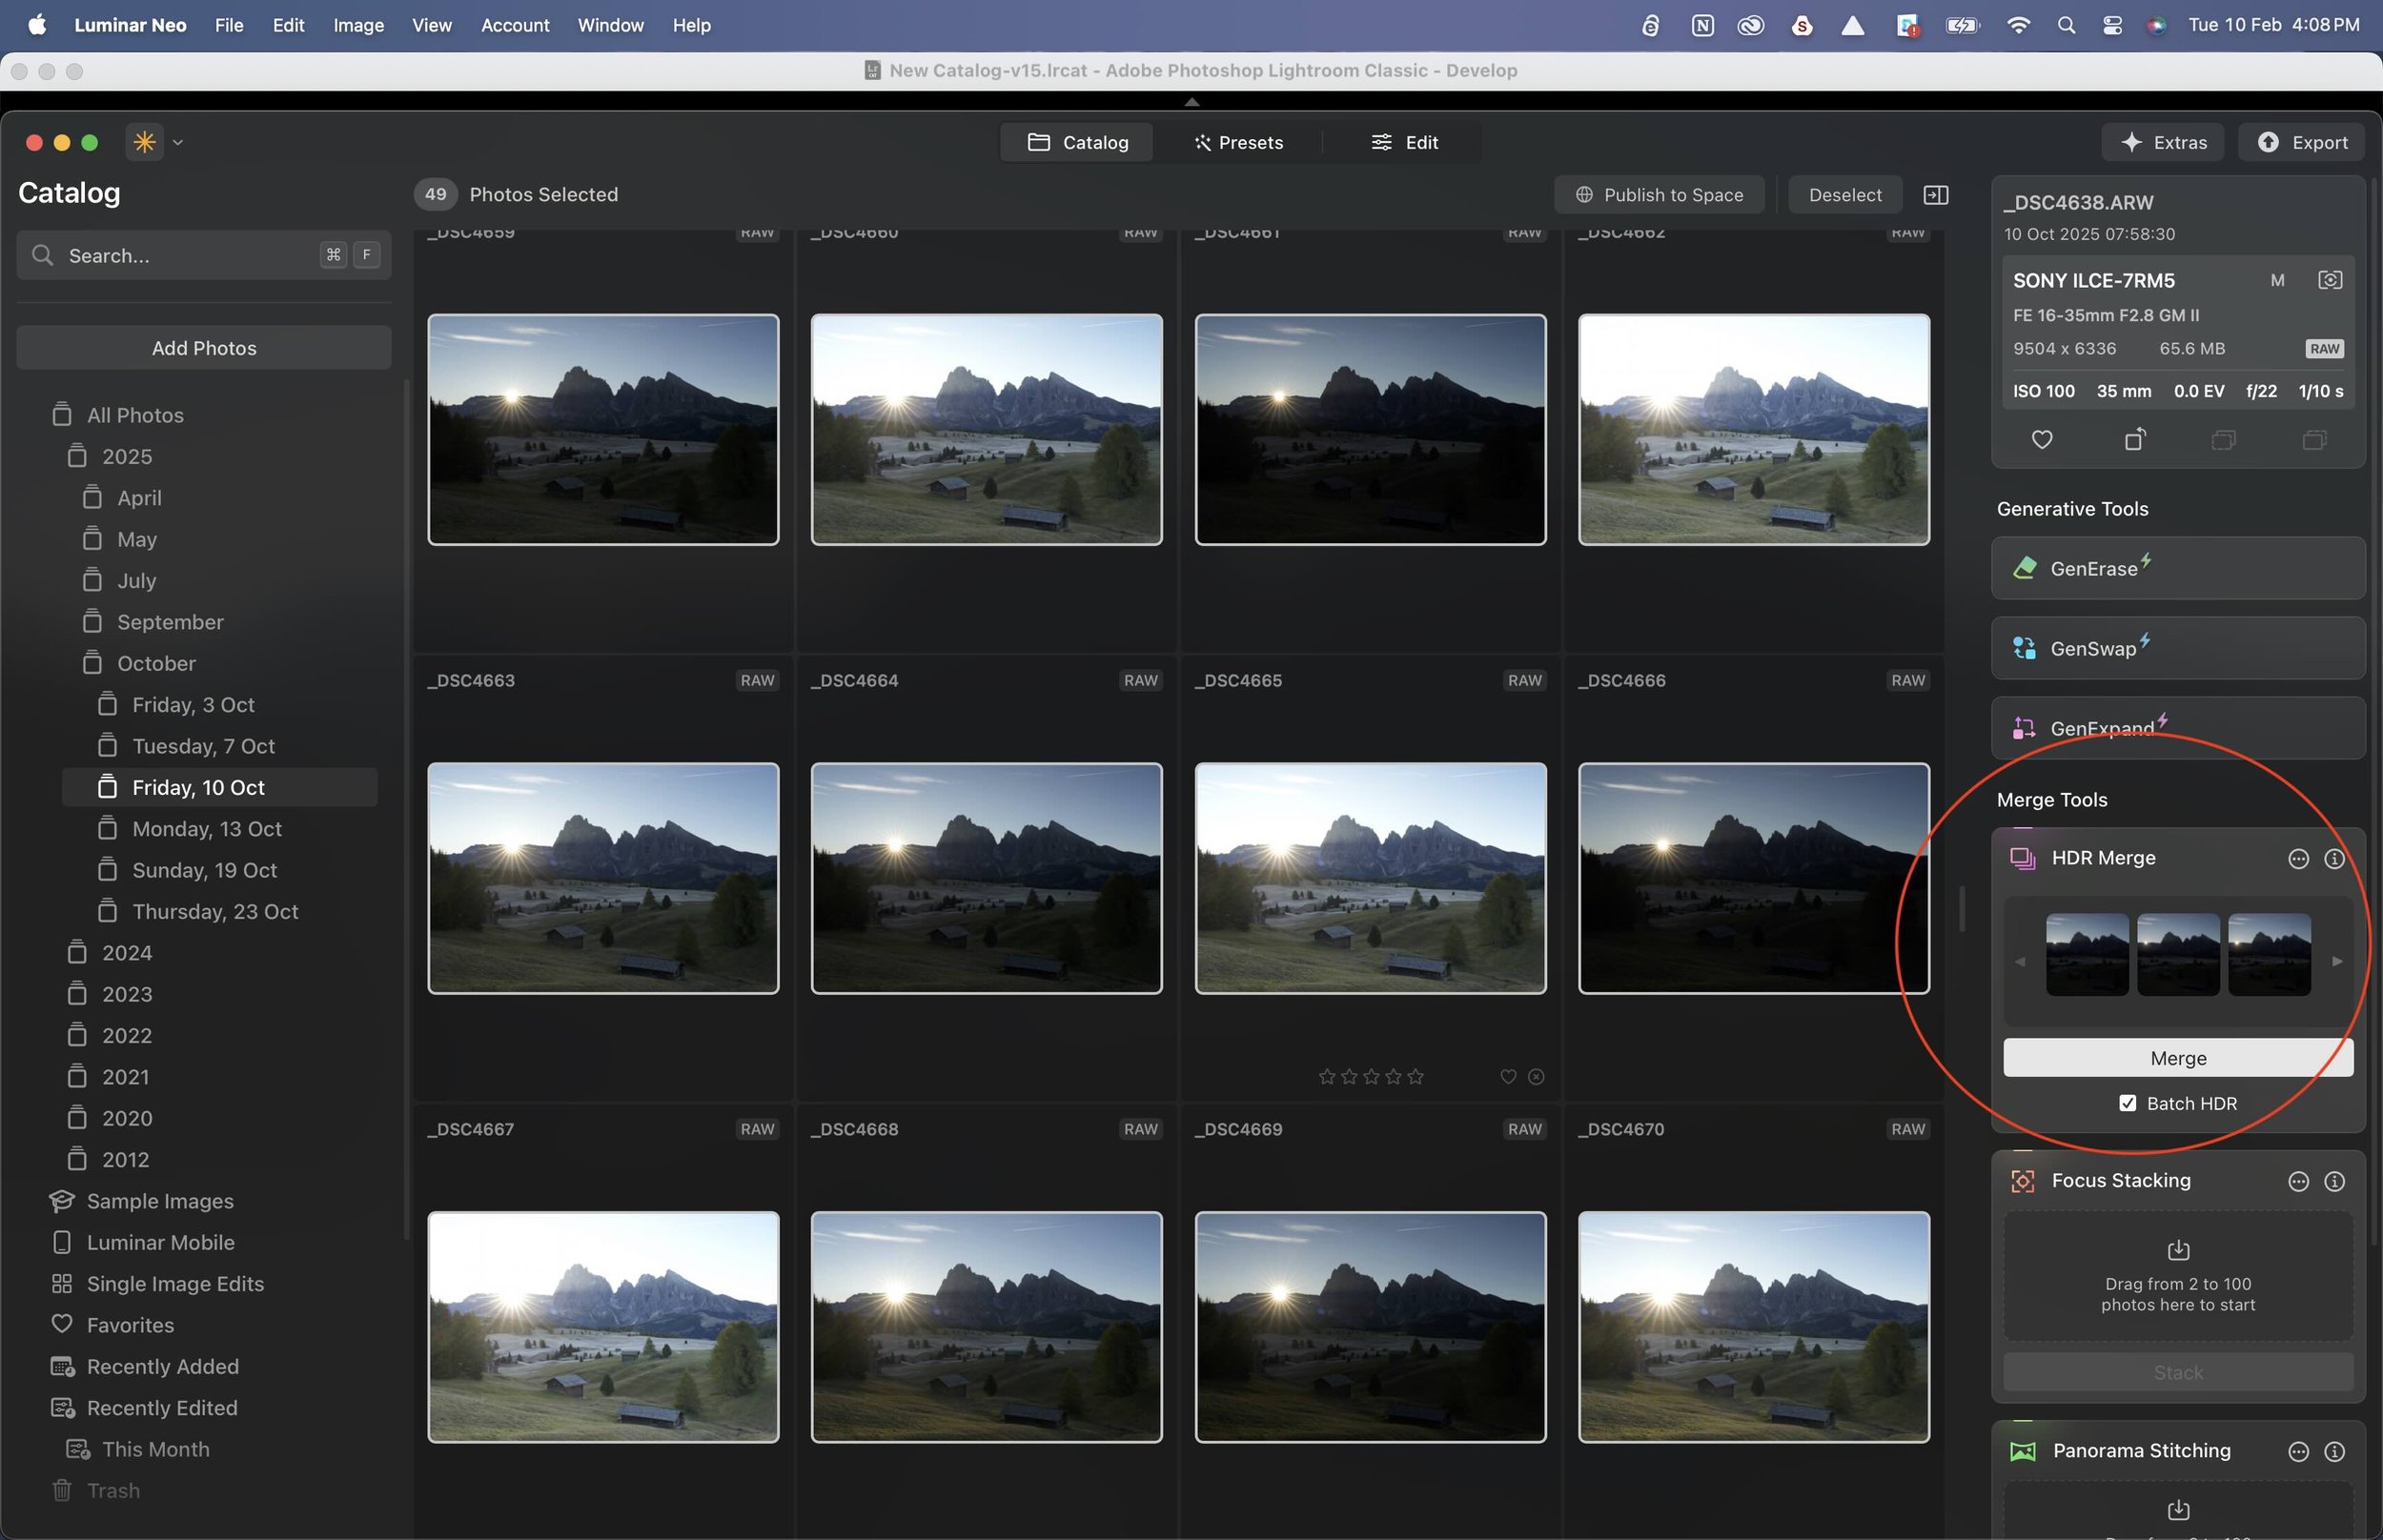
Selecting and dragging files to the HDR Batch Merge function is simple
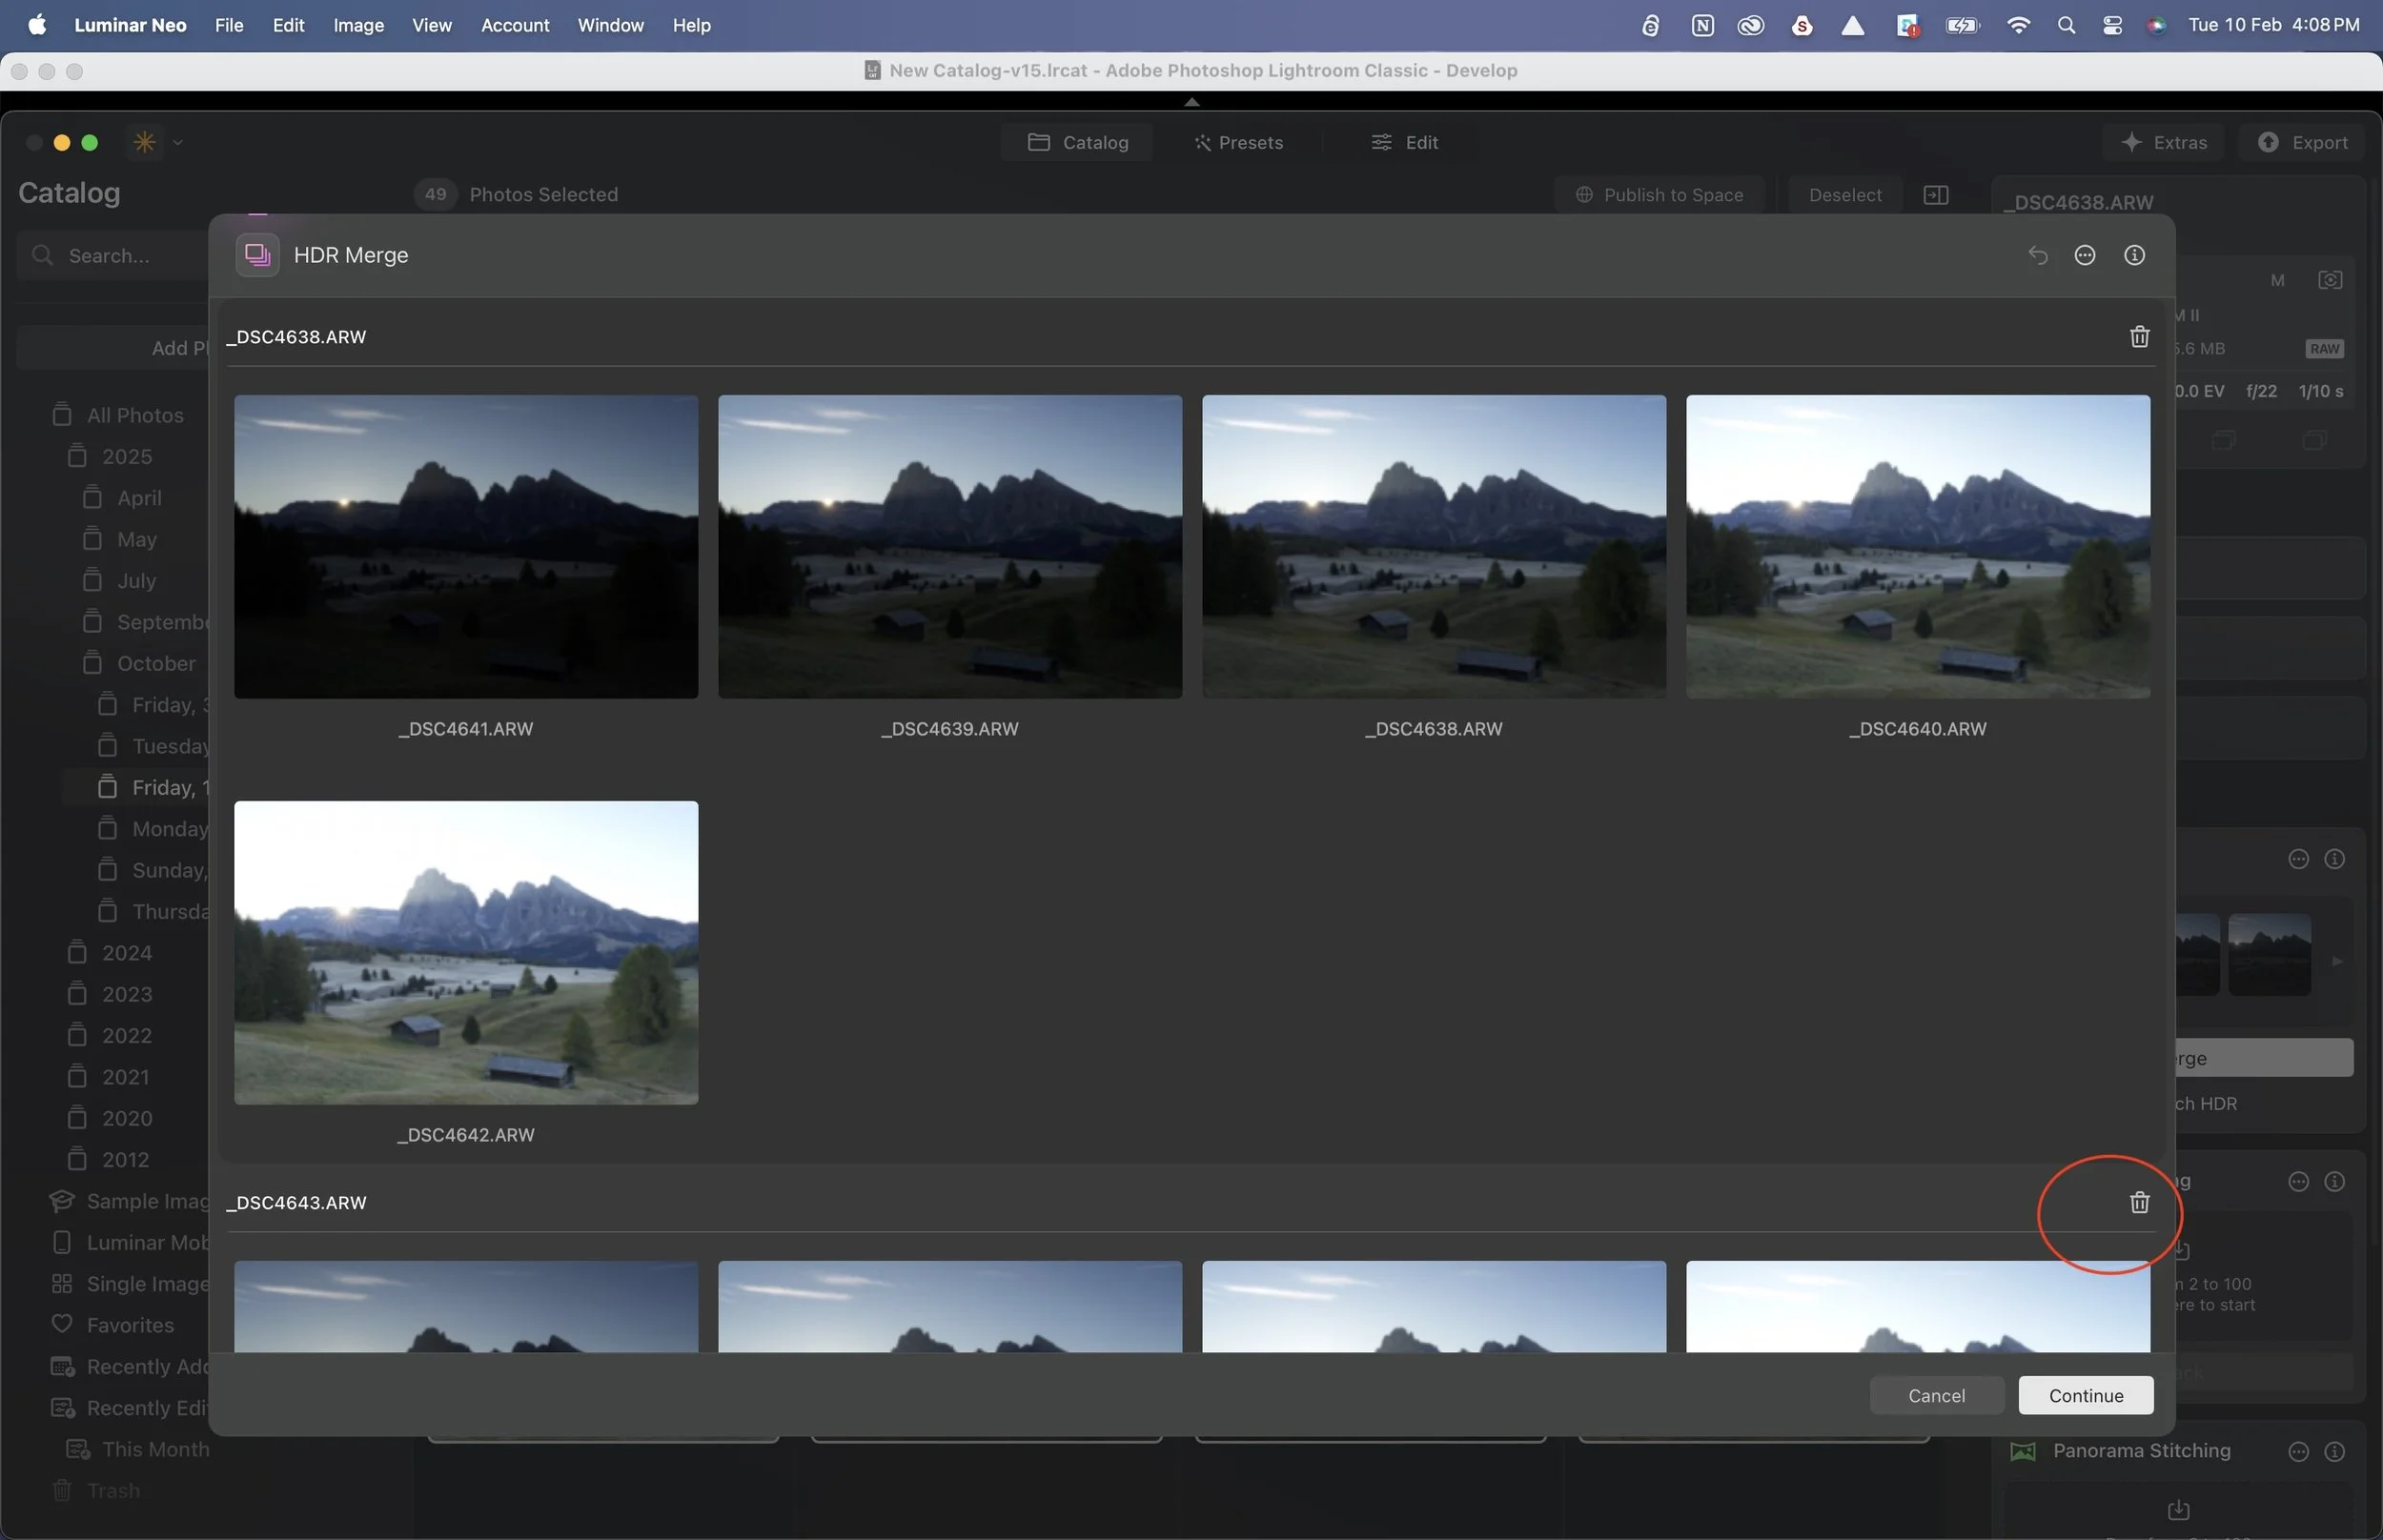
Grouped HDR batch images can be reviewed (and duplicates deleted) in Luminar Neo before you commit to the HDR Merge
Because the editing tools in Luminar Neo are different (and in my opinion superior!) to Lightroom’s, I edited both files separately to see how the HDR merged files turned out. I think the Luminar edit is a far nicer result, with warmth and glow that the Lightroom file is lacking.
I also wanted to see how Luminar Neo handled difficult exposure brackets, so I tested it against Lightroom using some cave photography exposure brackets I’ve created in the past. These scenes typically include extremely bright openings and very dark interior rock detail, exactly the kind of files that can break weaker HDR algorithms.
The results were mixed but informative. In one 5-shot bracket, Lightroom produced a more natural result in the brightest highlight area near the cave entrance. Luminar Neo’s version still looked slightly washed out there and was harder to balance back to a realistic tonal feel. However, in a different 9-shot bracket from another cave scene, Luminar Neo’s merge was just as good as Lightroom’s. So performance seems to depend partly on how extreme the dynamic range is and how many frames are included in the bracket.
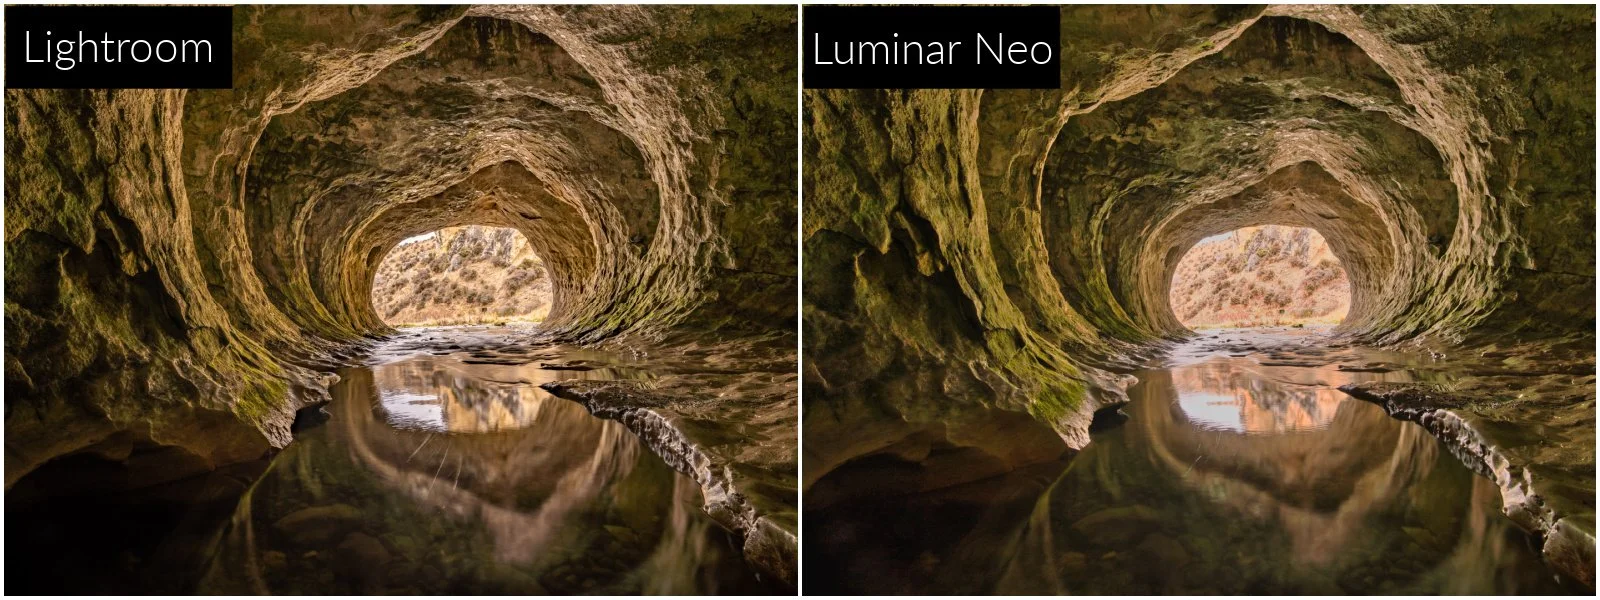
Lightroom’s result with a 5-shot exposure bracket seems superior to Luminar Neo’s in the highlight regions
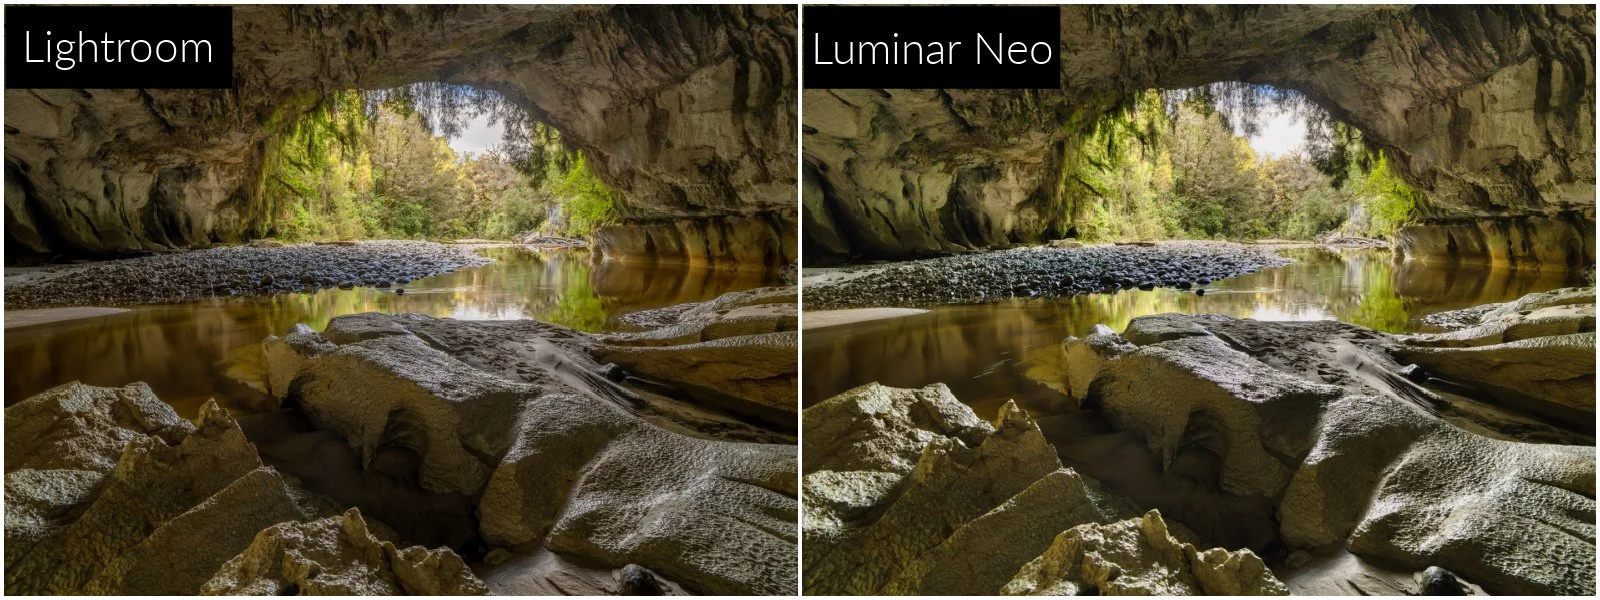
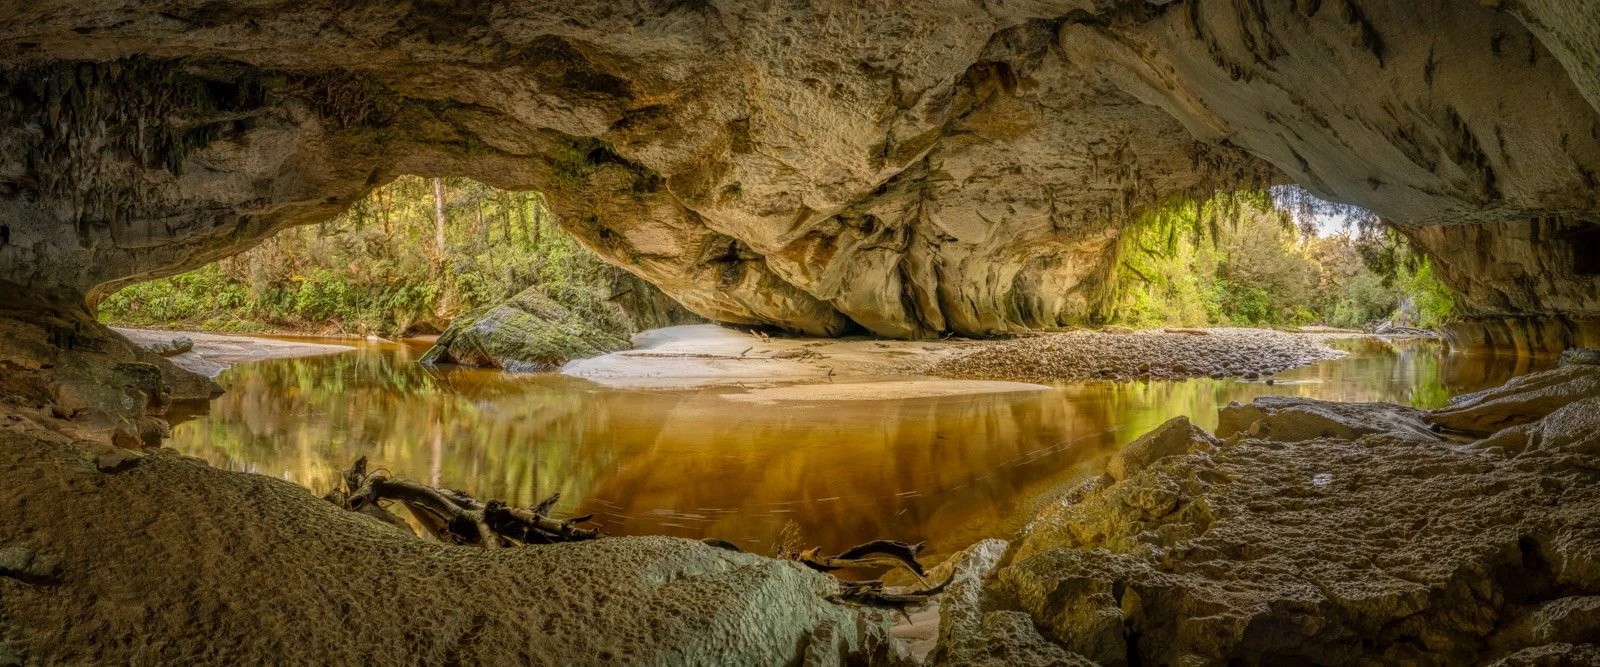
With this 9-shot exposure bracket , I’d argure that Luminar Neo’s result looks the better of the two
One limitation to be aware of with Luminar Neo is that it cannot merge HDR and Panorama in a single step. If you’ve shot a multi-row or multi-frame panorama with exposure bracketing at each position, you’ll need to run the HDR merge first to create merged files, then run a separate panorama stitch using those results. This isn’t something most photographers do every day, but if you regularly shoot bracketed panoramas, it’s an extra step to factor into your workflow.
Lightroom takes almost the opposite approach in its strengths. While it’s slower for volume HDR work, Lightroom does offer the ability to create an HDR Panorama in one single process. You can select all the bracketed panorama frames and merge them together into a single HDR pano DNG. That’s extremely powerful and keeps the workflow contained inside one application and one merge step.
Lightroom can process this 27 shot HDR Pano (9 shots x 3 exposures per shot) in a single step
However, Lightroom’s downside is speed and scale when dealing with lots of brackets. You can only merge one HDR bracket at a time. If you come back from a sunrise shoot with 20 bracketed compositions, you’ll be repeating the merge command over and over. It works, but it’s not very fast or efficient.
Summary
Luminar Neo = Best for Speed & Volume
Excellent batch HDR merging (up to 100 images across multiple brackets)
Automatic bracket detection and grouping
Preview stage lets you fix grouping before merge
Major time saver after large shoots
Downside: cannot create HDR panoramas in one step
Highlight handling may be different to Lightroom (sometimes better, sometimes worse)
Lightroom = Best for Flexibility
Can create HDR panoramas in a single merge
Very consistent highlight recovery in tough files
Clean integration with existing Lightroom workflows
Downside: only one HDR bracket merge at a time
Slower when processing many brackets
🏆 WINNER: LUMINAR NEO 🏆
Winner for most photographers’ day-to-day efficiency: Luminar Neo - especially if you regularly shoot multiple brackets and want a faster culling and merging pipeline. Lightroom still wins when you need HDR panoramas or maximum highlight control in the most extreme scenes.
Curious to try Luminar Neo for yourself?
If you decide Luminar Neo is a good fit for your workflow, you can purchase it here:
Luminar Neo using code MEGHAN10 for 10% off pricing
This helps support my content at no extra cost to you, and I only recommend software I genuinely use and trust!
Want to read more in this series?
Why I added Luminar Neo to My Lightroom Workflow (And You Should Too!)
Using Luminar Neo for Light, Colour & Mood (Why These Tools Make Images Pop)
Sky Replacement Showdown: Photoshop vs Luminar Neo
Panorama Showdown: Lightroom vs Luminar Neo