
Sky replacement showdown: Photoshop vs Luminar Neo
Sky Replacement: Photoshop vs Luminar Neo
While Sky Replacement isn’t something I use often in my own landscape workflow, it can be a very handy tool in the right circumstances, and in some cases it can save a huge amount of time. I find it particularly useful when working with complicated astrophotography horizon blends, where balancing exposure between land and sky requires multiple captures, careful masking, and a fair bit of patience. Used thoughtfully, sky replacement can help create a much more pleasing final image, but it also comes with important integrity considerations.
With Luminar Neo, the process is very simple. You can either load one of your own sky images or choose from the built-in sky library, and the software automatically detects the horizon and applies the replacement. From there, you can refine the result using intuitive sliders and dropdown adjustments: including sky positioning, edge blending, colour matching, atmospheric haze, and foreground relighting.
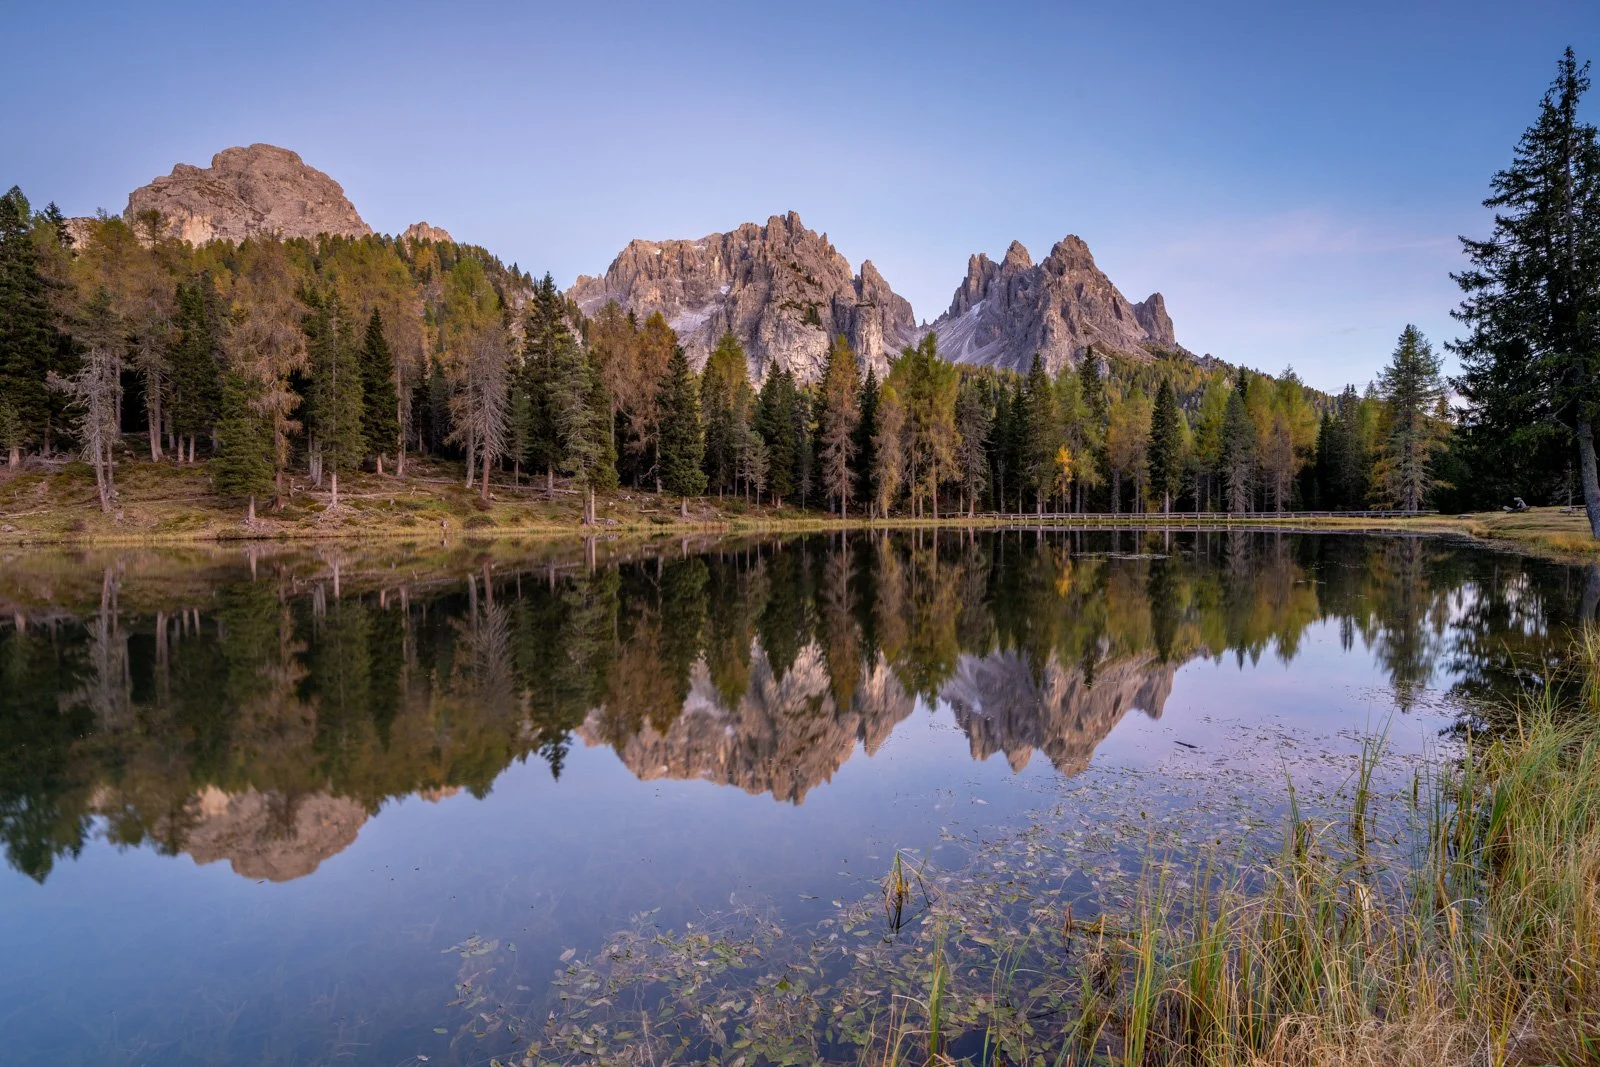
Original Image
One of the standout features of Luminar Neo is its realistic reflection generation for water surfaces. Lakes, rivers, and ocean foregrounds can automatically receive a matching reflection of the new sky, and in most cases it looks surprisingly natural with only minor fine-tuning required. The whole process feels very visual and fast, which makes it accessible even if you’re not deeply experienced with layer-based editing.
Photoshop also includes a Sky Replacement feature, and while it’s powerful, it’s not nearly as streamlined when it comes to reflections and complex blends. The sky swap itself is straightforward, but adding a believable water reflection requires multiple additional steps, duplicating layers, transforming and flipping the sky, adjusting blend modes, and carefully masking the result back into the scene.
Since I wanted to do a full comparison with Luminar Neo’s result, this was the first time I’d attempted to create a reflected sky replacement fully in Photoshop, and while I achieved a somewhat realistic outcome, it involved significantly more manual work. I needed to duplicate the sky layer, use overlay blending, then mask and colour-correct the reflected area so it matched the tones of the water and landscape. It worked eventually, but it took much longer and required more technical precision.
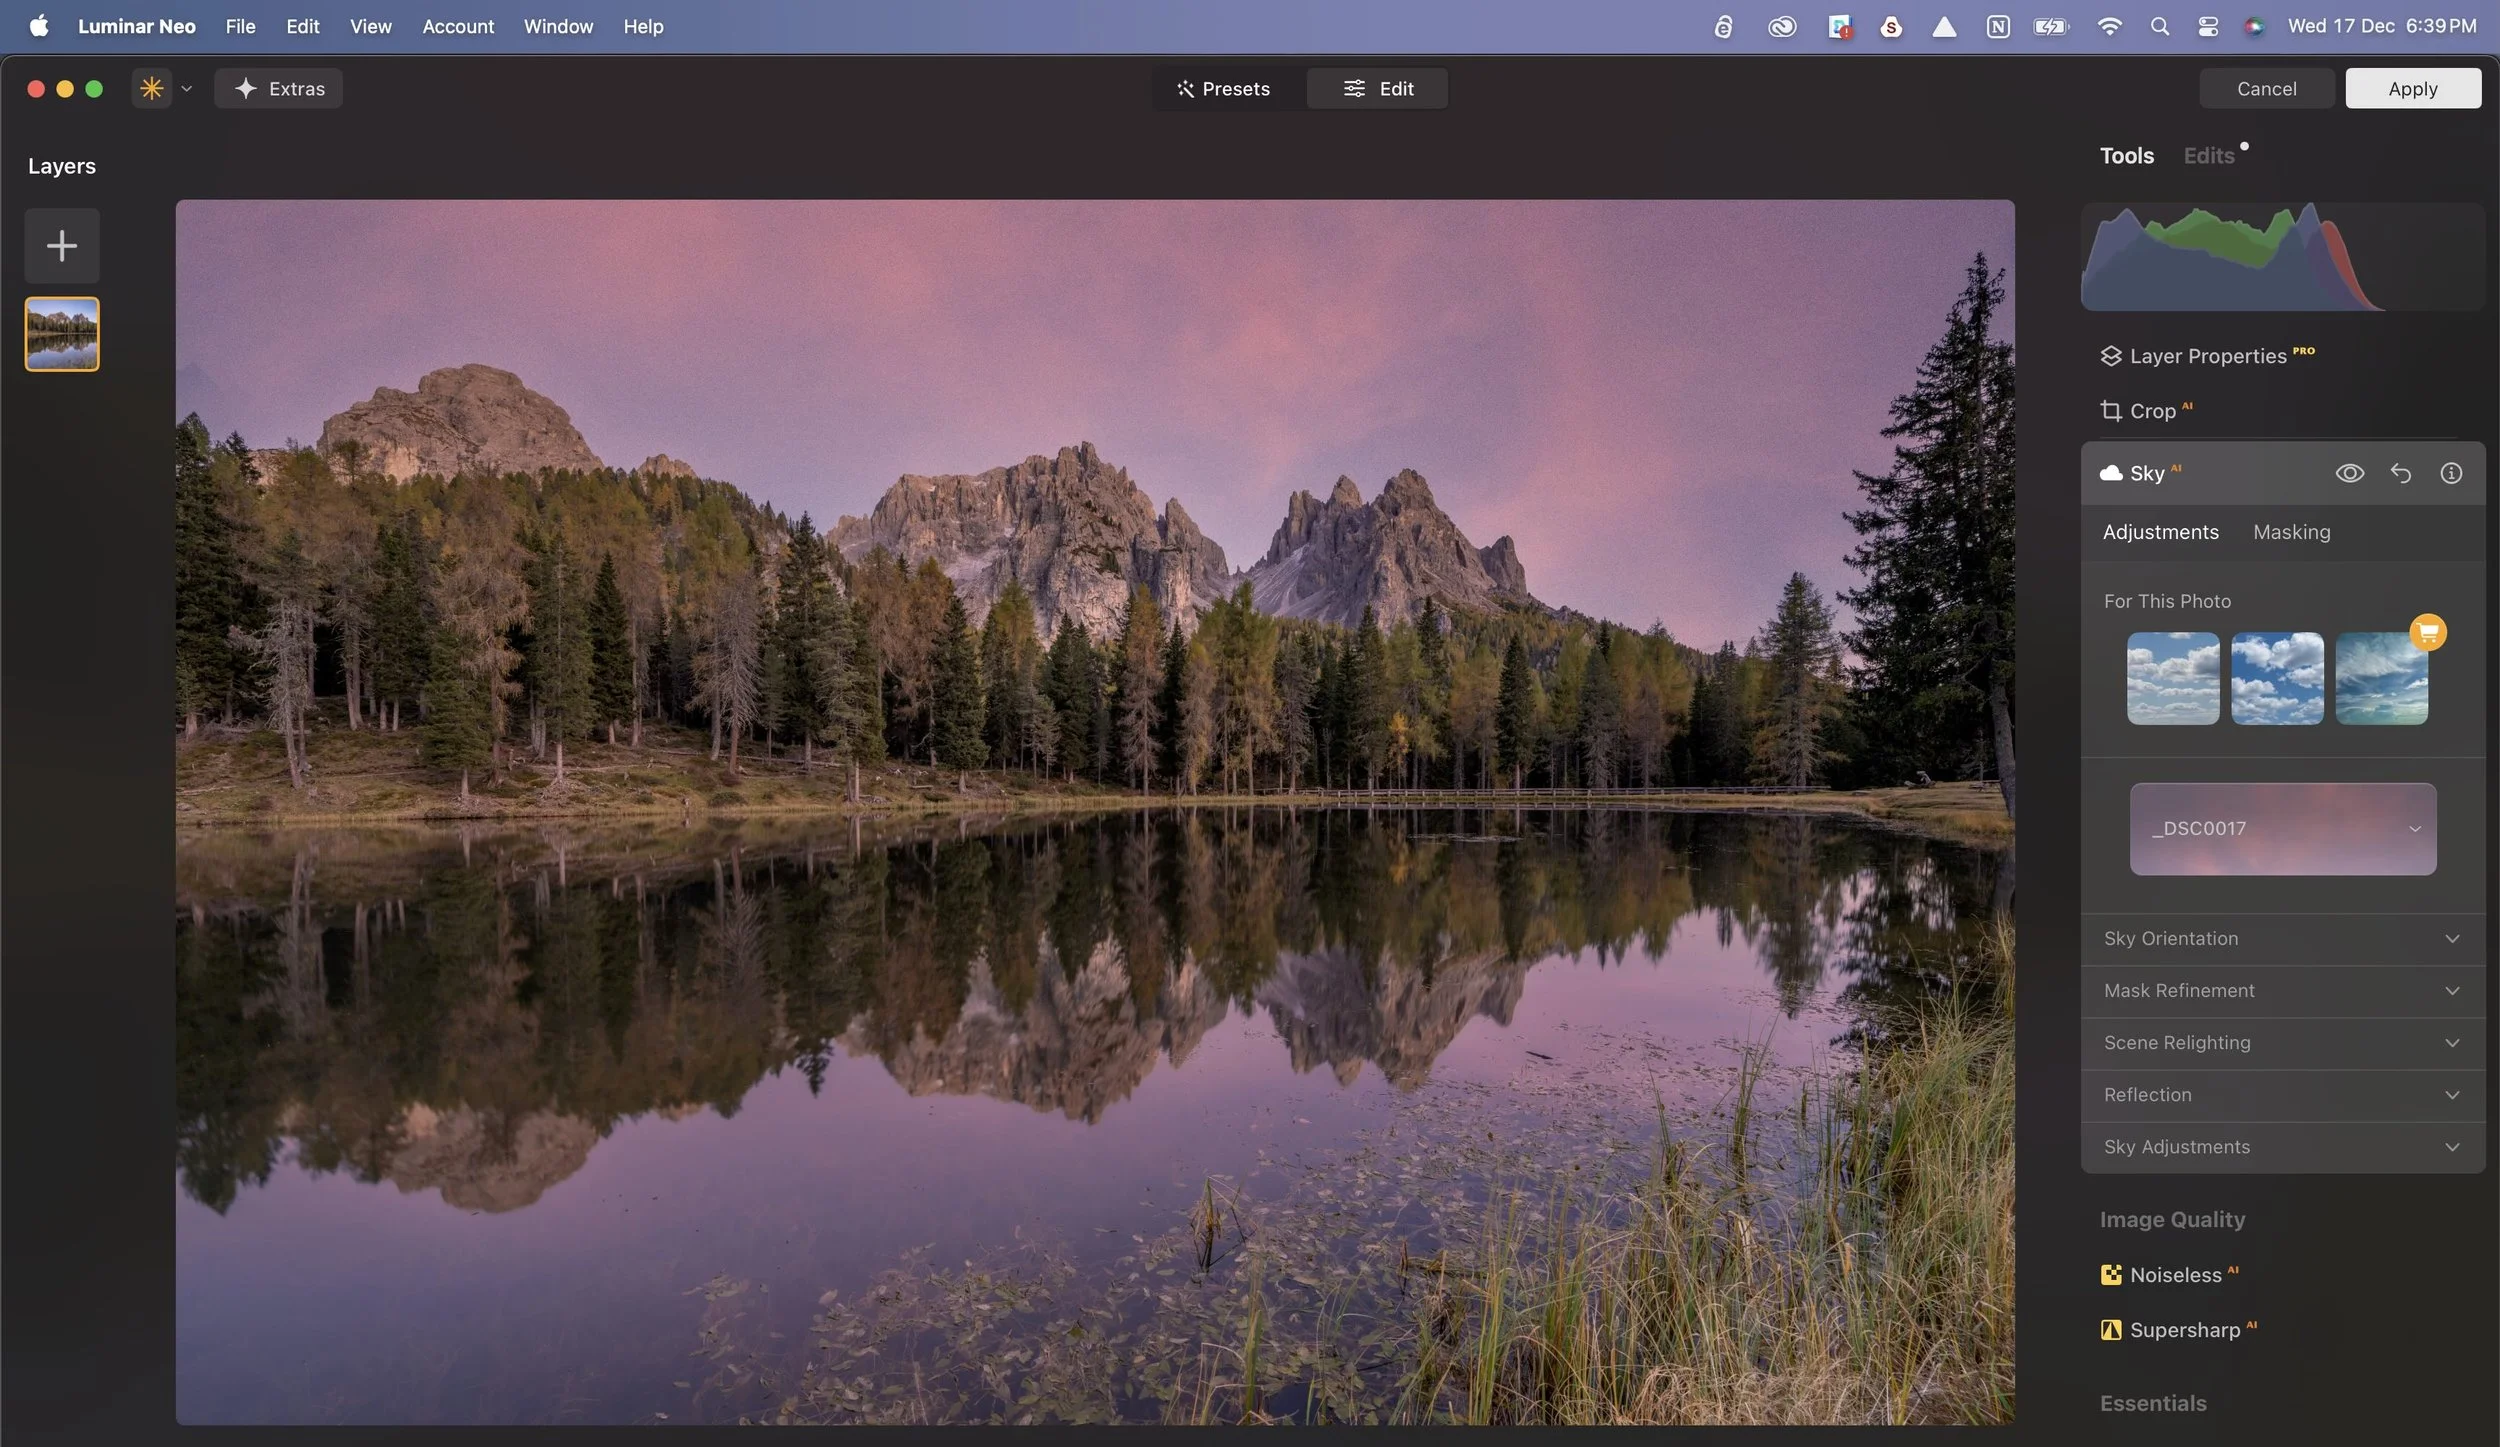
Luminar Neo Sky Replacement with Reflections (just a few simple slider adjustments made within the tool to refine the result)
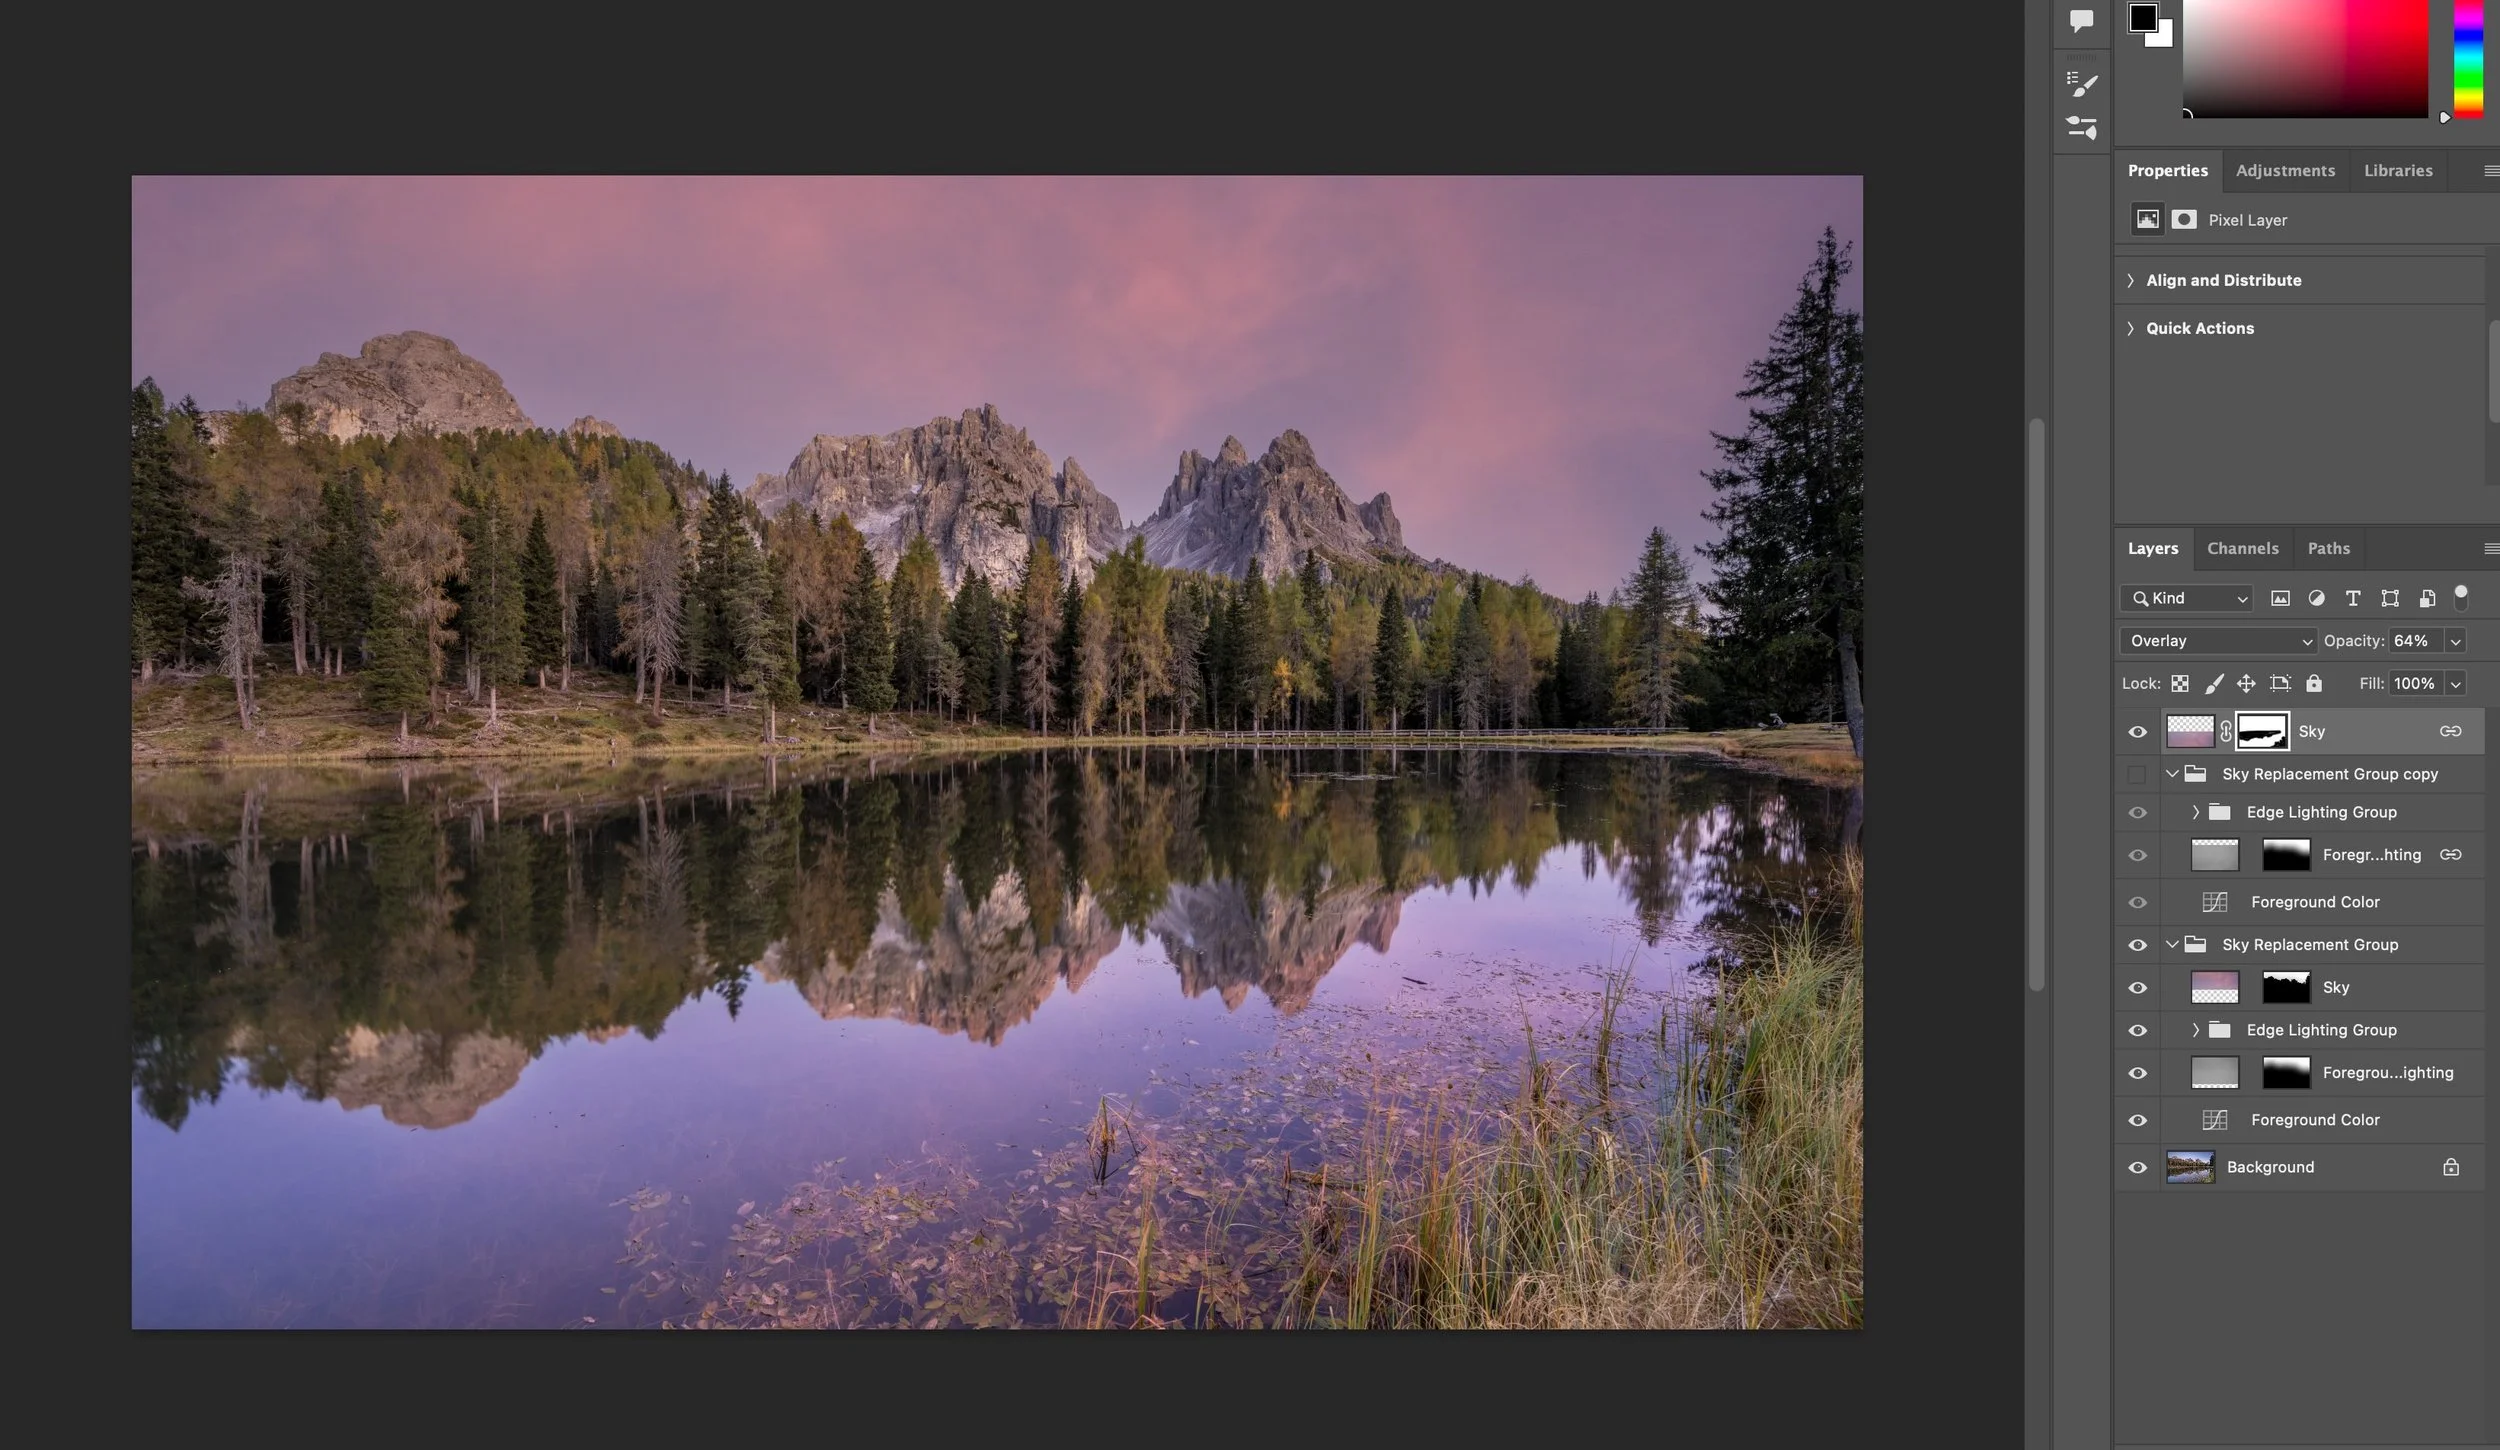
Photoshop Sky Replacement with added reflections. Note all the manual layers and adjustments required to achieve this effect. You’ll note the water still looks a little too bright and not that well matched to the sky.
At this point, it’s also important we discuss integrity and intent when using Sky Replacement.
Personally, if I do replace a sky in a daytime landscape, I will use a realistic sky that I’ve photographed myself, where possible from the exact same location and same session, so the final image remains truthful to the conditions and story of the scene. Dropping in a dramatic sunset or Milky Way that never existed over that landscape may look impressive, but it shifts the image from photography to digital compositing. That’s not inherently wrong, but it needs to be transparent and appropriately labelled (a truth I often find can be lacking in images posted online).
Entering a competition?
For competition entries, sky replacement is usually not acceptable and falls under prohibited compositing or manipulation rules. The only exception to this is astrophotography, where a long exposure foreground taken in the exact same position and at the same time as the sky will generally be allowed. Always check the guidelines carefully. For client work, editorial, and teaching examples, it’s also good practice to disclose when a sky has been replaced.
Here’s a roundup of the Sky Replacement Showdown!
Luminar Neo
Brilliant when you want fast, realistic sky replacements without masks or layers
Automatic horizon detection + foreground relighting makes the result look natural instantly
Reflection generation (for lakes/oceans) is automatic and believable
Downside #1: no access to underlying masks, if Luminar Neo misreads a tree edge or building line, fixes are limited
Downside #2: less suitable for images where you need pixel-perfect control or multi-layered sky elements
Photoshop
Best when you need total control over layer masks, brushes, blend modes, luminosity masking
Best for astrophotography - I wasn’t able to achieve an accurate blend in Luminar Neo using a Milky Way noise-stacked sky image with a long exposure foreground as I would usually do in Photoshop with Sky Replacement, you might have more luck with Layer Properties
You can refine every edge, paint in missing detail, and perfect tree branches, and other tricky edges
Supports multi-layer sky composites (e.g. adding clouds from different images or blending multiple colours)
Downside #1: Slower, more manual steps, and requires greater skill and knowledge of Photoshop Tools
Downside #2: Foreground relighting is not as sophisticated, so you often need extra layers and steps
🏆 OVERALL WINNER: IT’S A TIE!🏆
For speed and simplicity: Luminar Neo wins. For precision and full creative control: Photoshop still leads. For competitions and integrity-critical work: just keep the original sky.
Curious to try Luminar Neo for yourself?
If you decide Luminar Neo is a good fit for your workflow, you can purchase it here:
Luminar Neo using code MEGHAN10 for 10% off pricing
This helps support my content at no extra cost to you, and I only recommend software I genuinely use and trust!
Want to read more in this series?
Why I added Luminar Neo to My Lightroom Workflow (And You Should Too!)
Using Luminar Neo for Light, Colour & Mood (Why These Tools Make Images Pop)
HDR Merge Showdown: Lightroom vs Luminar Neo
Panorama Showdown: Lightroom vs Luminar Neo