
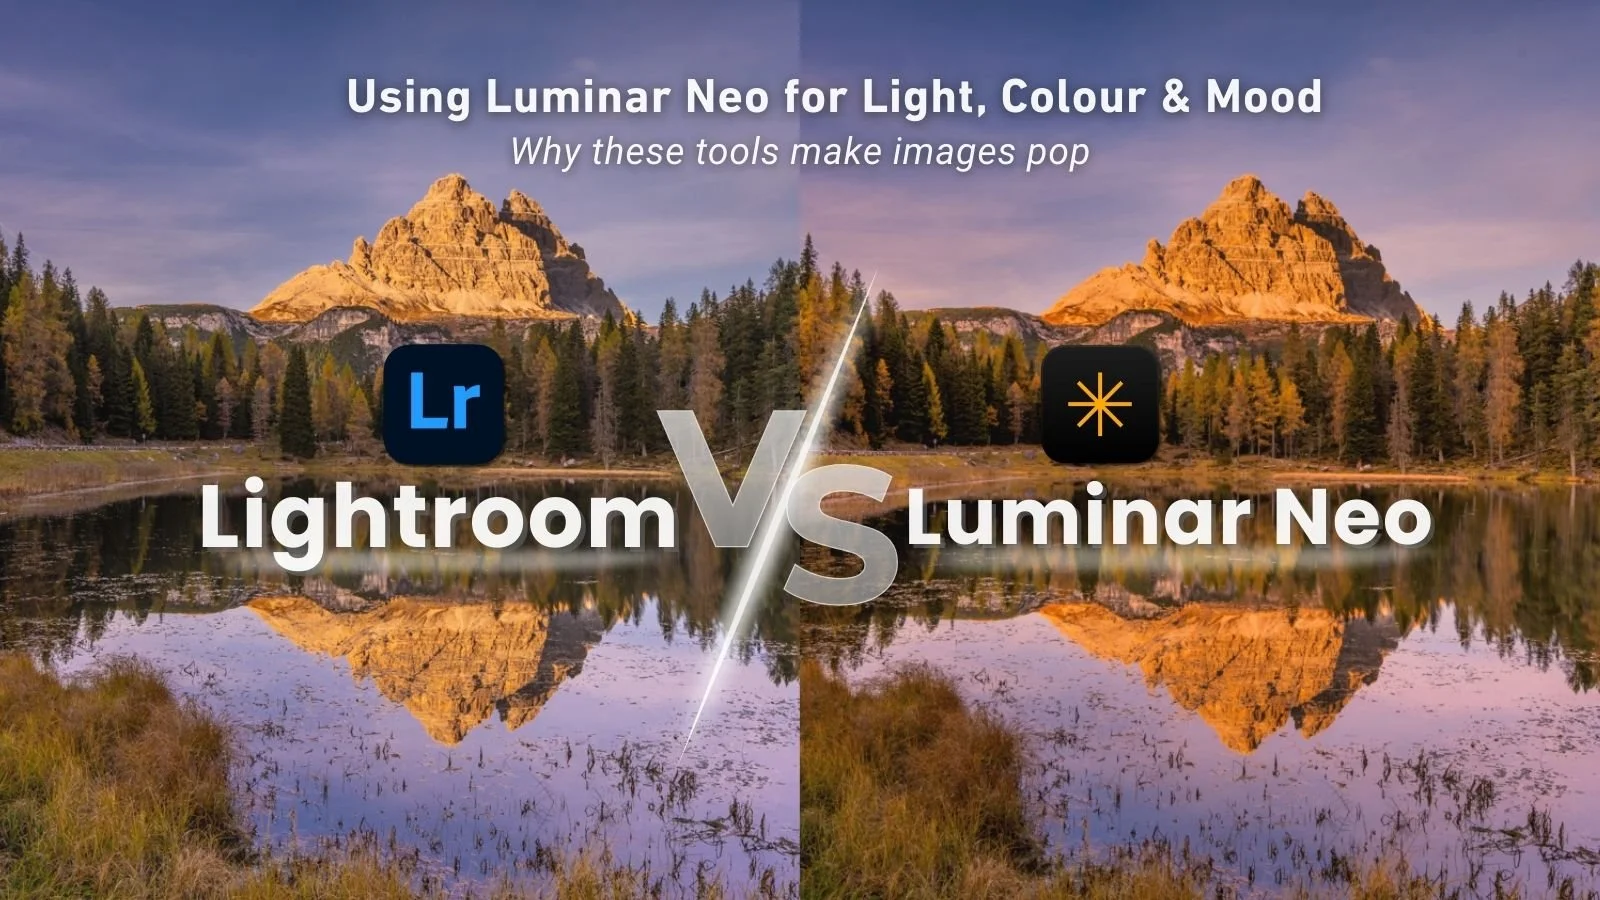
Using Luminar Neo for Light, Colour & Mood (Why These Tools Make Images Pop)
In Part 1 of this series, I explained why Luminar Neo has become my favourite finishing tool alongside Lightroom, and I showed three before-and-after examples where subtle changes made a big difference to the results.
In this post, I want to go one step deeper and explain how I use my favourite tools to in Luminar Neo to get transformative results.
I’ll walk through the key tools I actually use to refine light, colour, and mood using the same three images from Part 1. For the blog, I’ll reference screenshots; for the video version, I’ll edit these images live so you can see exactly what’s happening.
Why Luminar Neo feels different to Lightroom
Lightroom is excellent for foundational edits using exposure, tone, white balance, and basic colour work. But when it comes to finishing, many of its tools are either global or would require complex masking to achieve the nuanced results I can get in Luminar Neo.
Luminar Neo approaches editing differently. Many of its tools are scene-aware, depth-aware, or purpose-built for specific photographic problems. That means you can achieve refined results faster, and without pushing sliders too far.
So let’s dive in!
Enhance: A smart starting point
The Enhance tool might seem like it’s just designed as a “one-click fix,” but it’s so much more than that.
Enhance can help improve contrast and clarity intelligently and balance tone across the image.
Small adjustments here often give me a better starting balance before I move into the more targeted tools.
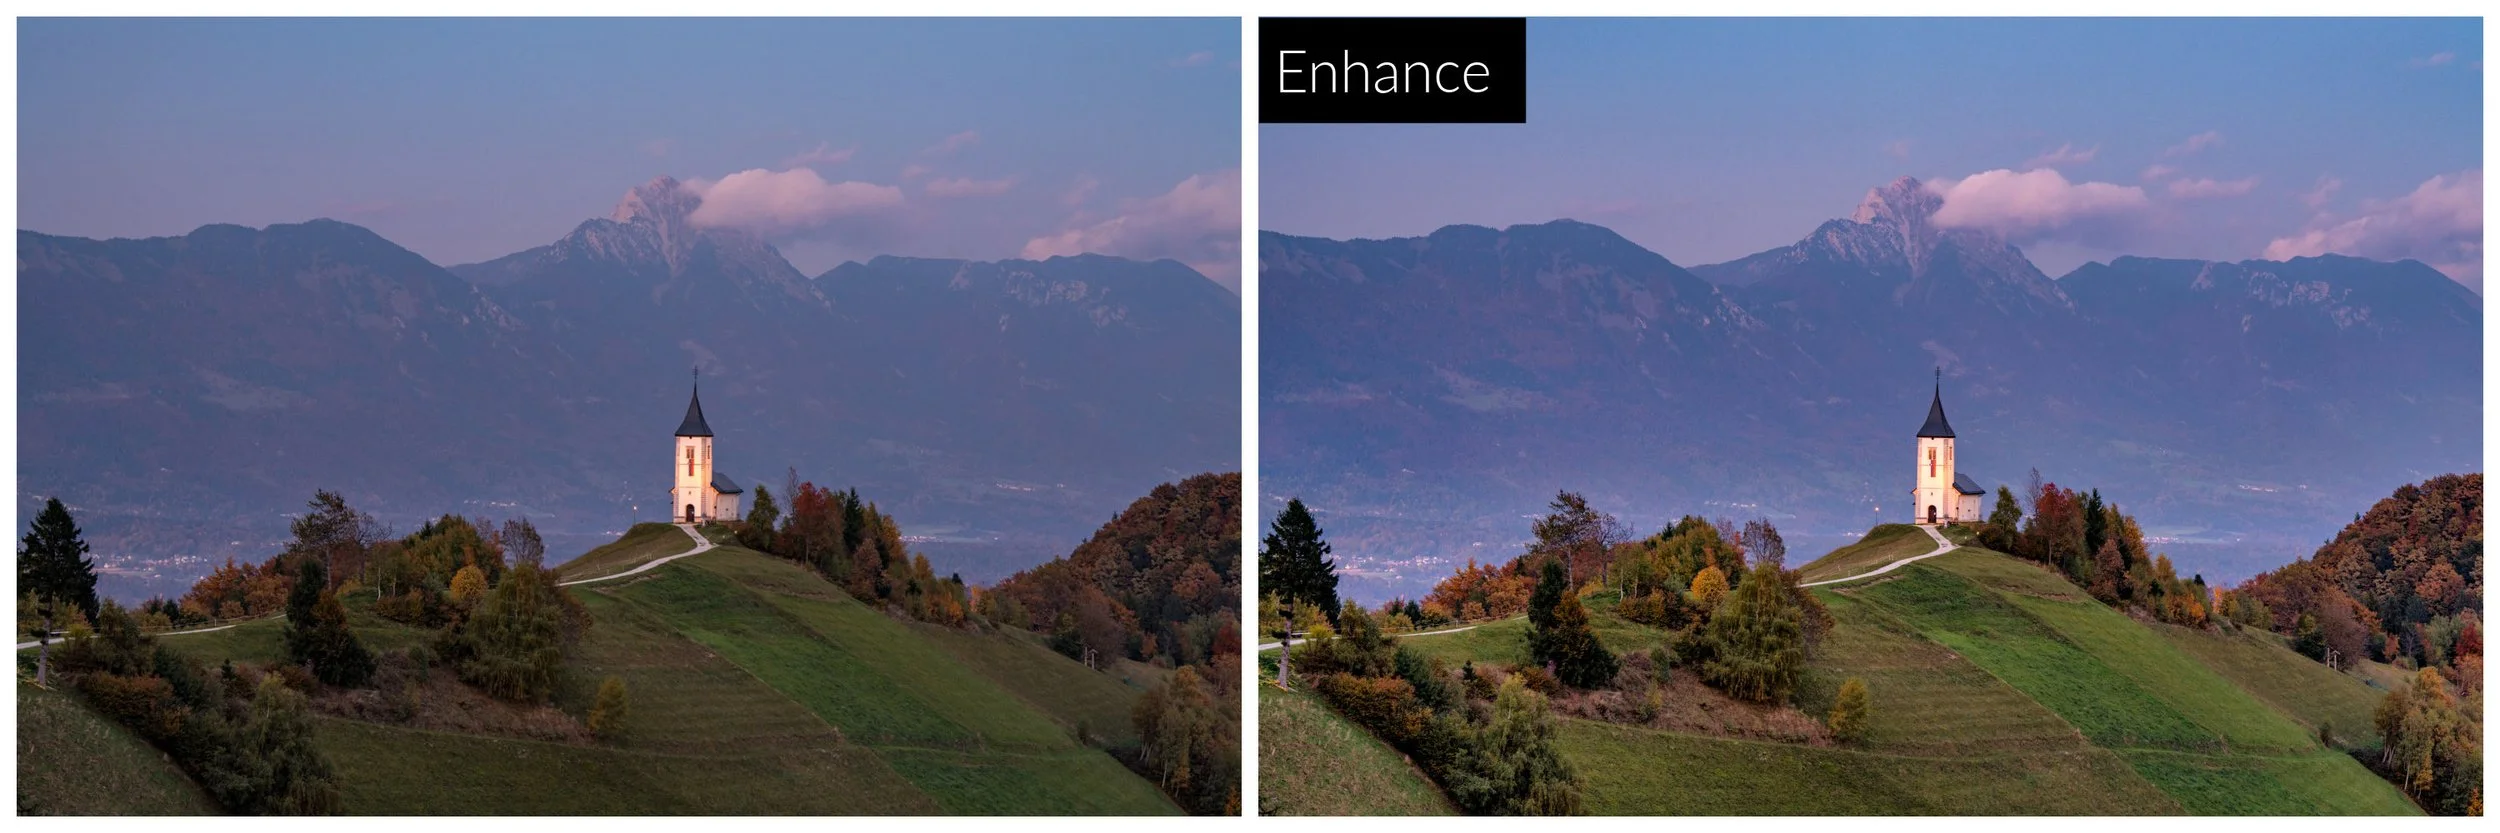
Lightroom edit vs Luminar Neo with just Enhance AI applied
Landscape tools: scene-specific refinement
Twilight Enhancer
Twilight Enhancer is one of the best tools to enhance dawn and dusk scenes. It selectively enhances cool and warm tones, contrast, haze and depth. Used subtly, it enhances the feeling of early or late light rather than just boosting colour by:
Enhance warmth in sunrise and sunset light
Deepen sky colour without over saturation
Add atmosphere without flattening contrast
It’s not a one-click slider either, there are a number of refinements available within the tool (to adjust the Sky, Dawn, Scene etc) to give you full control over the result.
Water Enhancer
Water Enhancer really helps make water scenes POP! It will increase clarity and definition in water, enhance reflections and will spice up the look of water that’s would otherwise be a bit bland.
Again, small adjustments go a long way, but it’s so good to be able to give the water and reflections a little love of their own.
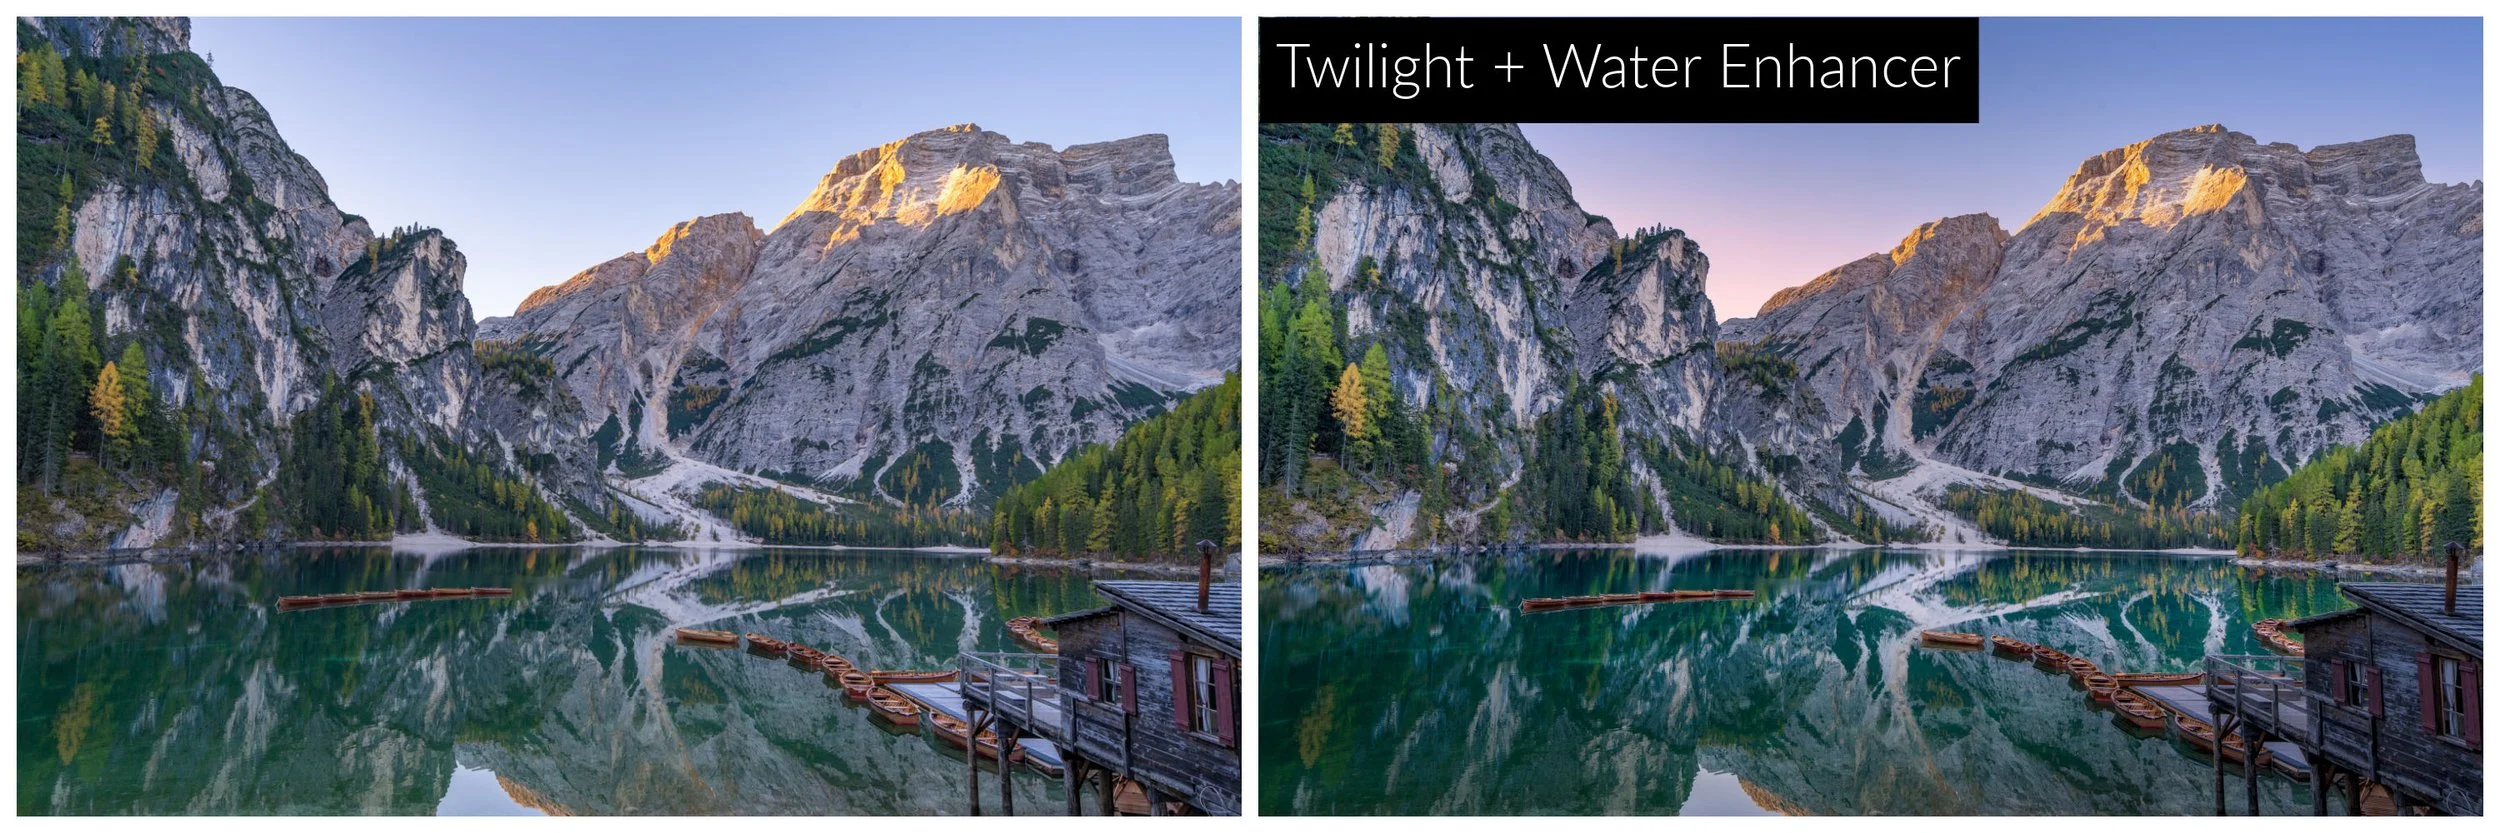
Lightoom edit vs Luminar Neo with Light Depth, Twilight Enhancer + Water Enhancer applied
Atmosphere
Atmosphere allows you to add targeted mist, fog and haze, with default gobal starting points, though masks can be used to target further.
Mist and fog work in a similar way - targeted most in the top half of the image
Layered fog - begins in the foreground elements as if fog in a valley
Haze is targeted most in the mid section of the image - like atmospheric haze would appear in reality.
The only tool in Lightroom that is similar to this is Dehaze but using it as Haze by reducing slider below zero. This just removes contrast from existing information, but Atmosphere adds new information to the image in a depth-targeted approach which is very intelligent.
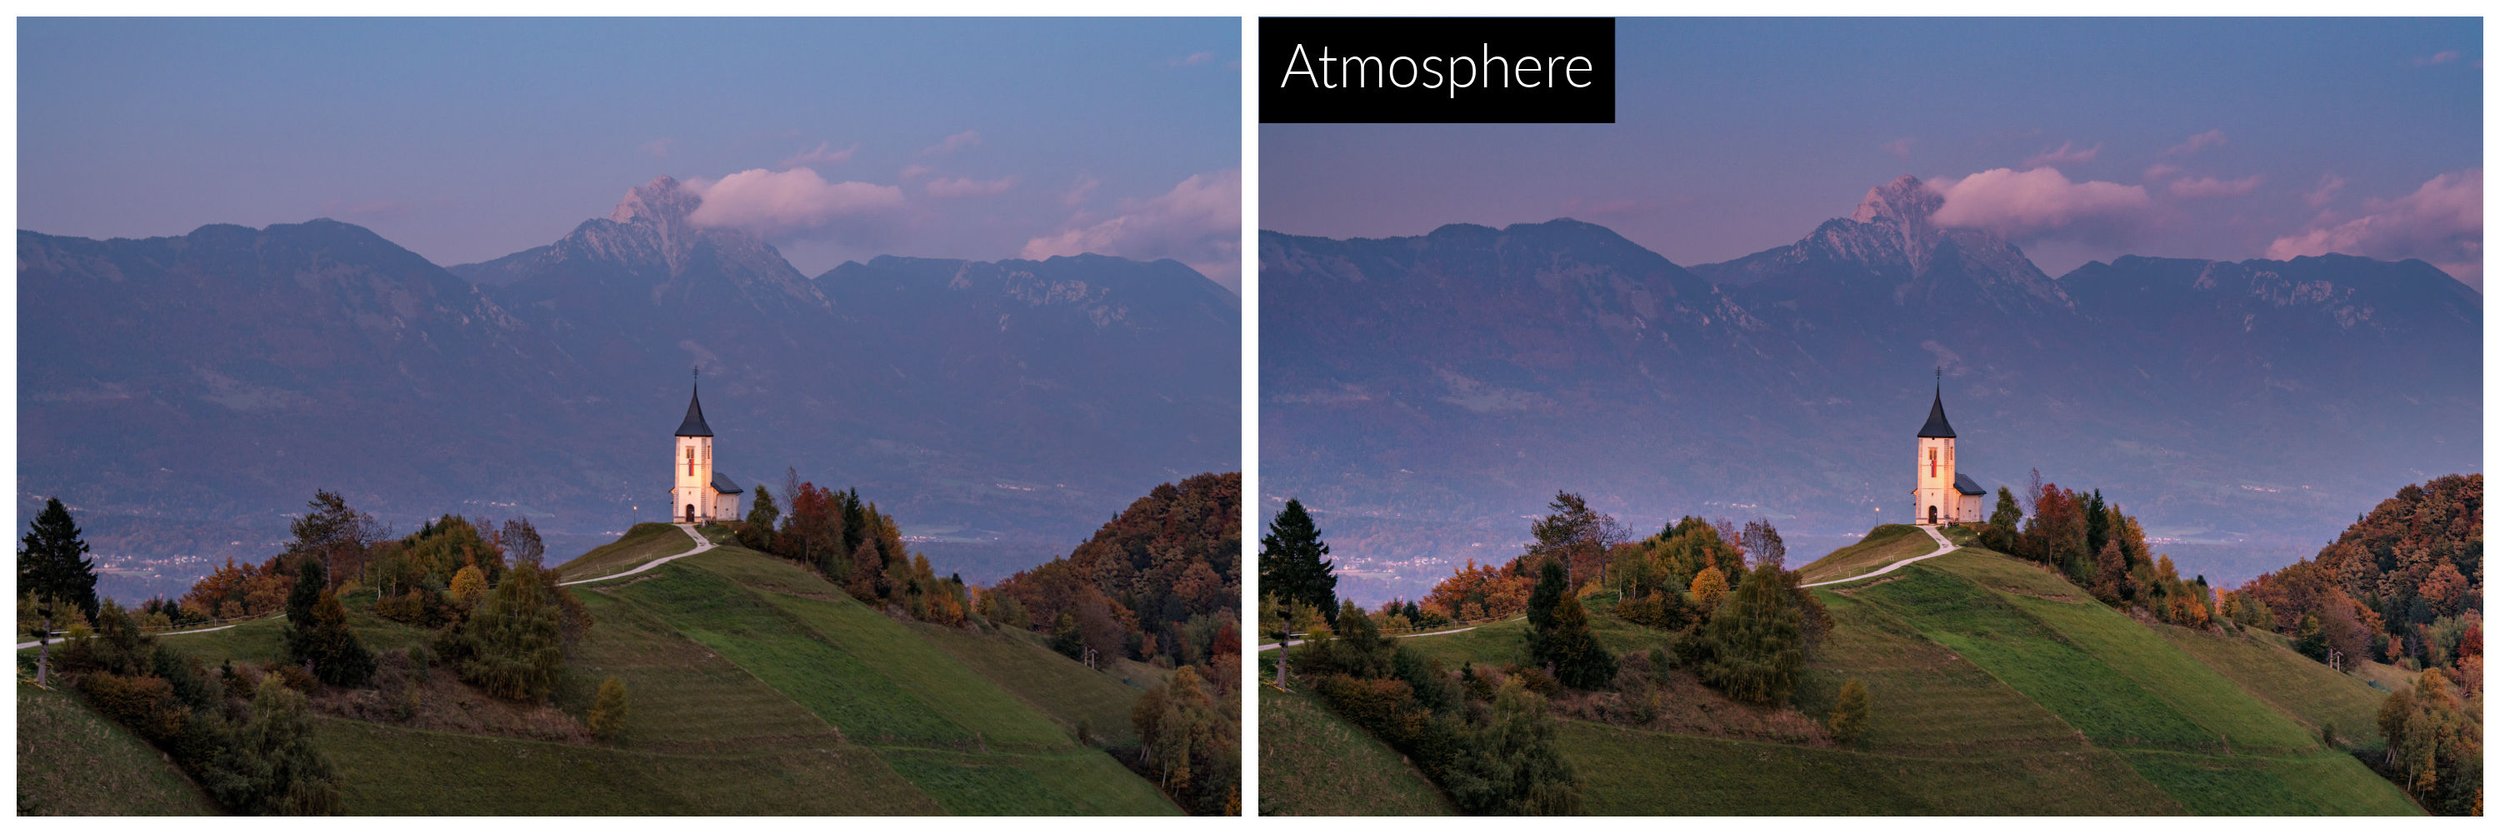
Lightroom edit vs Luminar Neo Atmosphere = Haze applied in the valley behind the church
Creative tools: where images come to life
This is where Luminar Neo truly feels like a finishing tool.
Light Depth
Light Depth is fast becoming one of my favourite tools because of how quickly it can transform a scene.
It allows you to:
Control brightness and contrast by distance
Enhance foreground, midground, and background independently
Add depth without heavy masking
In Lightroom, achieving this usually requires multiple masks and careful feathering.
The fact you can adjust exactly where the light will fall to accent the image, how wide the feathering is and the brightness in the foreground, background and the cool/warmth of these areas is nothing short of magic.
If you get Luminar Neo for one tool, THIS IS THE ONE THAT WILL BLOW YOU AWAY THE MOST!
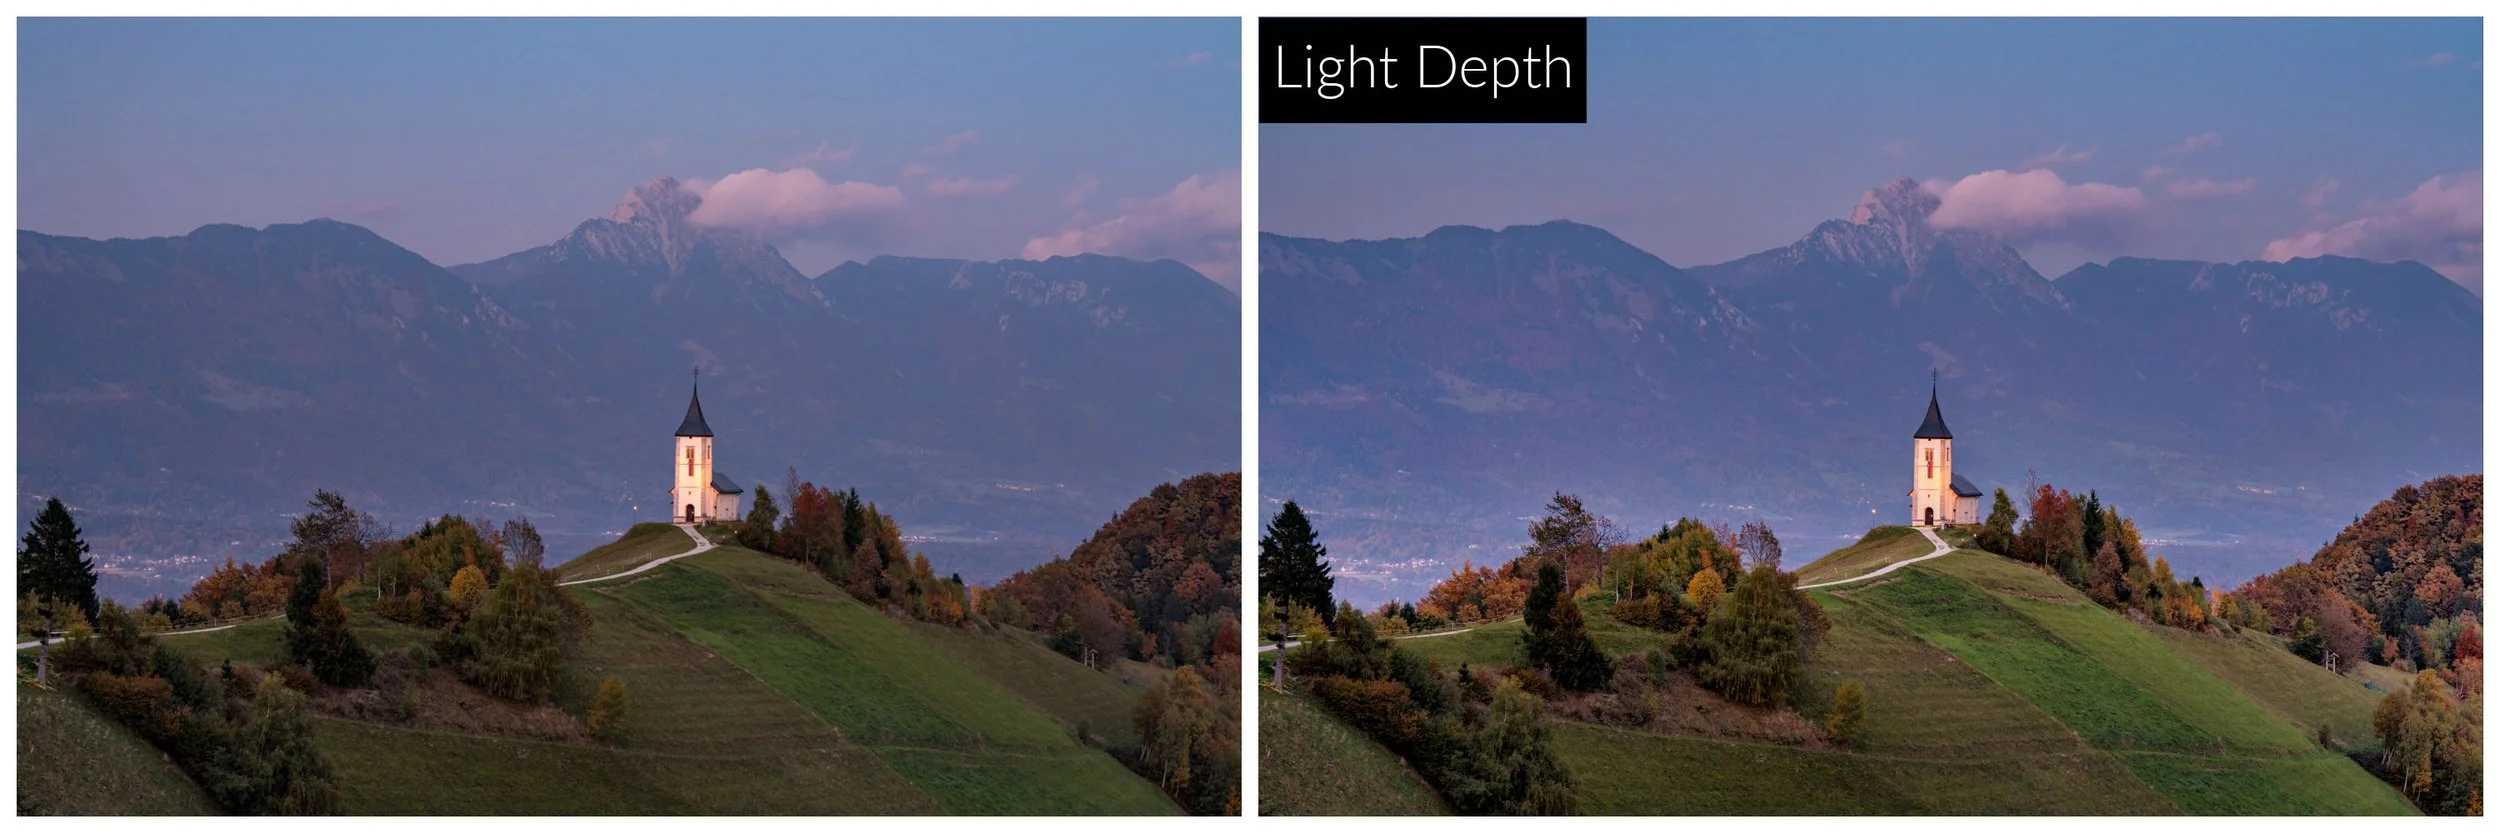
Lightroom edit vs Luminar Neo Enhance + Light Depth
Mood
These can act a little like the one-touch Lightroom Presets, but they have a much lighter touch. Used subtly, Mood shifts colour relationships across the image without the need for it to completely change the image. There are many options to choose from, the ones I find myself drawn to that often work with my image tones are Long Beach and Candlelight. Once again though I love that you can refine the Mood in multiple ways which has never felt that easy with Lightroom Presets.
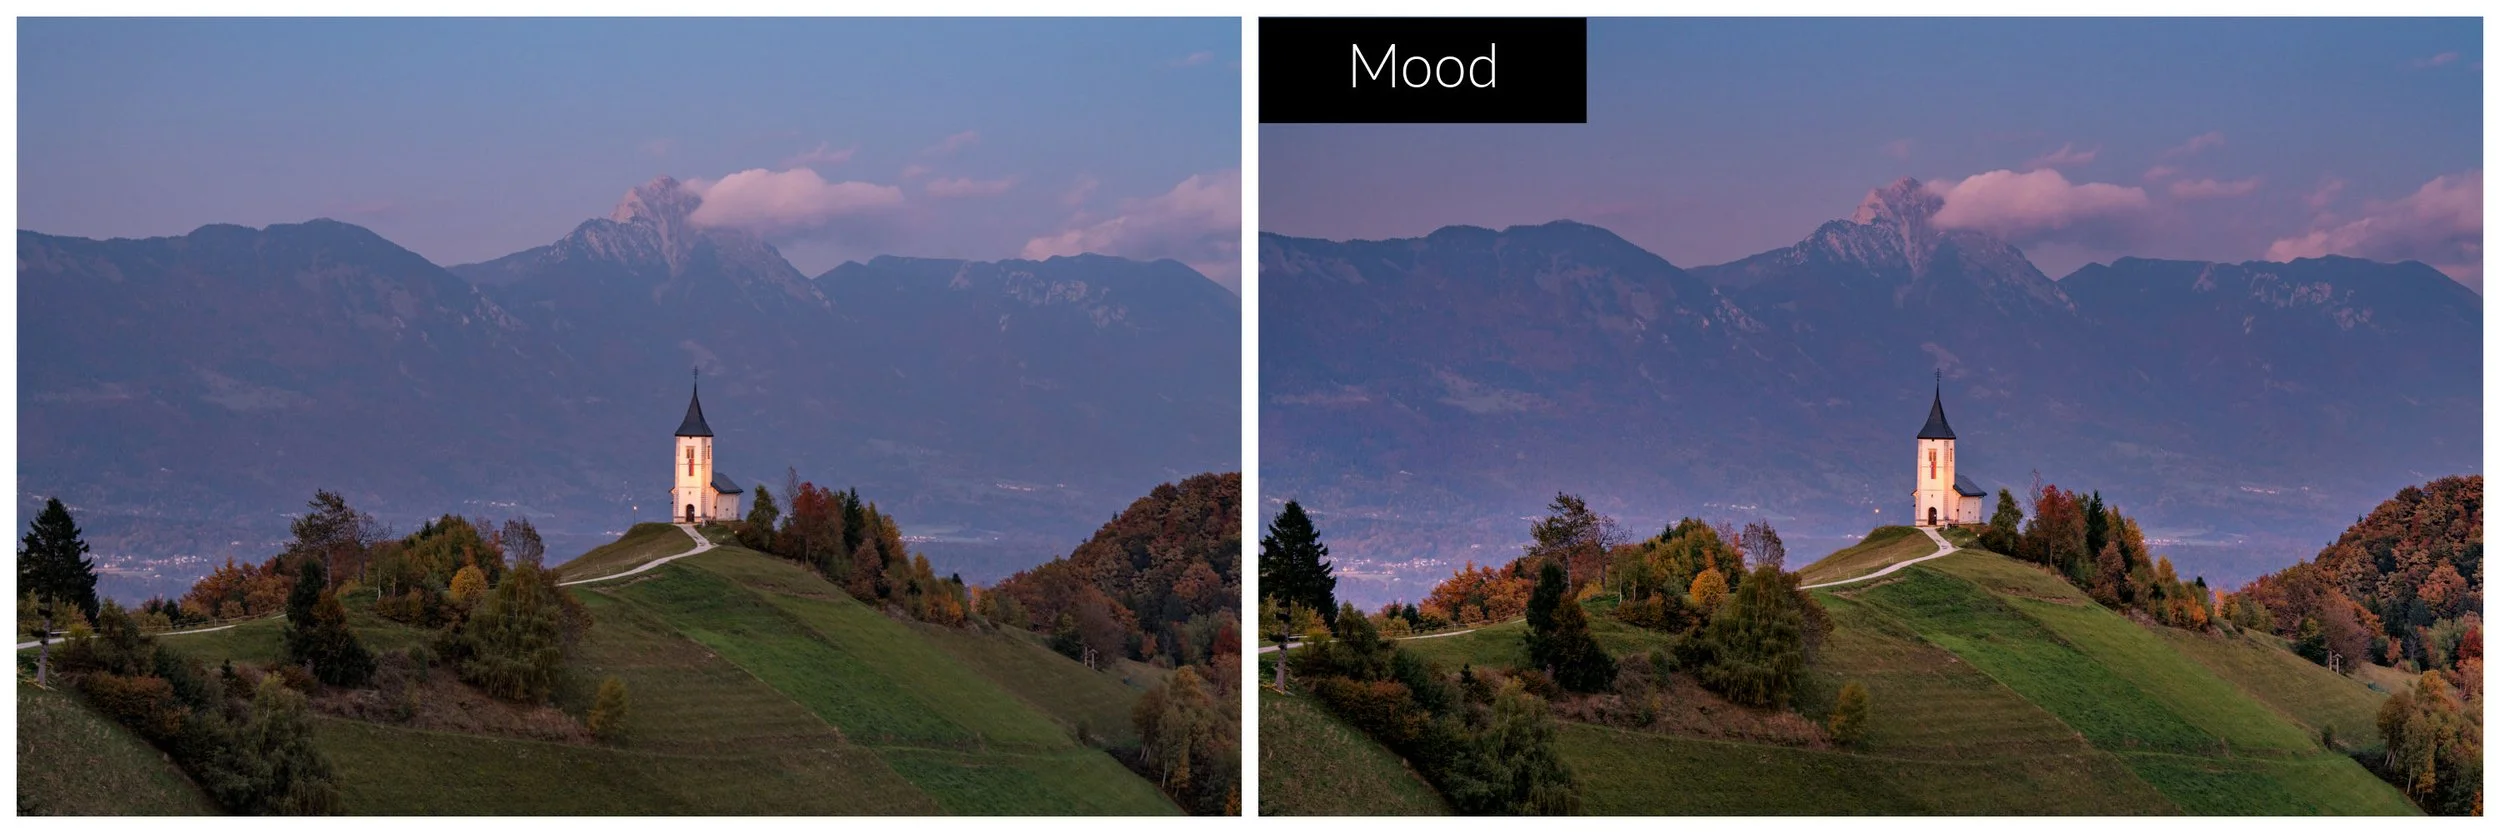
Lightroom edit vs Luminar Neo with Enhance, Light Depth, Mood = Long Beach
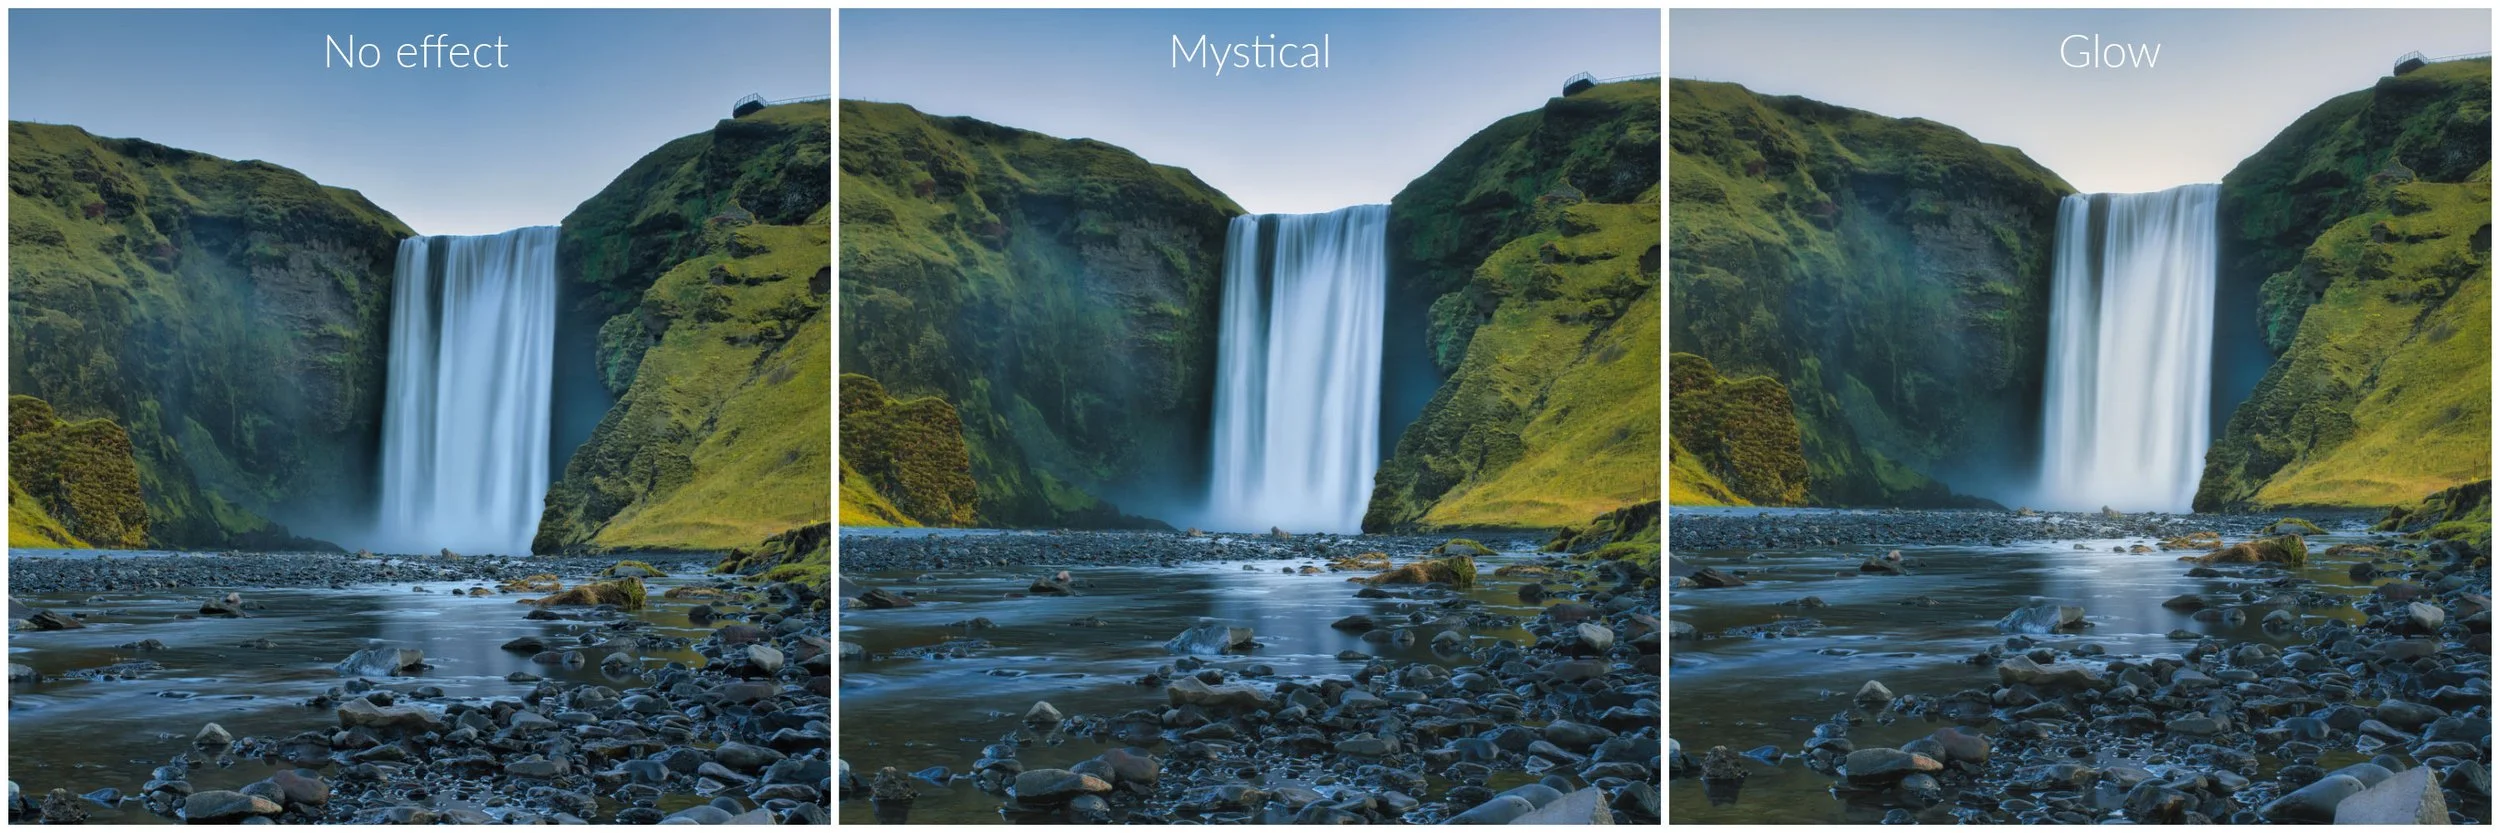
Mystical and Glow
While these both will create a dreamy soft feel to your images, they do it in different ways.
Mystical - is a simple slider that creates a soft, dreamy, atmospheric glow in light areas and adding contrast.
Glow - has 4 options: Soft Focus, Glow, Orton Effect and Orton Effect Soft to add glow but it will only affect the highlights in the image.
The key here is small global adjustments or masking, not relying on just one heavy-handed swipe of the slider.
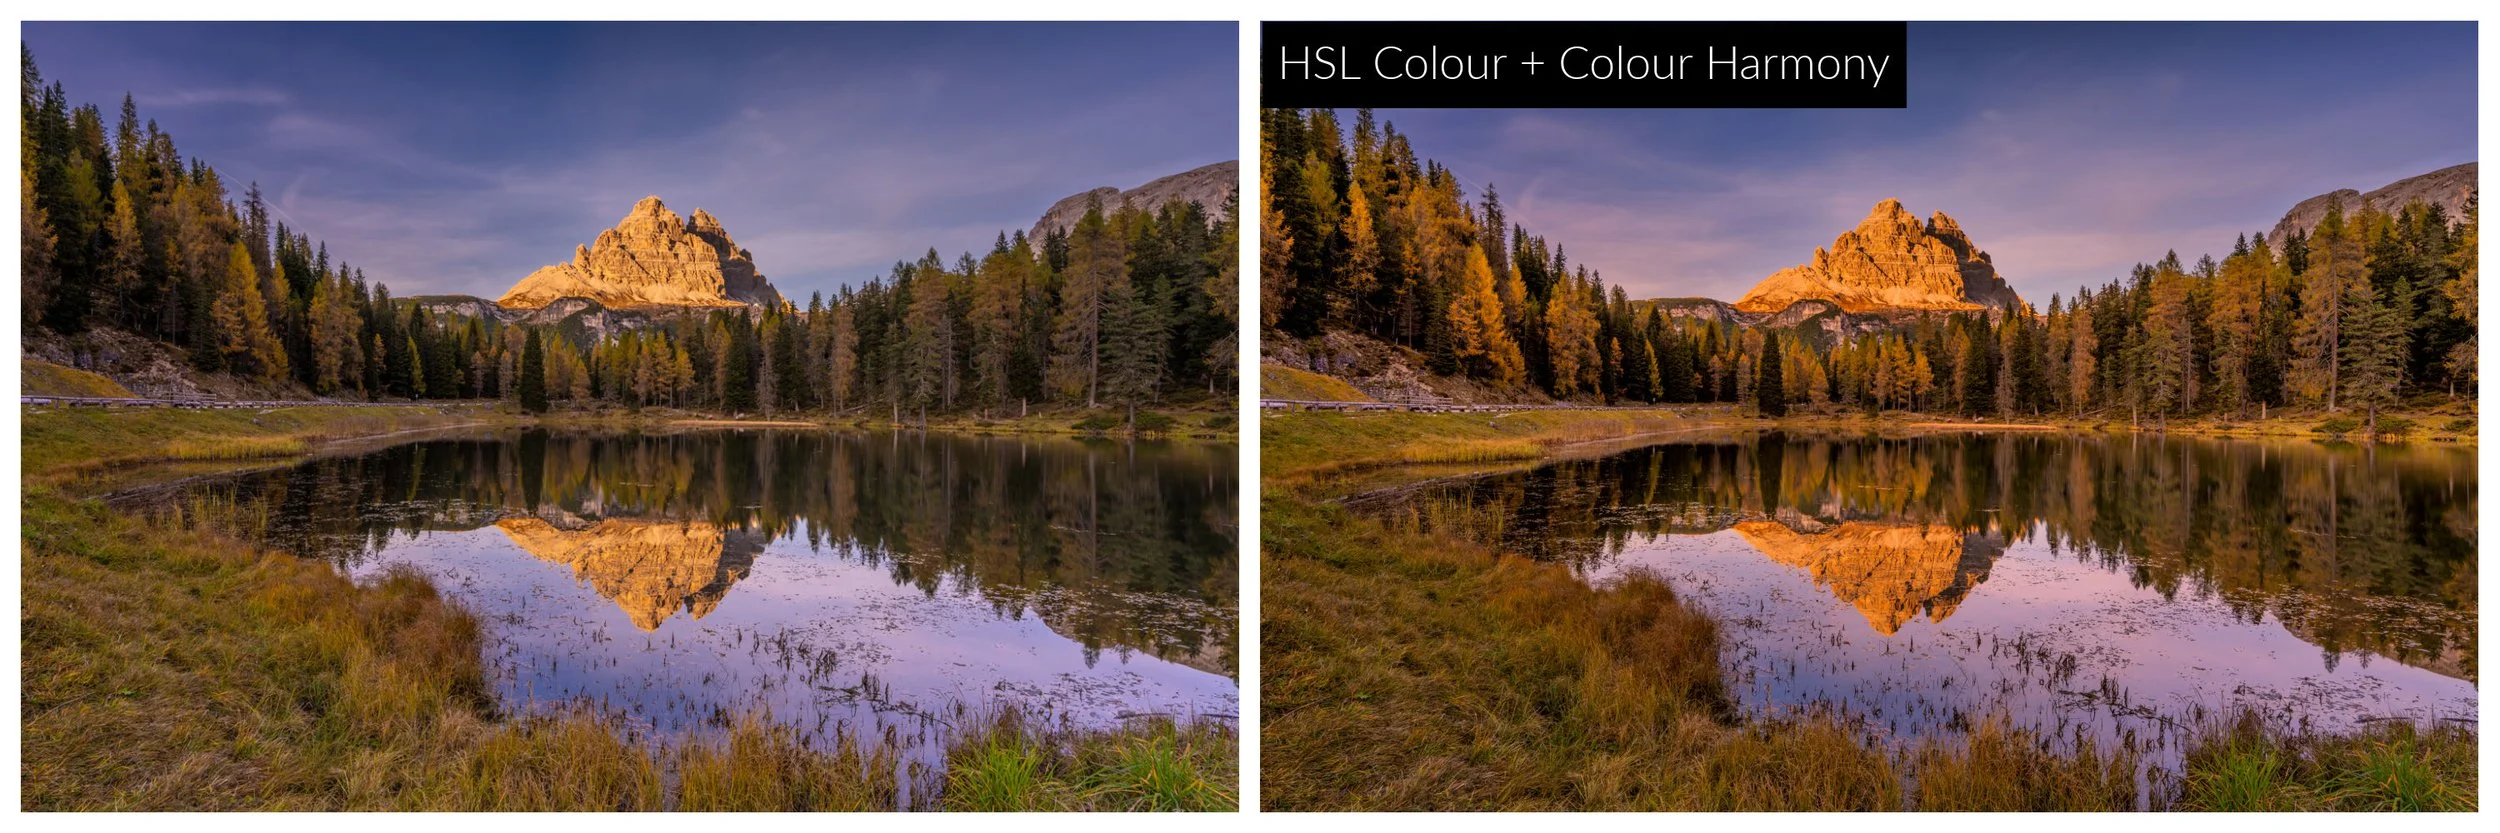
Targeted colour: HSL with masks & colour harmony
HSL with Masks!
One of Luminar Neo’s biggest advantages over Lightroom is the ability to use Hue, Saturation and Luminance adjustments within masks.
This means I can adjust colour only where it matters and enhance specific areas without affecting that colour throughout whole image, something I have long wished that Lightroom would add to its own masks! The results in the image below would have been very difficult to achieve without a mask due to the similarity in tones between the autumn trees and the golden cloud.
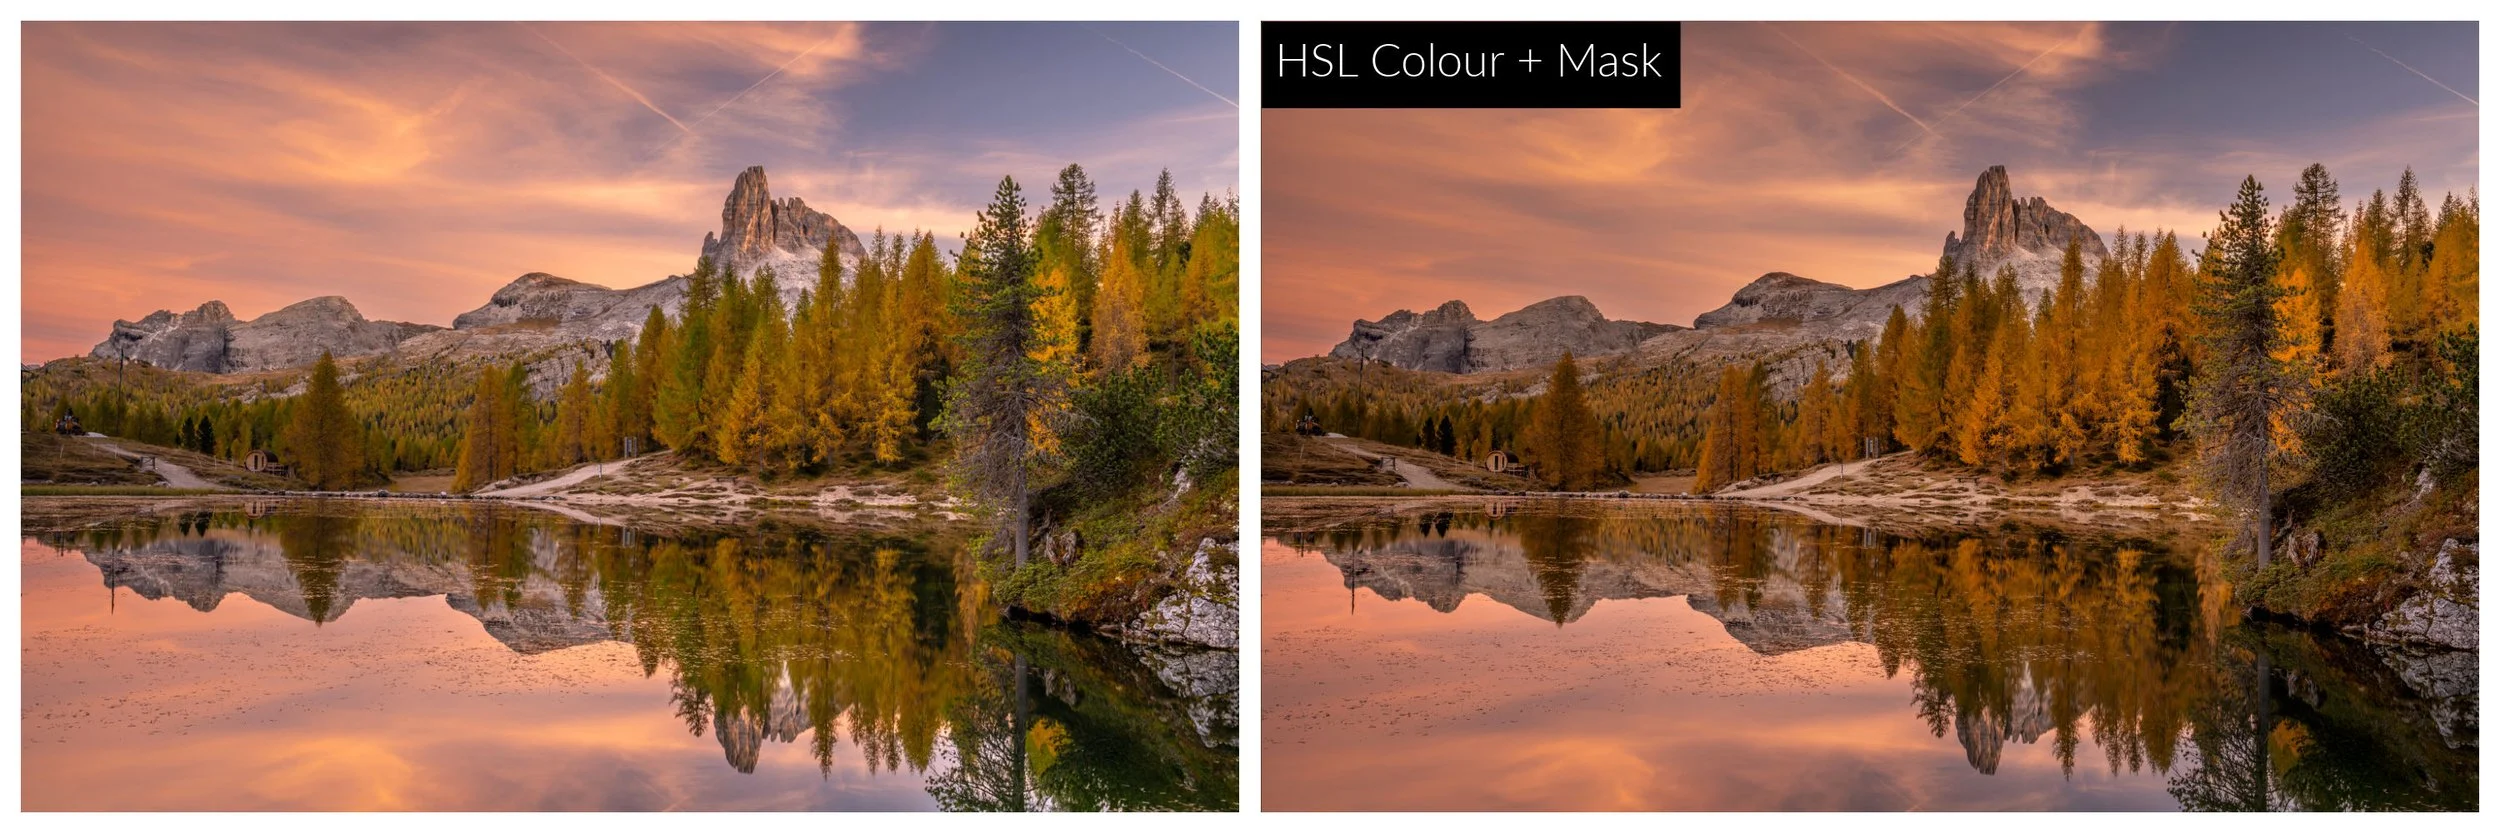
Lightroom Edit vs Luminar Neo using HSL + Mask on all but the sky/water allowed me to make the trees more autumnal without affecting the lovely tones in the sky
Colour Harmony = colour control
Color Harmony is Luminar Neo’s main colour-grading engine letting me shape shadows, midtones, and highlights independently to create balanced, cinematic colour, it’s the closest thing to Colour Grading in Lightroom, but there are far more options and control over the end result where I often feel in Lightroom that all I can really do is cool the shadows to blue and warm the highlights to orange.
Why these tools make images “pop”
What surprised me most when using Luminar Neo is that images don’t look any more edited, but they do look more polished and have an extra WOW factor that I’ve discovered isn't easily achievable in Lightroom online.
The combination of scene-aware tools using depth based adjustments, targeted colour control and subtle mood and atmosphere layering means I can achieve impact without sacrificing the intention of my edit.
That’s the difference between editing an image and finishing it.
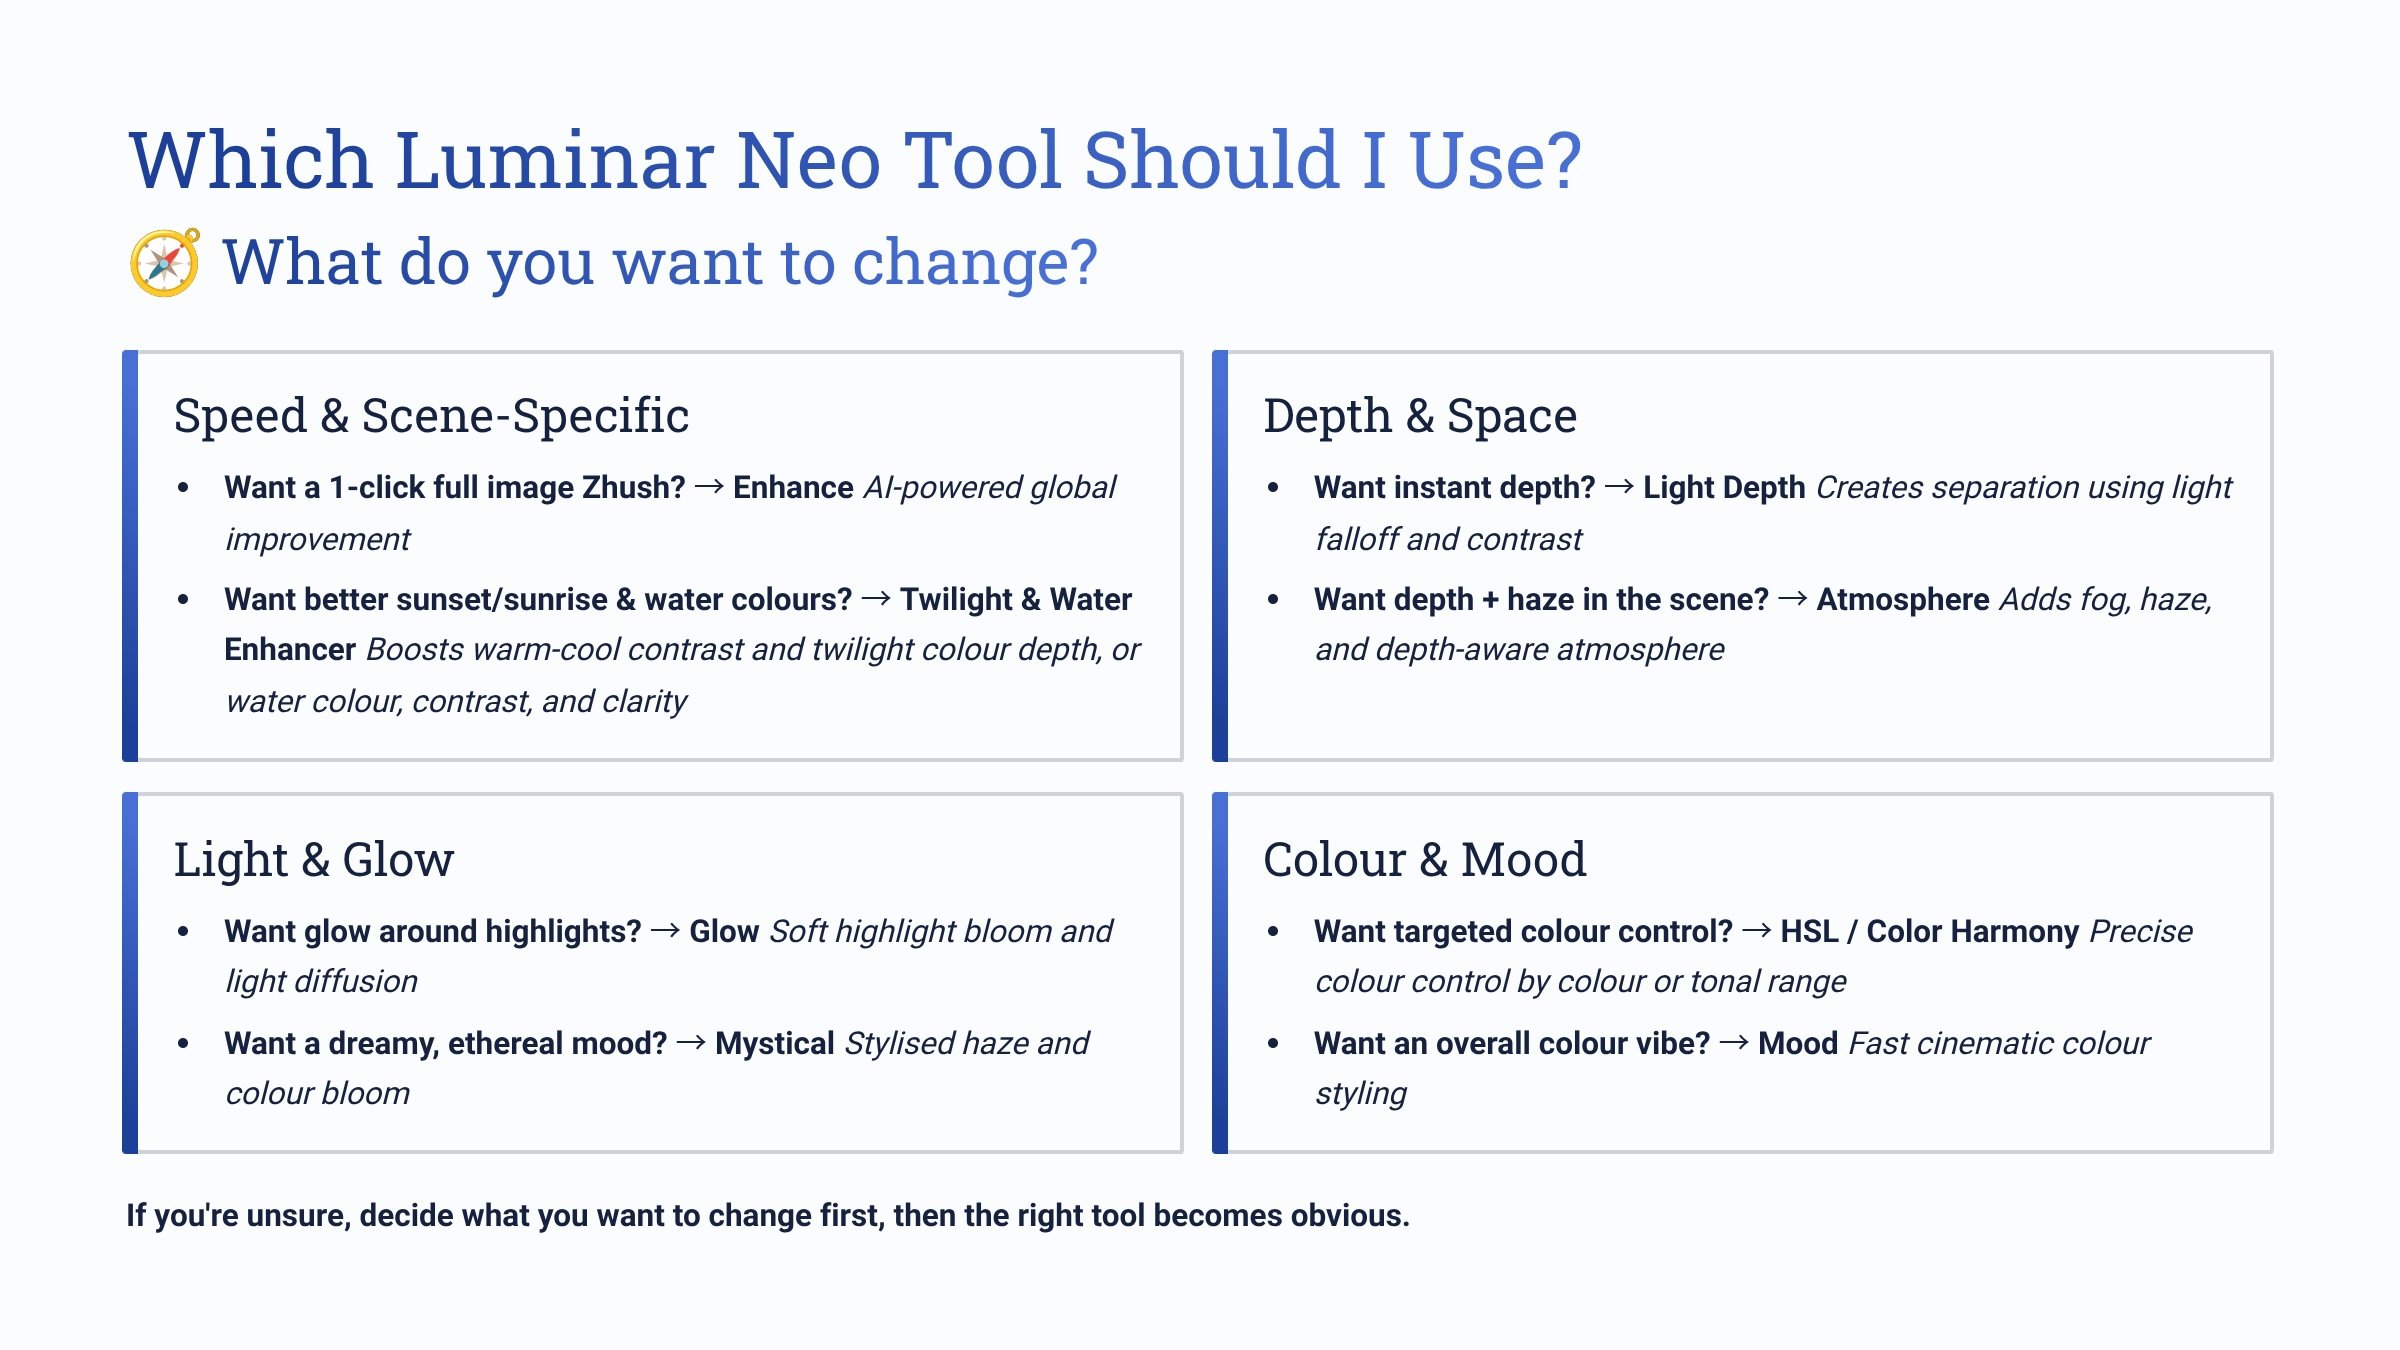
If you’re unsure which tool to use, here’s a great infographic to help decide.
Putting it all together
To see this in action, check out my video below where I use these tools to show the transformation of the 3 before/after examples from my last post:
What’s next
In the next posts in this series, I’ll focus on more advanced features I use for editing such as Exposure Bracketing, Focus Stacking, Panoramas, Cleanup/Removal Tools and Sky Replacement to really put Luminar Neo to the test. The software offers some very compelling advantages over both Lightroom and Photoshop (but with a few limitations you should know about).
Curious to try Luminar Neo for yourself?
If you decide Luminar Neo is a good fit for your workflow, you can purchase it here:
Luminar Neo using code MEGHAN10 for 10% off the price.
This helps support my content at no extra cost to you, and I only recommend software I genuinely use and trust!
Want to read more in this series?
Why I added Luminar Neo to My Lightroom Workflow (And You Should Too!)
Sky Replacement Showdown: Photoshop vs Luminar Neo
HDR Merge Showdown: Lightroom vs Luminar Neo
Panorama Showdown: Lightroom vs Luminar Neo