
Panorama Showdown: Lightroom vs Luminar Neo
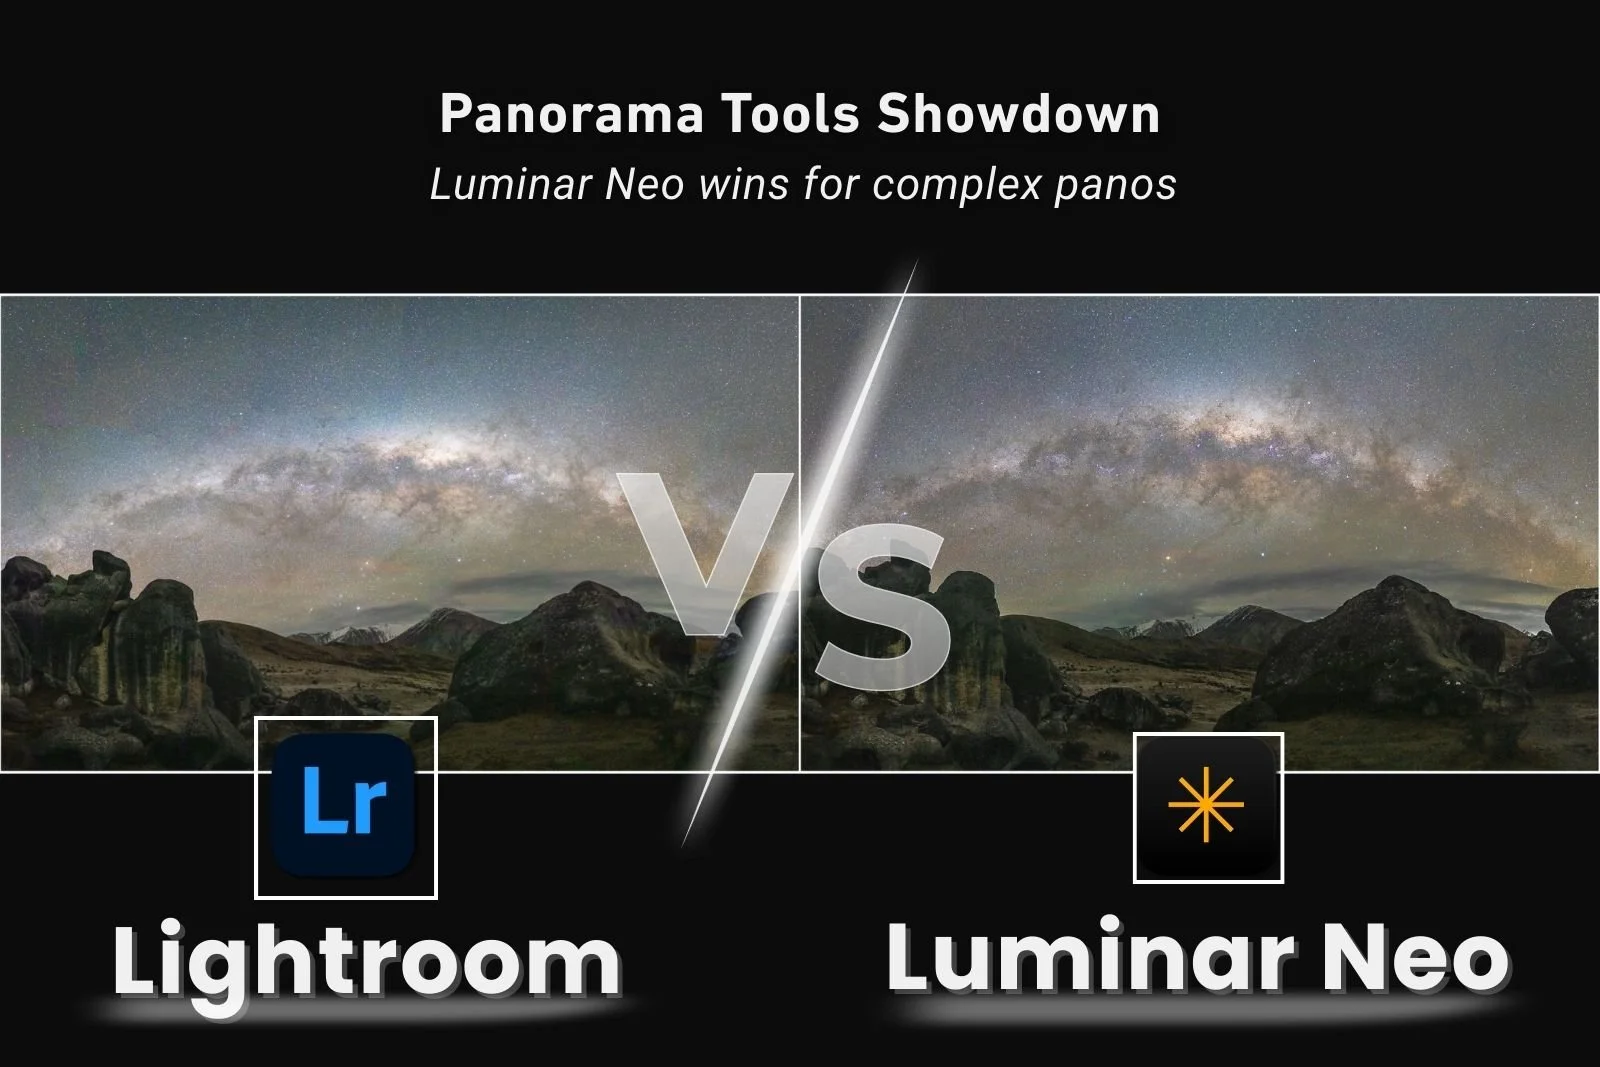
Panorama Tools: Lightroom vs Luminar Neo
Which Delivers Better Results for Milky Way & Multi-Row Panos?
Panorama stitching has become a standard part of landscape and night photography workflows, enabling you to create sweeping mountain vistas with a long telephoto zoom through to multi-row Milky Way arch images with a wide angle lens. If you want to learn the basic techniques, I have a fantastic online course that will take you through shooting and stitching your panoramas: Learn The Art of Panoramas.
While Adobe Lightroom includes a fairly basic built-in panorama merge, and other external software like PT Gui and AutoPanoGiga are usually required for better results, I’ve been seriously impressed that Luminar Neo offers much of the benefits of these dedicated tools inside an all-in-one editor. After testing both on real-world landscape and astrophotography files, there are some meaningful differences in projection control, distortion handling, and noise performance that are worth understanding before you choose your stitching workflow.
Where Luminar Neo Wins:
1) Projection tools
One of the most impressive things about the Panorama tools in Luminar Neo is the range of projection options available at the stitching stage. The controls feel much closer to dedicated panorama software such as PTGui than to Lightroom’s relatively limited merge dialog.
Lightroom offers three projection types - Spherical, Cylindrical and Perspective
These work fine for many single-row landscape panoramas. However, they do struggle with multi-row Milky Way panoramas, especially two-row Milky Way arch images. In those cases, I often find:
Spherical projection tends to flatten the Milky Way arch
Cylindrical projection tends to stretch the sky unnaturally
Perspective often introduces foreground distortion or doesn’t work at all
My usual Lightroom workaround has been to apply Transform adjustments after stitching - stretching vertically or adjusting aspect ratio to make the sky look more natural. The downside is that this often costs pixels at the edges of the frame and can skew vertical foreground elements like trees or rock formations.
Luminar Neo, by comparison, offers five projection options, including Mercator, which has become my preferred choice for two-row Milky Way arch panoramas. Mercator keeps the curve of the Milky Way looking far more natural without excessive stretching or flattening.
2) Adjust before you stitch
Another advantage in Luminar Neo’s panorama tool is the ability to visually adjust the stitched preview before finalizing. You can:
Reposition the projection
Warp and stretch the pano interactively
Refine the framing before export
Reduce the need for heavy transform corrections later
With Lightroom, most of that correction happens after the merge, which makes the process more destructive in terms of losing pixels at the edges and limits the final composition.
In side-by-side tests, I found that to match the Milky Way shape produced by Luminar Neo’s Mercator projection, I had to apply both Vertical and Aspect transforms in Lightroom, and even then, the foreground vertical lines were slightly off as a result.
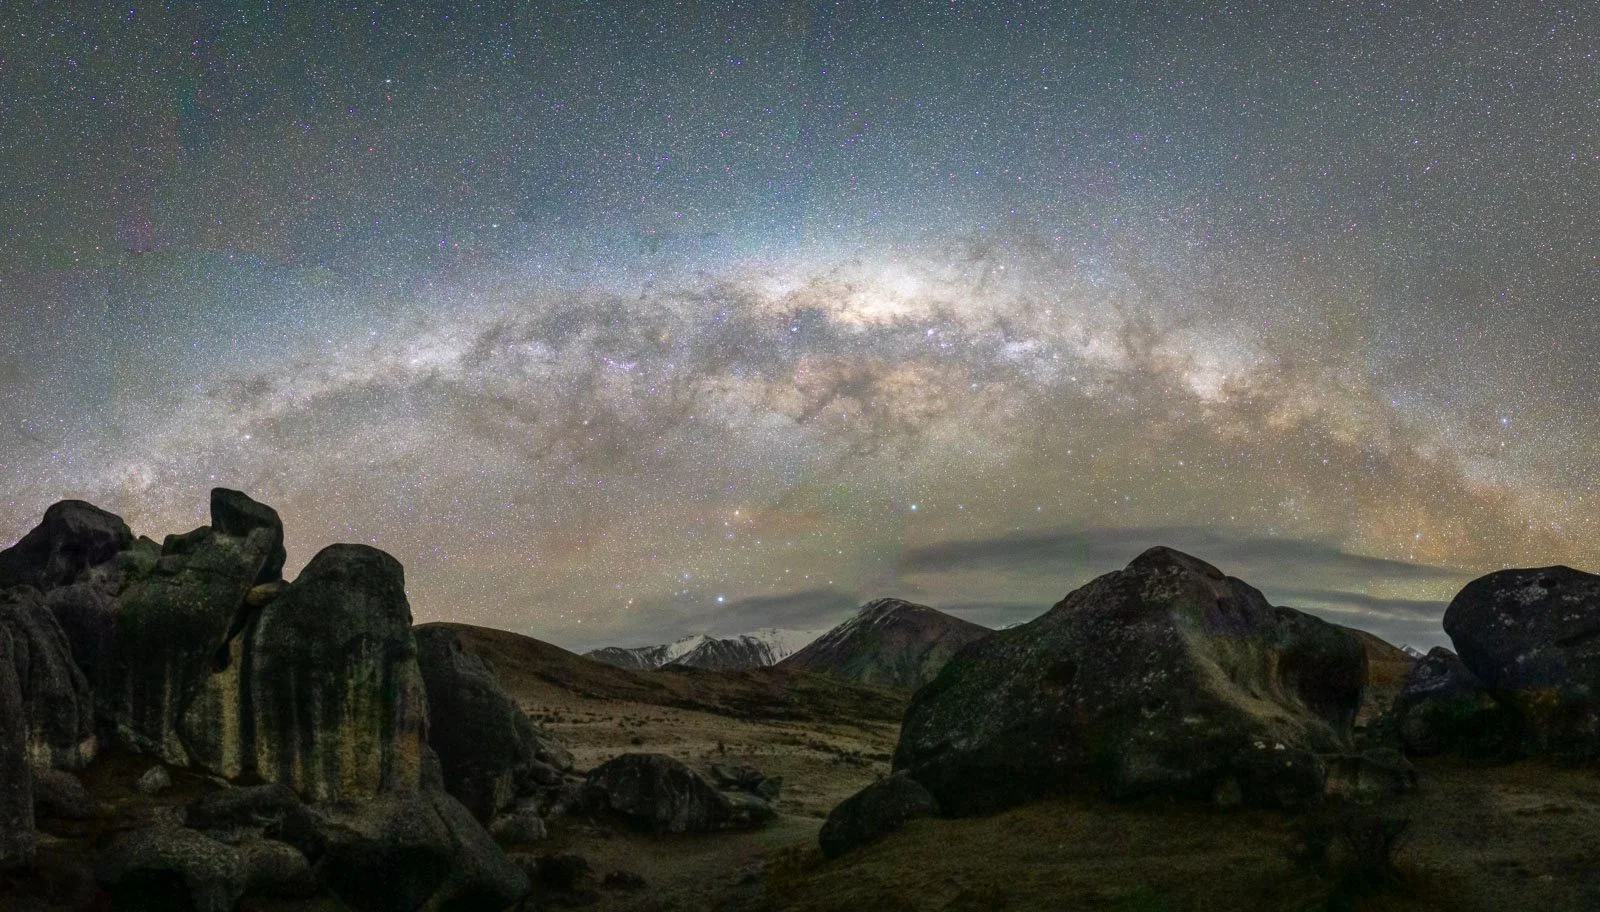
Lightroom Spherical Projection (no adjustments), the Milky Way aspect is very stretched and flat
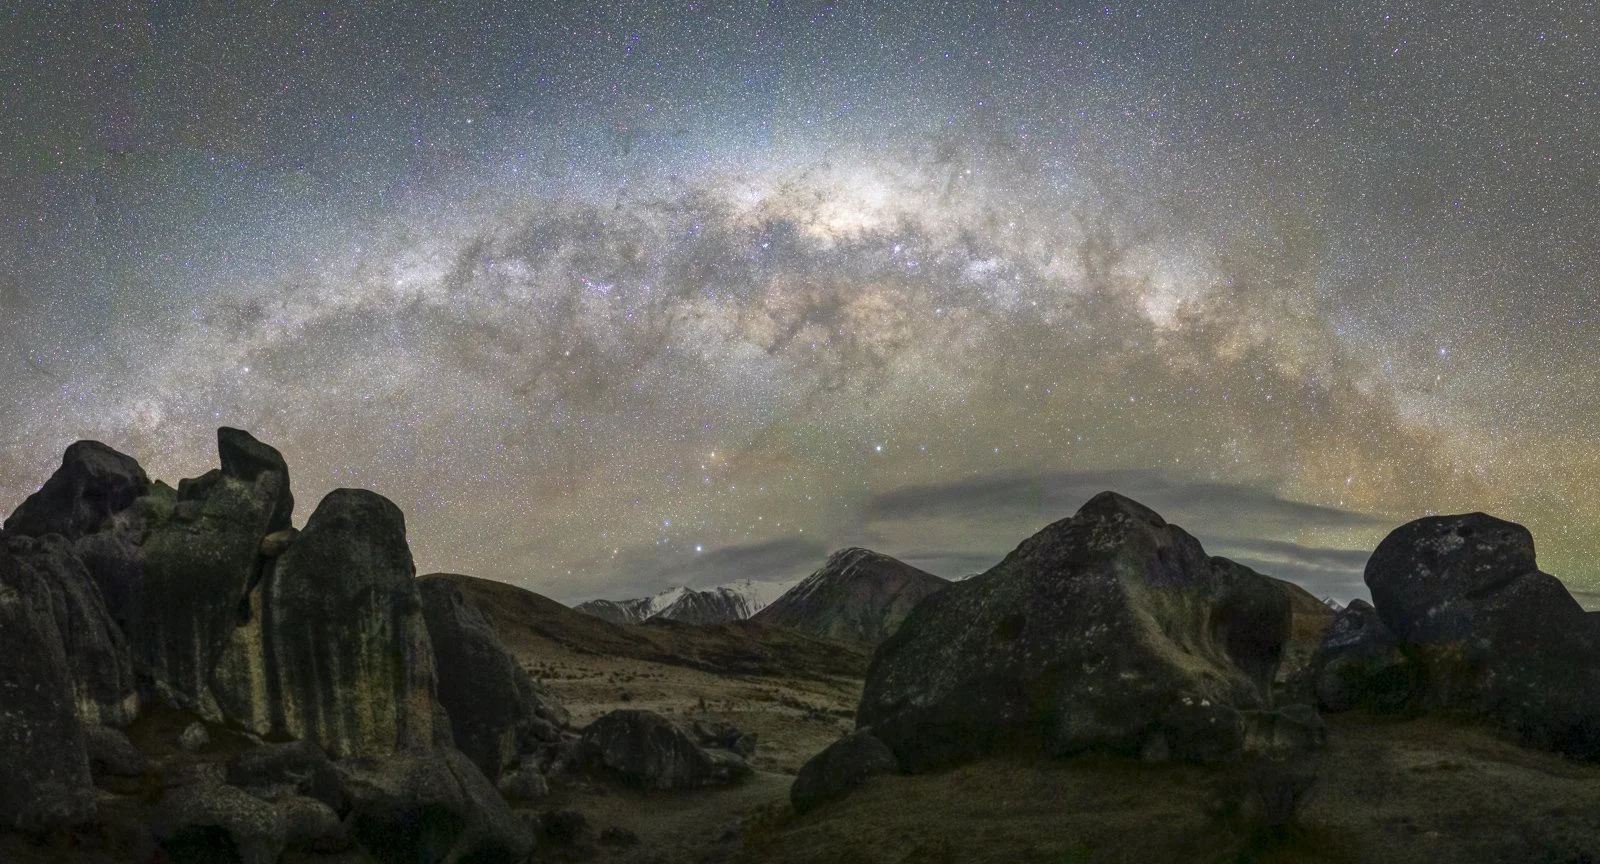
Lightroom Spherical Projection plus Vertical / Aspect Transform Tool (the foreground still appears skewed and there’s loss of data on the sides to crop dead space)
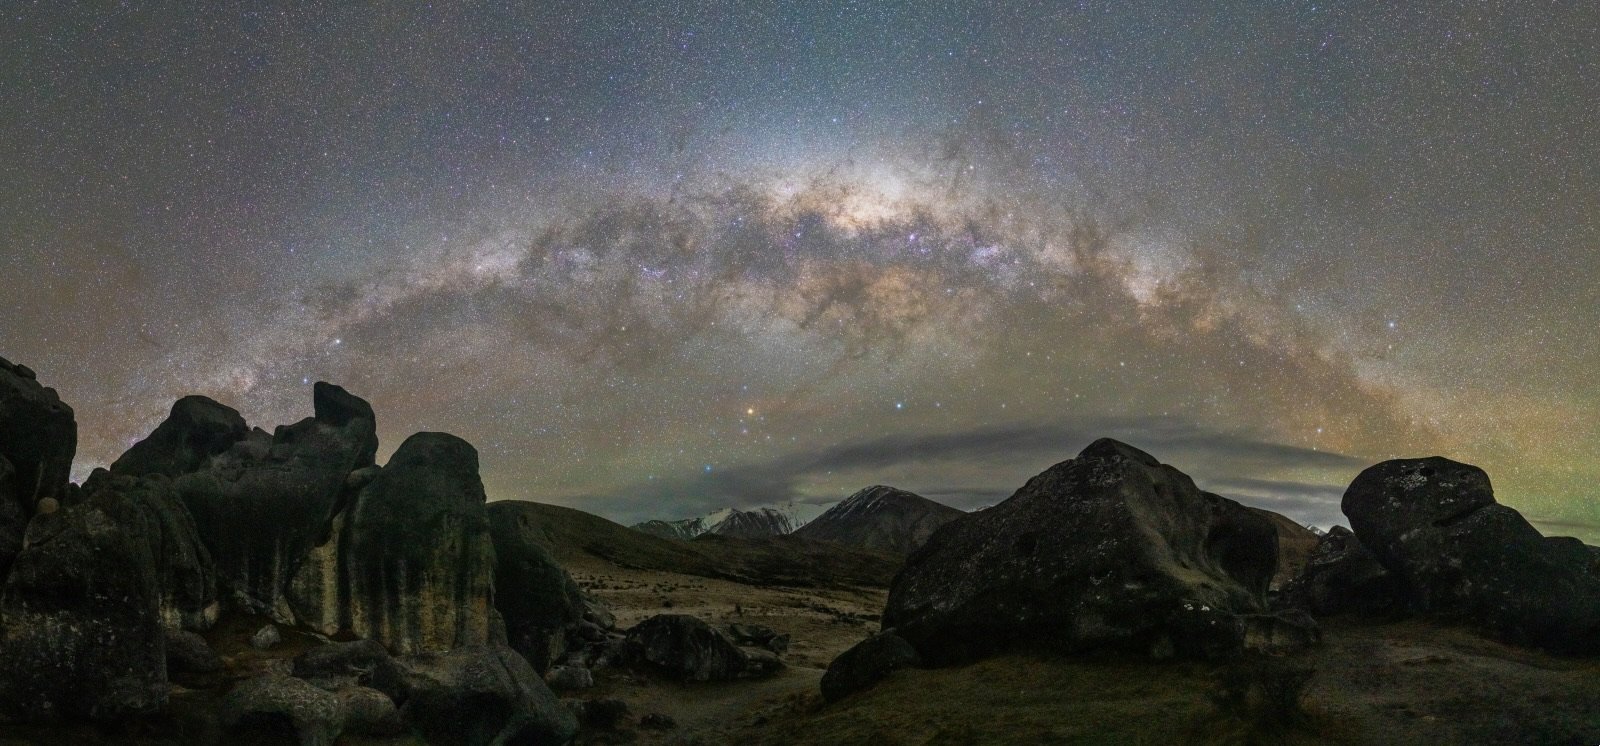
Panorama using Luminar Neo Mercator Projection (no distortion control needed)
3) High ISO Noise Handling: A Visible Difference
Another area where differences show up is high ISO noise, especially in astrophotography panoramas.
Night-sky panoramas are typically built from multiple high-ISO frames. How the software handles noise during and after stitching has a big impact on the final file quality.
In my comparisons:
At normal viewing sizes, the difference between Luminar Neo and Lightroom noise levels wasn’t dramatic
At 100% crop, Luminar Neo showed noticeably cleaner and more consistent noise rendering
Lightroom tended to produce rougher, more uneven noise patterns across stitched sky areas

At normal viewing High ISO noise differences aren’t noticeable
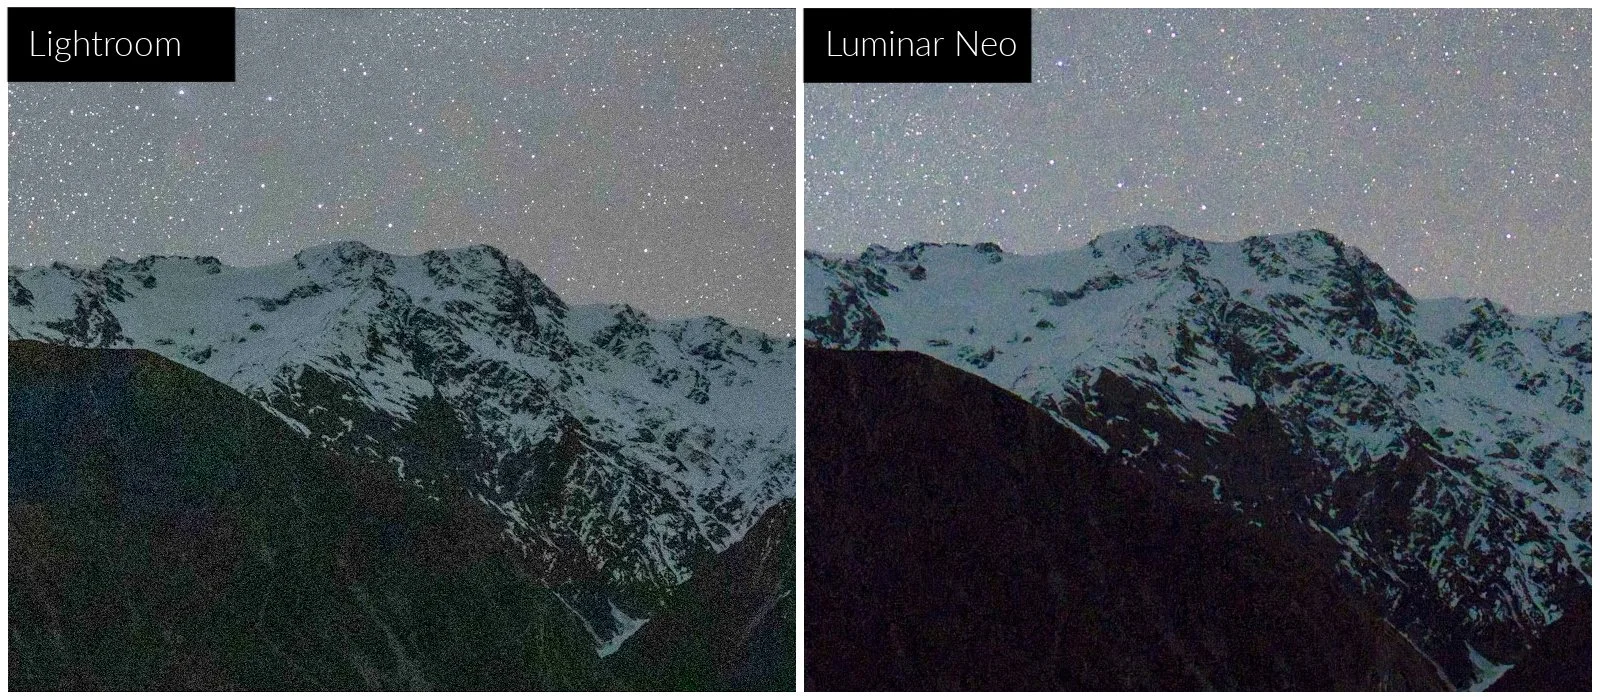
At 100% crop of the same image, the differences in noise are very apparent, with Luminar Neo providing a much cleaner result.
This suggests Luminar Neo is doing smarter noise handling as part of, or immediately after, the stitching process. For night photographers, that’s a meaningful advantage and can reduce the amount of noise reduction required during the editing process.
How Luminar Neo compares to dedicated panorama software
It’s still true that dedicated panorama tools like PTGui or AutoPanoGiga offer the highest level of control, including:
Advanced control points
Lens model refinement
Complex multi-row stitches
Deep geometric correction
However, those tools are more expensive and come with a much steeper learning curve. What’s impressed me is how close Luminar Neo gets in practical results for many real-world panoramas, all within a simpler, all-in-one editing environment.
For many photographers, that’s got to be a very attractive proposition!
When Each Tool Wins
Choose Luminar Neo if:
You shoot multi-row panoramas regularly
You create Milky Way arch panoramas
Projection accuracy matters
You want more projection choices (especially Mercator)
You want cleaner high-ISO stitched results
You want near-pro pano controls without having to use specialist software
Choose Lightroom if:
You mostly shoot simple single-row panoramas
You want to complete the process in a single program
You want to create an HDR Merged Panorama in one step (see my post on HDR Merging)
You don’t need advanced projection control
Final Verdict
For straightforward single-row daytime panoramas, Lightroom is perfectly usable. But once you move into multi-row and astrophotography panoramas, Luminar Neo’s expanded projection options, and better high-ISO noise handling make a visible difference.
🏆 WINNER: LUMINAR NEO 🏆 for advanced panoramas
Curious to try Luminar Neo for yourself?
If you decide Luminar Neo is a good fit for your workflow, you can purchase it here:
Luminar Neo using code MEGHAN10 for 10% off pricing
This helps support my content at no extra cost to you, and I only recommend software I genuinely use and trust!
Want to read more in this series?
Why I added Luminar Neo to My Lightroom Workflow (And You Should Too!)
Using Luminar Neo for Light, Colour & Mood (Why These Tools Make Images Pop)
Sky Replacement Showdown: Photoshop vs Luminar Neo
HDR Merge Showdown: Lightroom vs Luminar Neo