Light Depth in Luminar: The Most Underrated Tool for Landscape Photographers?
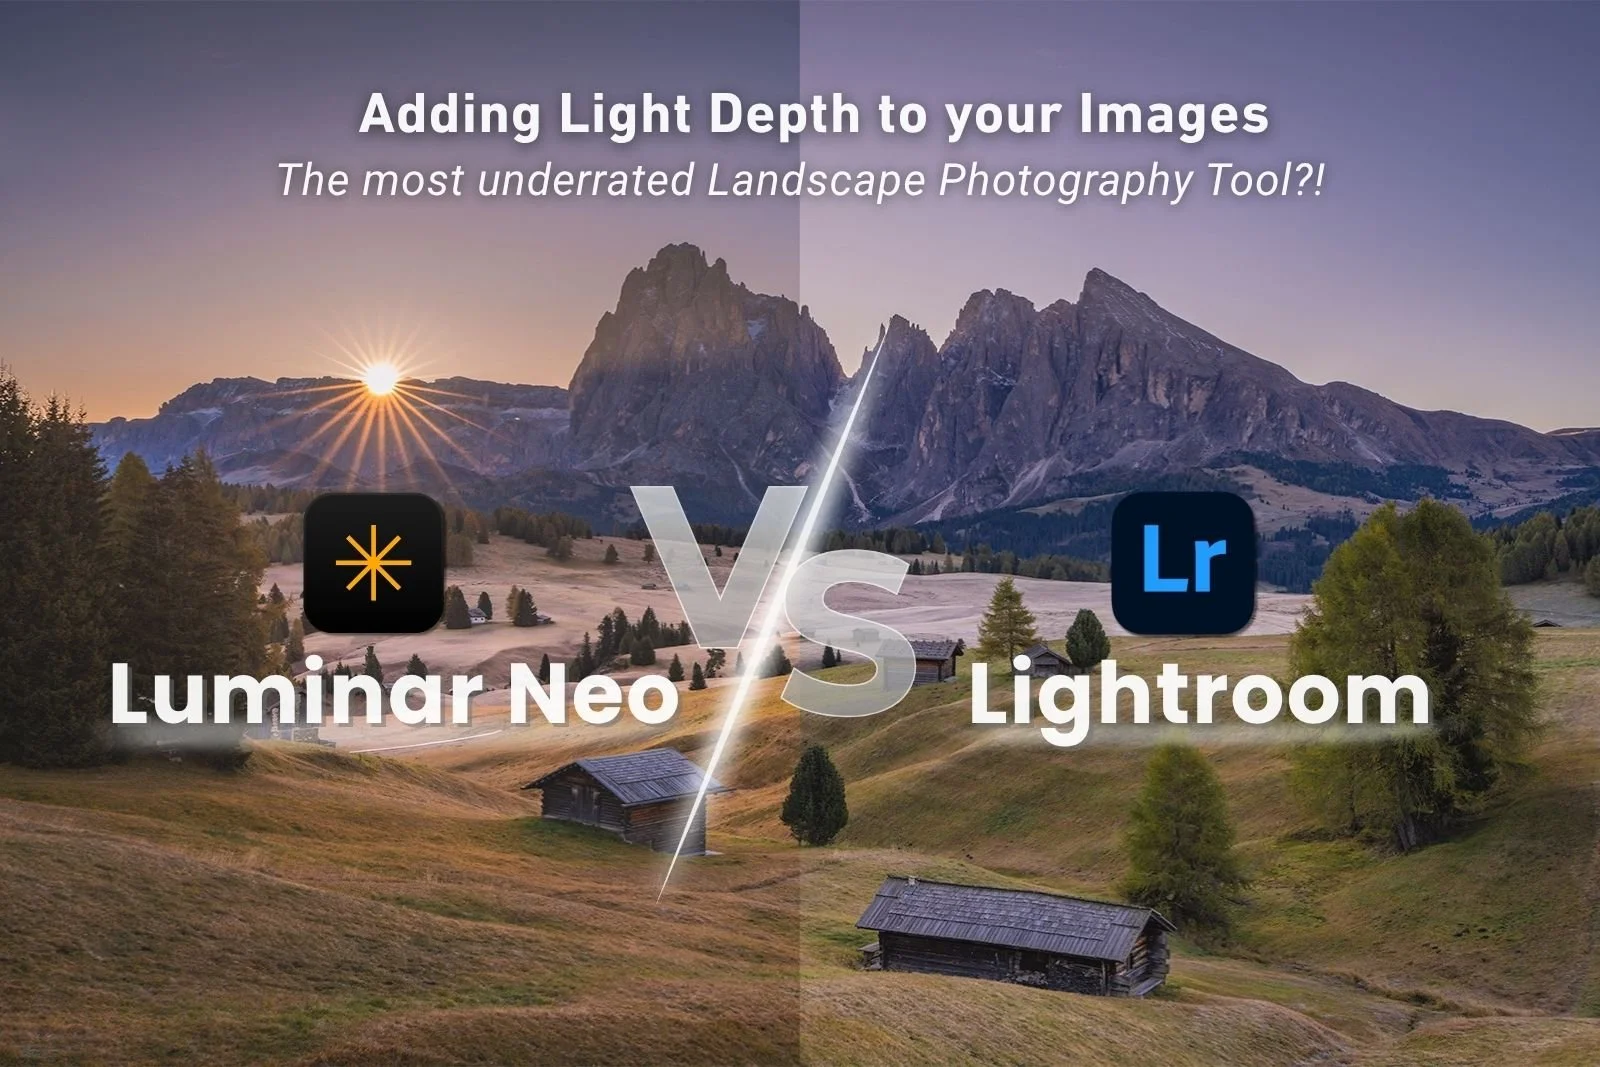
Landscape photographers are obsessed with light…and if we’re not, we certainly should be!
Often this means being up before dawn and staying out long after sunset, patiently waiting for any moment when the light transforms a scene into something special. Light reveals texture, creates mood, adds depth and leads the viewer's eye through an image, and so without great light, even the most spectacular location can feel like just a record, and a snapshot of a moment that anyone could have captured.
As well as harnessing light out in the field, doesn’t it makes sense to use a tool that allows us to refine the way light flows through an image?! Of course it does!
That tool is Light Depth in Luminar.
Unlike standard masking tools that limit you to using brushes, gradients or AI-selected parts of a scene like Sky, Water or Natural Ground, Light Depth intelligently adjusts light based on the perceived distance or focal depth within an image. It gives you the ability to enhance depth, atmosphere and visual separation better than any other tool I’ve come across.
Once you understand how to use it, I think you’ll find it can quickly become part of your editing workflow, especially as it is so easy to use with the inbuilt plug-in from Lightroom, so all it takes is a simple right-click from your image.
What Makes Light Depth Different?
Most other editing software tools give you limited ways to adjust light, even using the newer AI-style Landscape masks in Lightroom that try to intelligently identify parts of the image (e.g. Mountains, Architecture, Water, Flora or Natural Ground), to me these still feel like quite two-dimensional adjustments. I also think it’s difficult for us to visually identify HOW we might want to direct light more naturally within the scene without seeing what is actually possible.
Light Depth takes care of that by asking "Where could the light naturally belong within this scene?" and analyses the perceived depth of your photo allowing you to move, enhance or soften light based on distance.
That distinction is what makes Light Depth so unique. Instead of manually trying to recreate natural light with multiple masks, you can achieve a beautifully balanced result with just one simple adjustment.
How to Use Light Depth
Within the tool, use these adjustments to personalise the result for each image:
Amount slider: controls the overall strength of the effect.
As you increase it, Luminar adds more light based on the perceived depth of the scene, creating greater separation between foreground and background. Used subtly, it can add a real sense of dimension. Push it too far, however, and the effect can begin to look unnatural.
As with most editing tools, I find the best results usually come from a lighter touch. It's amazing how much impact even a small adjustment can have.
Width: determines how broadly the adjustment is applied across the scene.
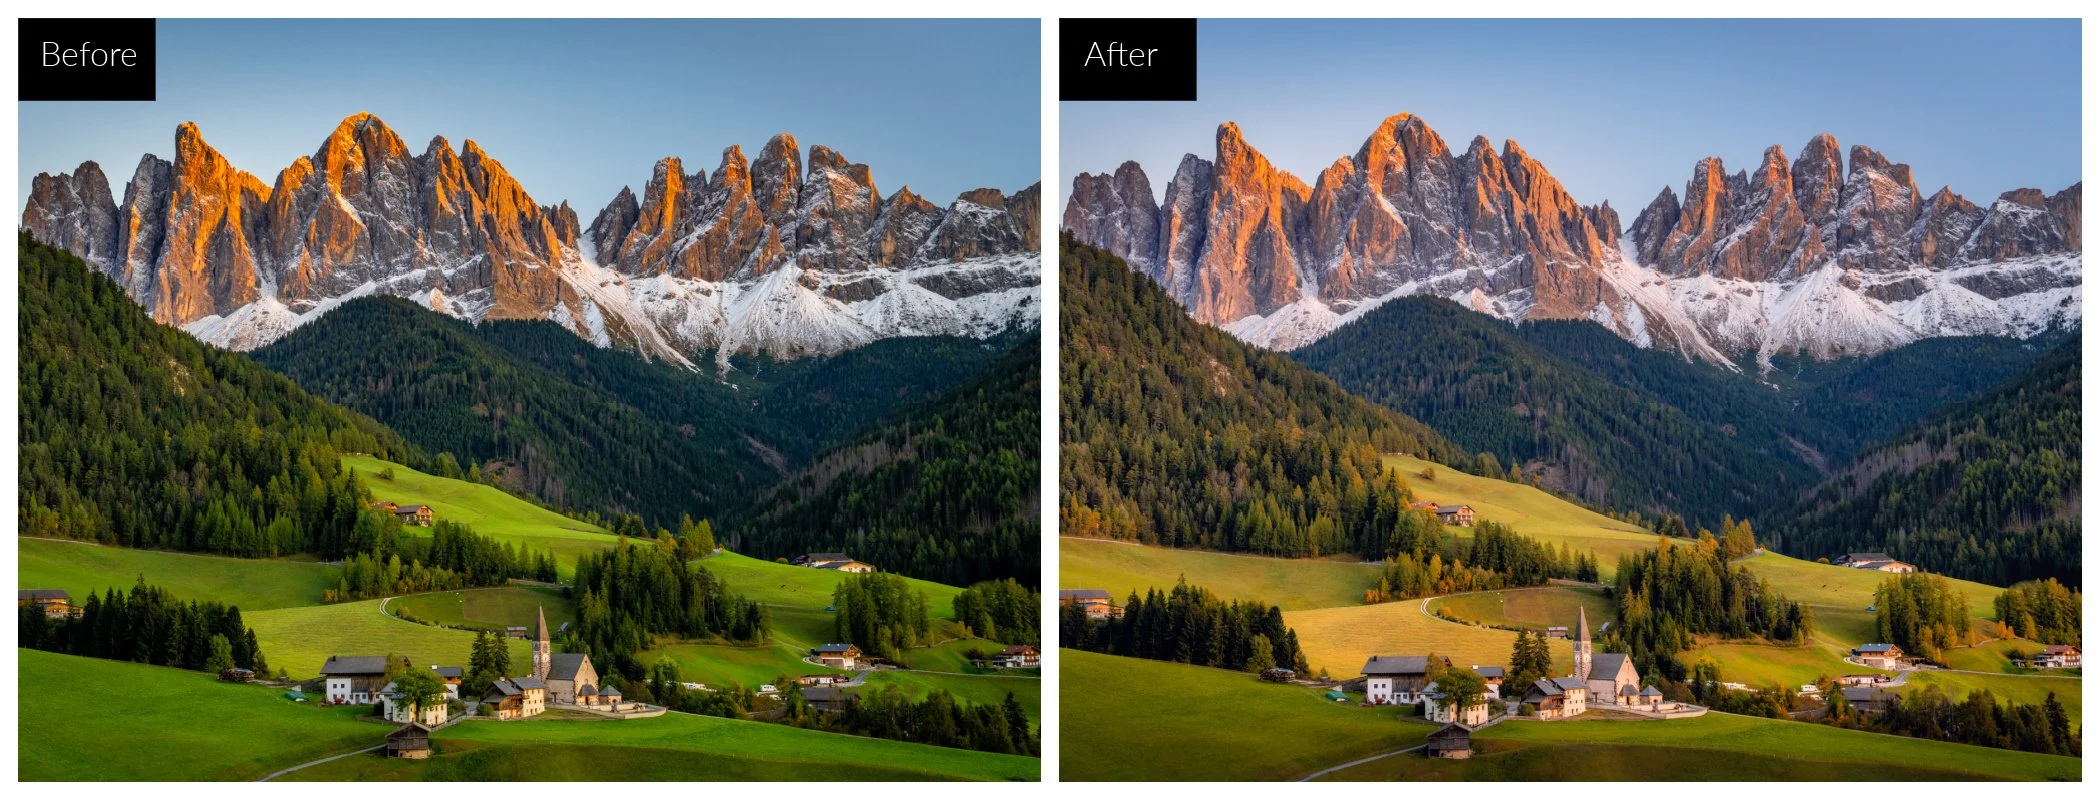
Think of Width like a Radial Gradient, a narrow selection makes it useful when you want to emphasise a shaft of sunlight or highlight a specific part of the composition - like subtly enhancing the diagonal area of the church on the hill in the scene below.
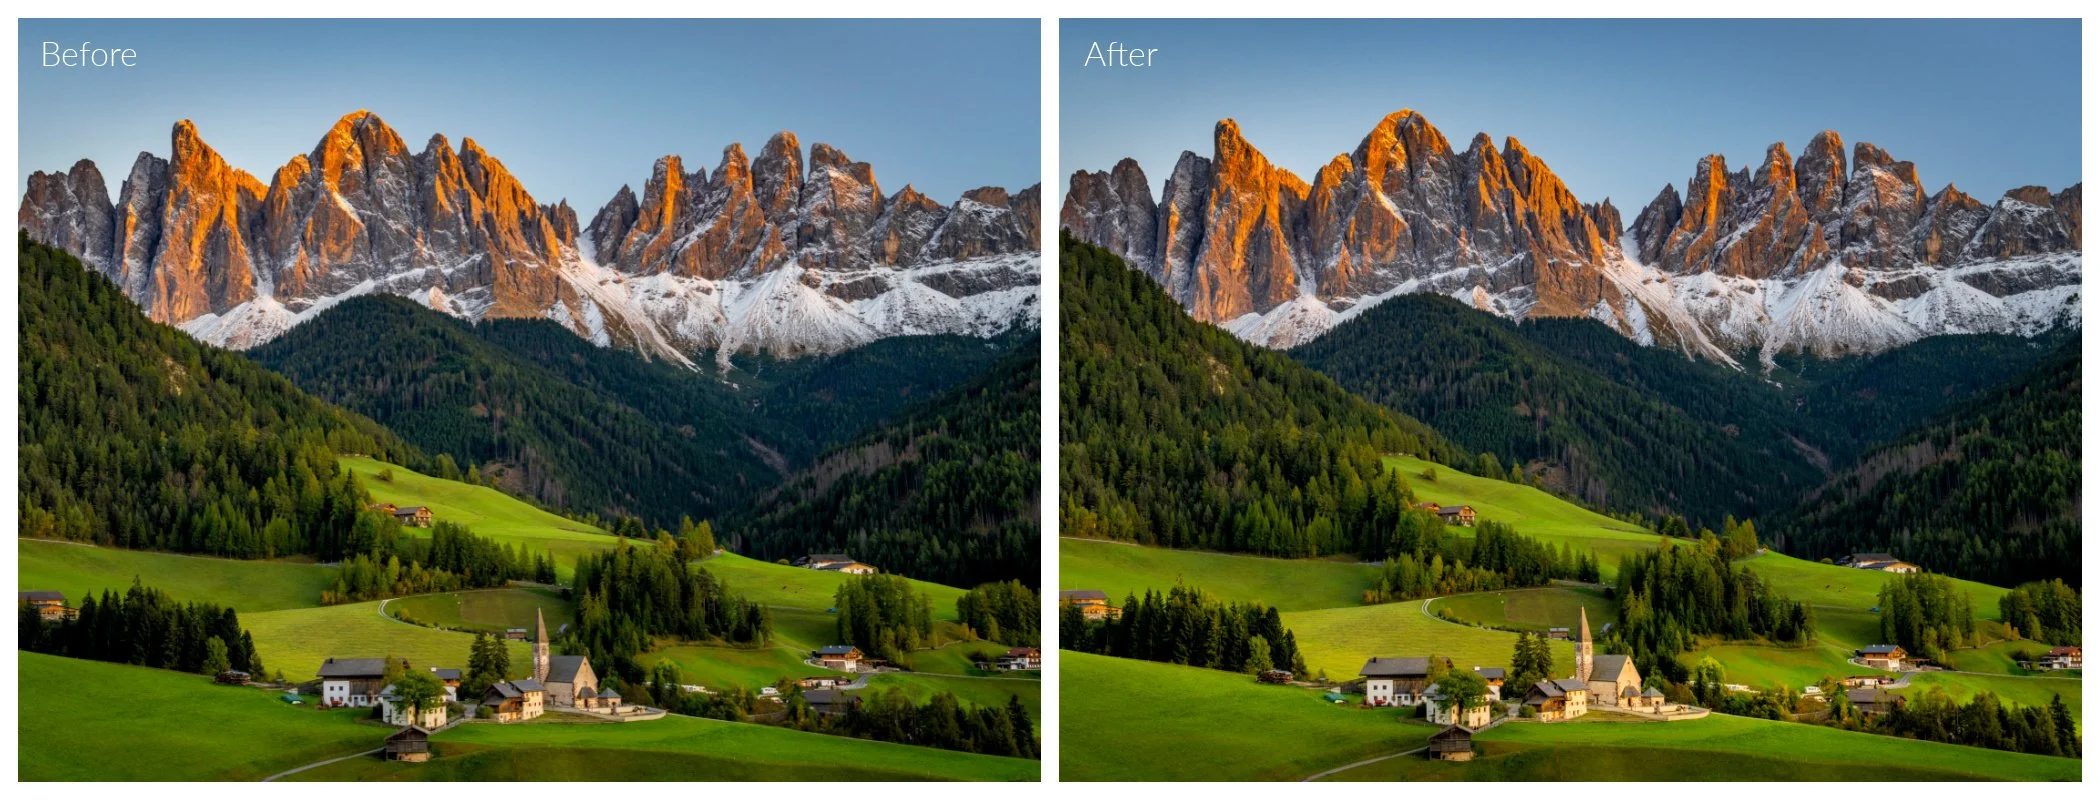
Increasing the Width area spreads the effect more evenly across the image, producing a softer, more gradual transition. For most landscape photographs, a wider setting is usually better as it tends to mimic the natural way light falls across a scene. In the scene below, a wider area was used to naturally highlight the light falling on the fields in the distance.
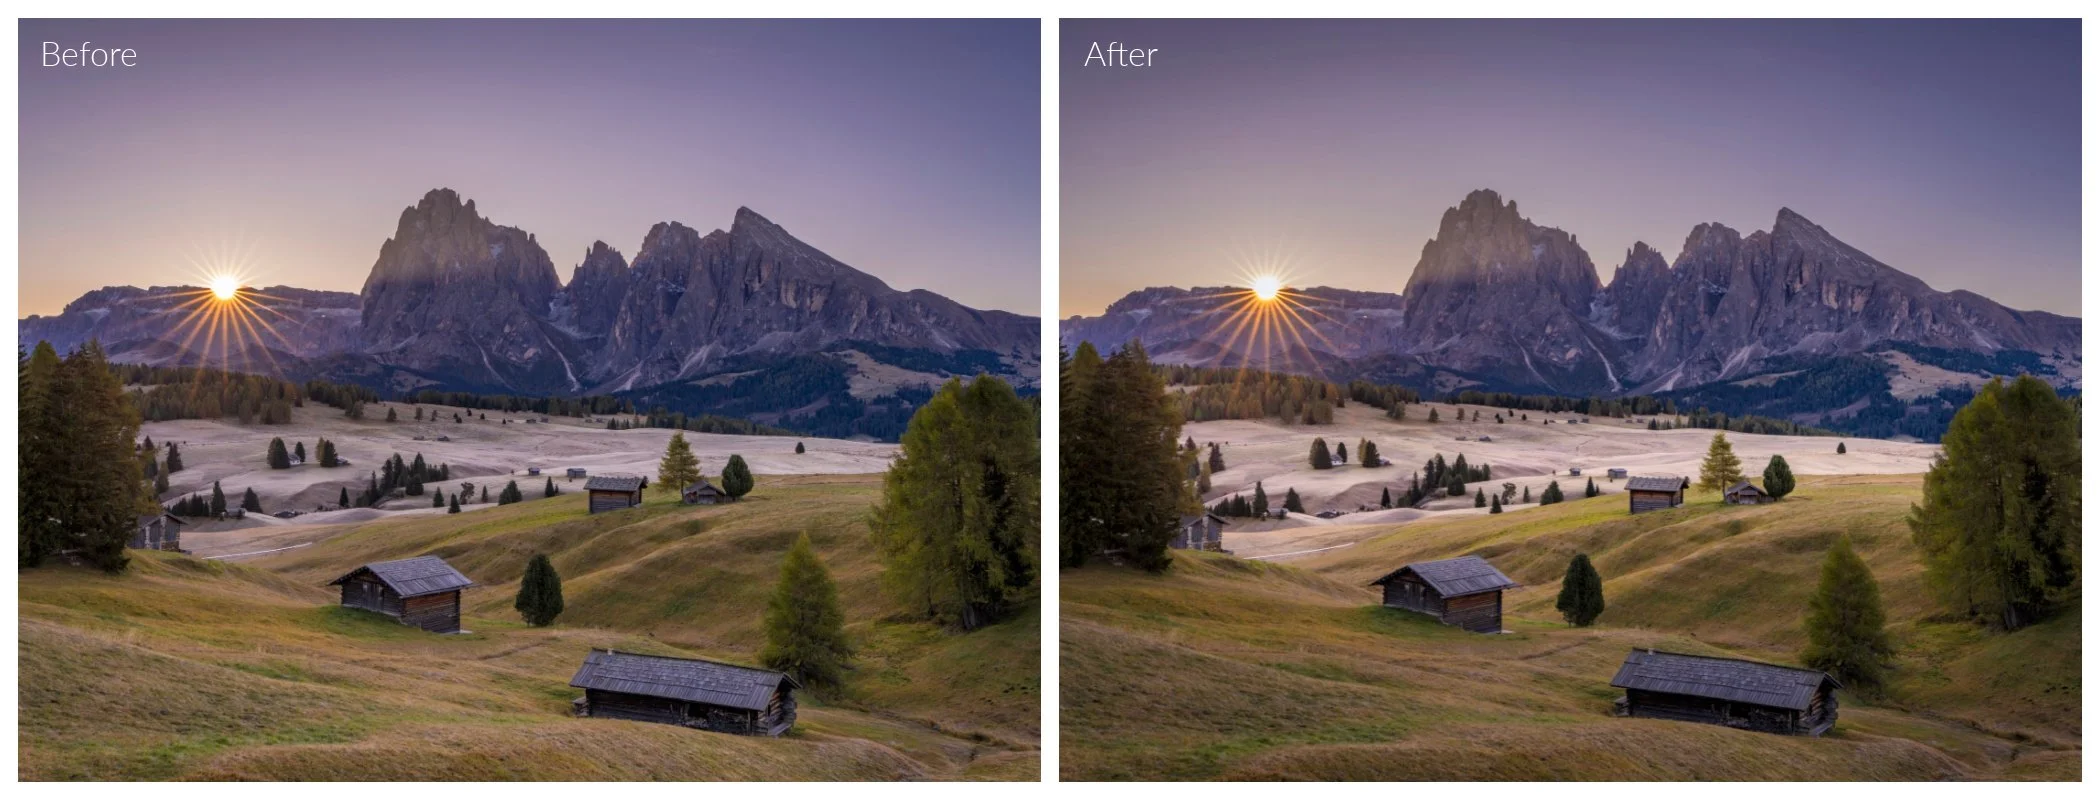
You can also use Softness to feather the result more, and Warmth to add more warmth in the area being lightened.
Advanced Settings (Brightness & Warmth)
The Advanced Settings give you even greater creative control over how Light Depth behaves, allowing you to further darken or lighten the areas outside the Depth mask, and/or add a cooler or warmer tone to these parts of the image.
Here’s the live examples moving the Light Depth Tool so you can see it in action.
A Practical Workflow
For almost every image, my workflow is the same:
Apply an Amount adjustment and assess the overall depth.
Adjust the Width until the light feels natural and balanced.
Zoom in and check for any areas where the effect may be too strong, e.g. you can use a Brush Mask to erase or soften any areas that need it
Use the Advanced settings for subtle refinements if needed.
Turn the tool on and off a few times to compare the before and after.
If you find you are noticing the editing rather than the image, you've probably gone too far. The best Light Depth adjustments are the ones that simply make the image feel more immersive, guiding the viewer's eye naturally through the scene without actually realising why.
Not Just for Grand Landscapes, try Intimate Scenes too!
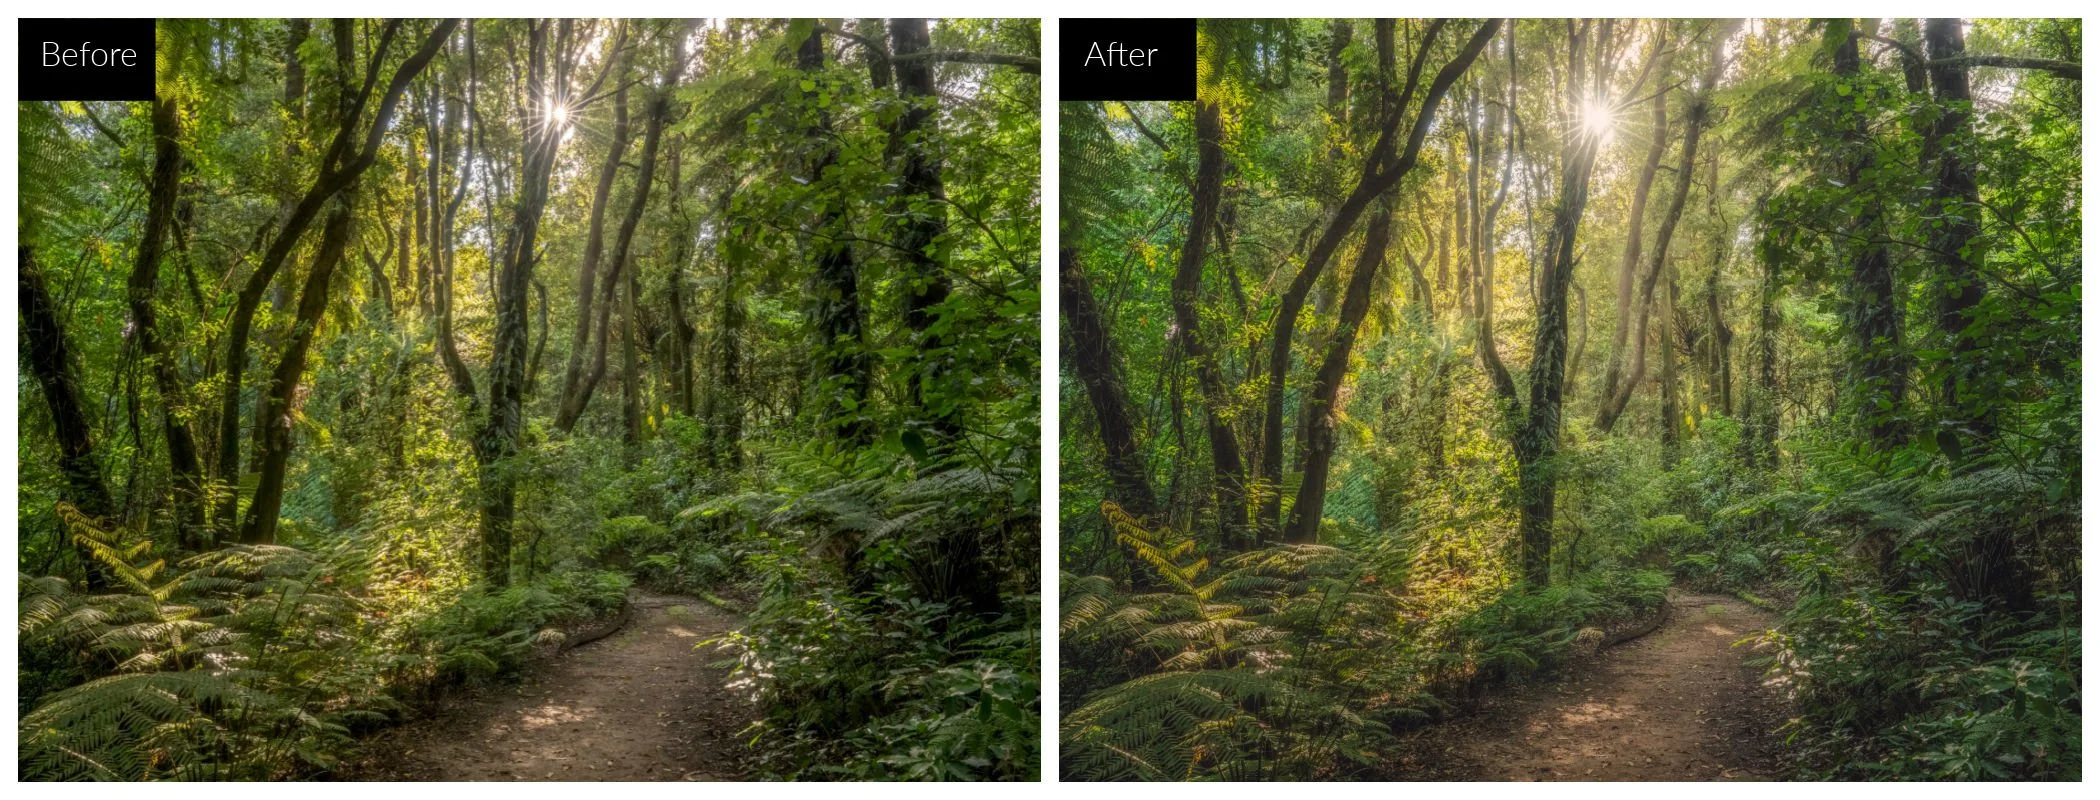
I’m a huge fan of forest photography, but editing forest images is complicated! Forests are visually chaotic, with layers of trees, branches and foliage that often look cluttered, making it difficult for the viewer to know where they are meant to look. By subtly enhancing the existing light, Light Depth can help separate those layers and create a much stronger sense of depth.
Rather than simply brightening a patch of trees, it enhances the feeling that light is naturally filtering through the forest, like in this example below.
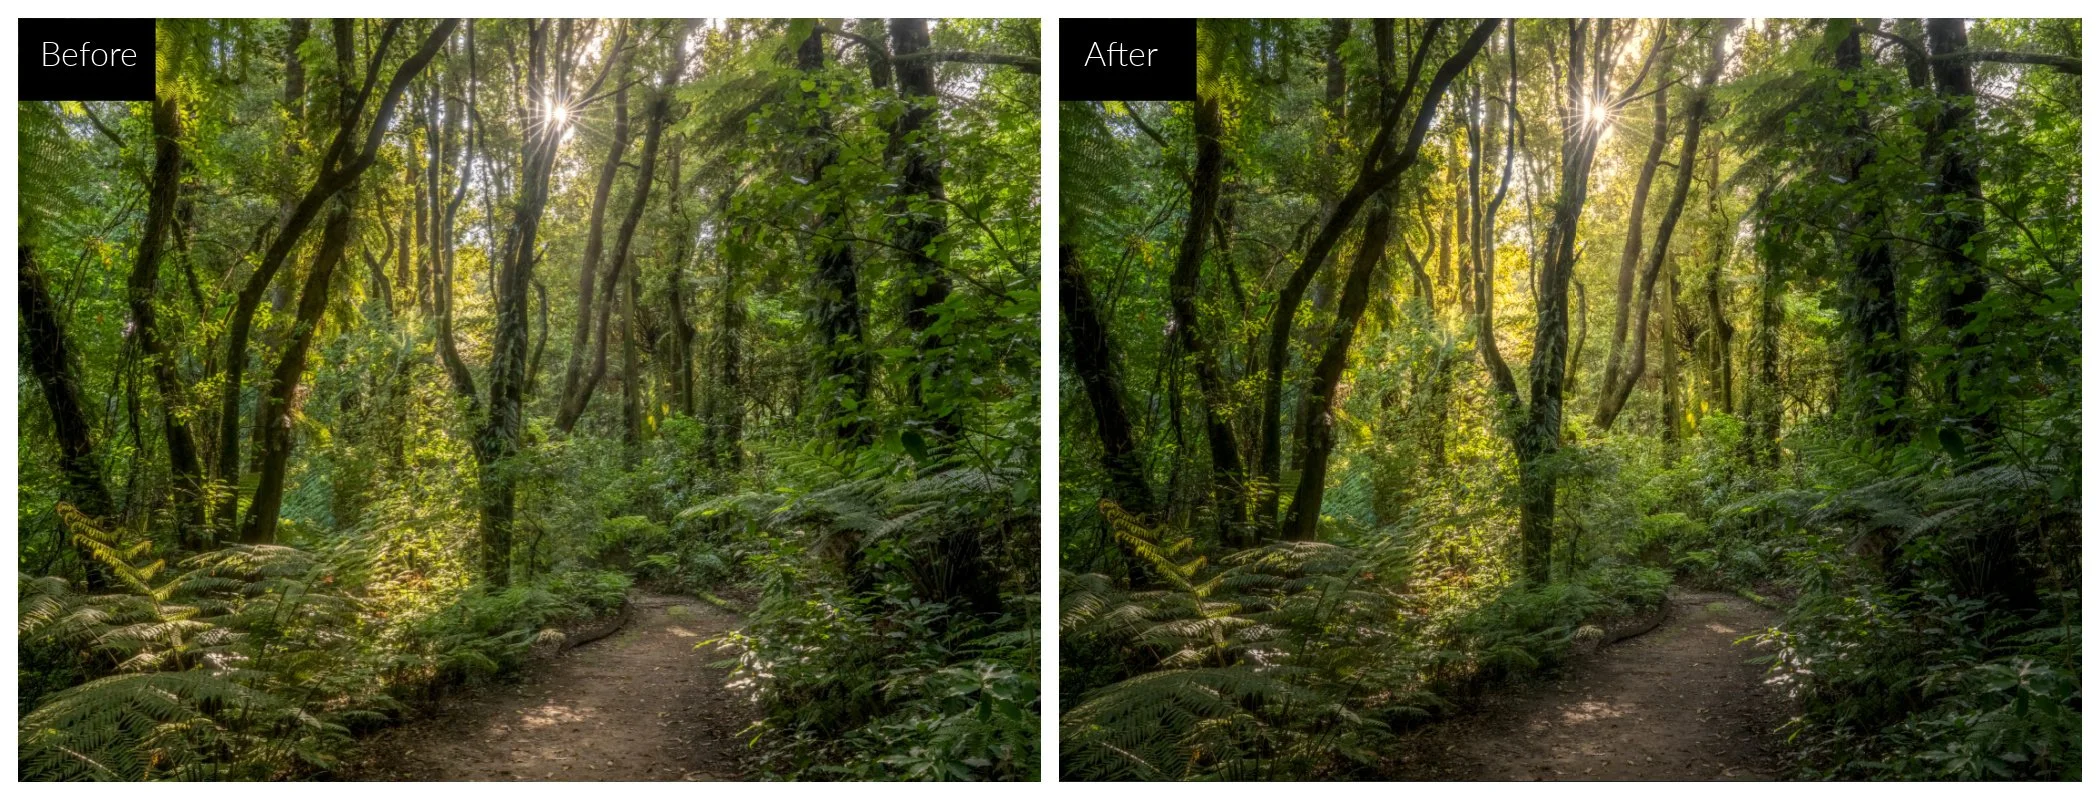
The result is an image with light that feels more directed and atmospheric without looking over-edited.
Combining It with Other Luminar Tools
My favourite workflow is to start with Light Depth and then use it alongside a few of Luminar’s other creative tools that don’t exist in Lightroom, it’s my starting point from which I’ll explore other edits. More of my other favourite tools are:
Mystical to soften harsh detail and introduce a subtle dreamlike atmosphere.
Magic Light to enhance and soften the glow around bright highlights like sunstars, helping light sources feel more natural and luminous.
Mood using LUTs (look up tables) to apply cinematic colour grading and strengthen the emotional feel of an image.
Using all these tools together (but with restraint!) can completely transform the mood of your image while still looking natural.
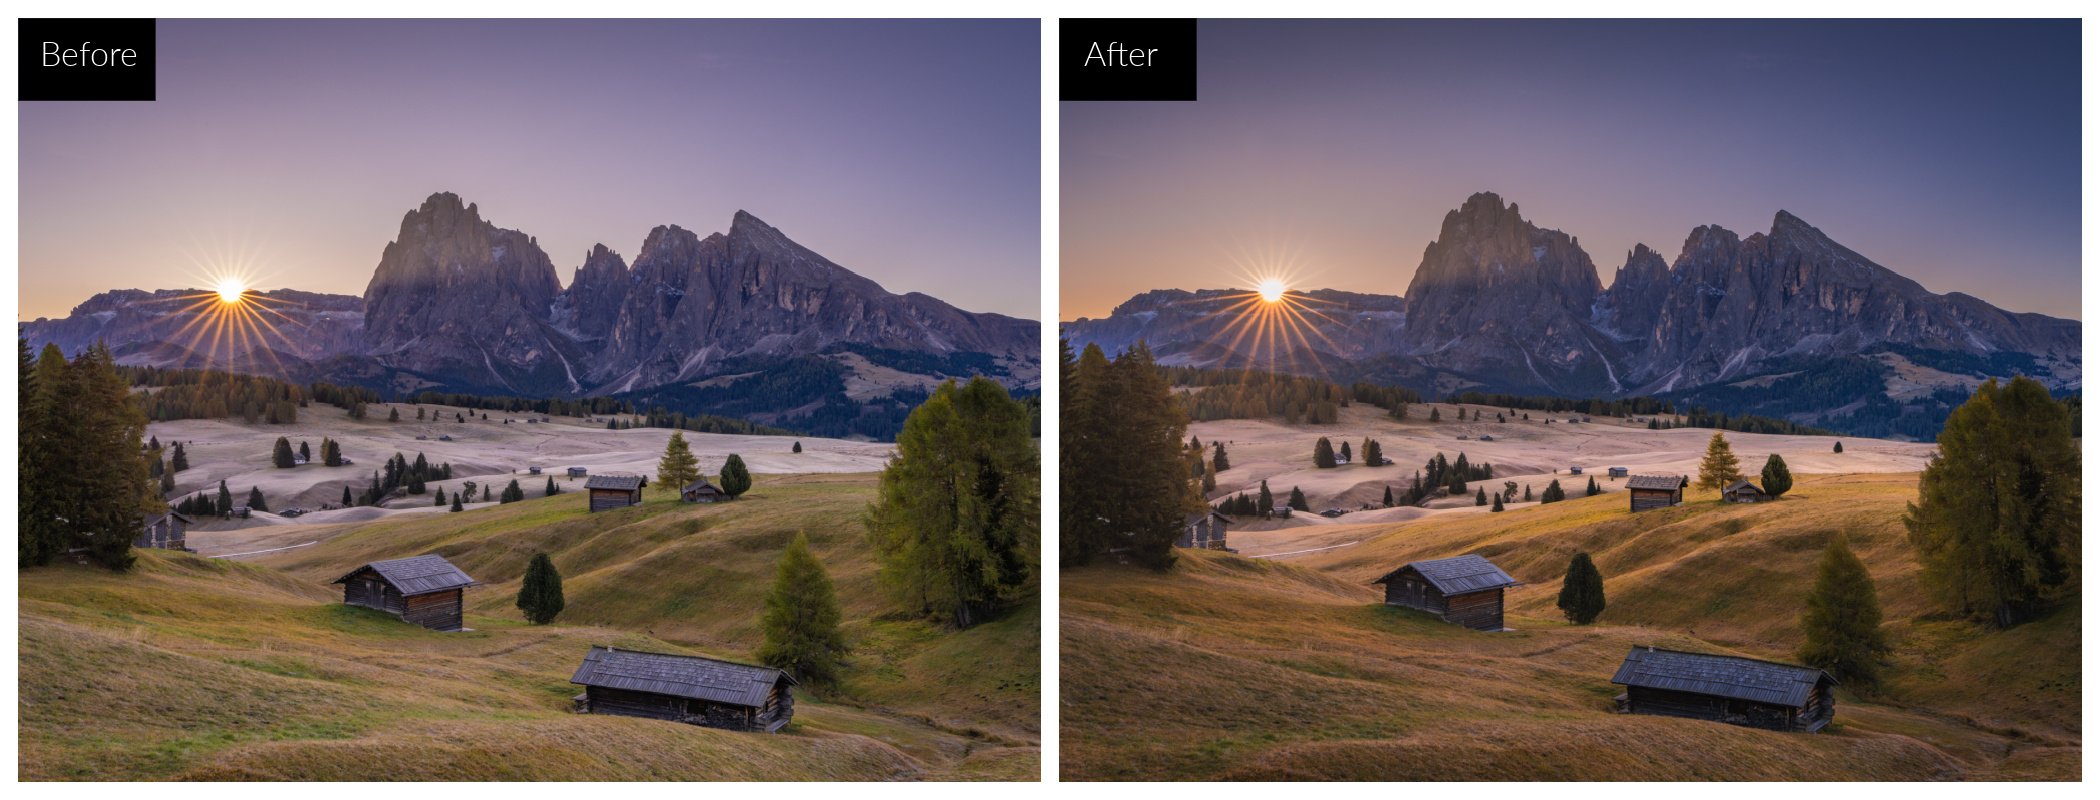
Here are the finished versions of the above examples after I’ve combined Light Depth with some of my these other tools in Luminar.
Final Thoughts
As photographers, we spend countless hours chasing the perfect light, waiting for those fleeting moments of brilliance to happen. Yet once we're back behind the computer, it's all too easy to focus solely on technical aspects like exposure, colour and sharpness, while forgetting that the LIGHT was what made us press the shutter in the first place.
Light Depth helps me execute my original vision. Rather than creating light that never existed, it allows me to strengthen the light that first caught my eye, to subtly guide attention, enhance depth and recreate the atmosphere I experienced while out in the field.
That’s why I believe Luminar is a MUST HAVE to elevate your editing workflow, even if Light Depth is the only tool you choose to use! While Lightroom is still my main library catalogue and starting point for RAW editing, Luminar offers a collection of unique creative tools that elevate and complete my images that simply don’t exist in Lightroom.
If you've never experimented with Light Depth, I'd encourage you to pick a few of your favourite landscape images and spend just five minutes on them exploring what the tool can do. Start with subtle adjustments, compare the before and after, and pay attention to how your eye moves through the image.
You don't need to throw every editing tool at an image to make it stand out. Often, all it takes is one tool that helps your viewer connect with the scene exactly as you remember it.
Curious to try Luminar Neo yourself?
If you decide Luminar Neo is a good fit for your workflow, you can purchase it here:
Luminarusing code MEGHAN10 for 10% off pricing
This helps support my content at no extra cost to you, and I only recommend software I genuinely use and trust!
Want to read more in this series?
Why I added Luminar Neo to My Lightroom Workflow (And You Should Too!)
Using Luminar Neo for Light, Colour & Mood (Why These Tools Make Images Pop)
Sky Replacement Showdown: Photoshop vs Luminar Neo
HDR Merge Showdown: Lightroom vs Luminar Neo
Panorama Showdown: Lightroom vs Luminar Neo